
- My First CNC Guitar: a Sapele Telecaster
- Finishing Up the Body
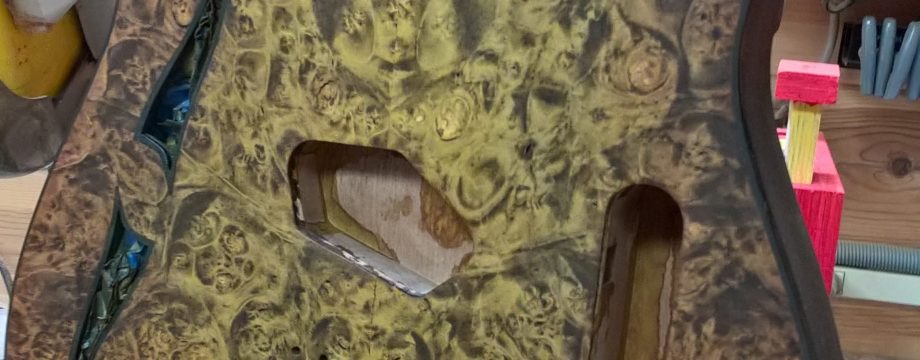
- Digital Abalone
- Introducing “Honeybee,” the Sapele-Tele
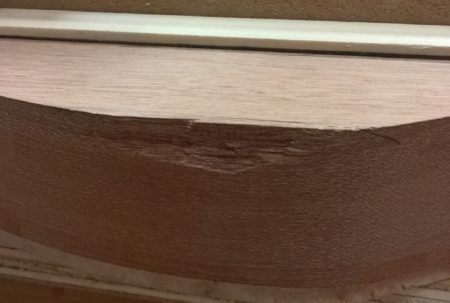
Ouch! Tear out during the manual routing bit.
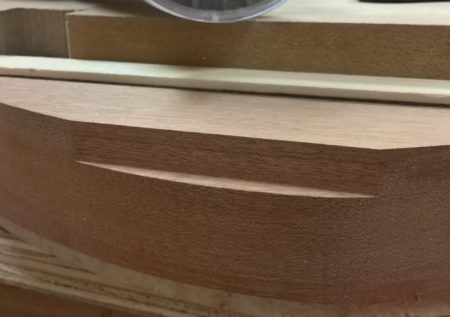
Squaring up the tear out in prep for a fix
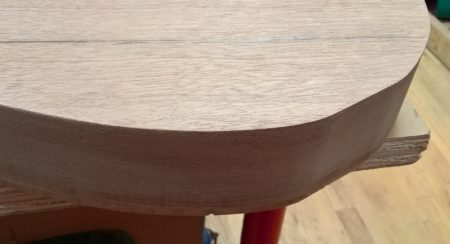
Completed tear out fix

Body bound in black plastic binding strips
Yellow dye over sanded-back black coat
Ready for around 20 hand-applied layers of clear coat
Ouch!
When I was prepping to cut out the body on the CNC, I knew I didn’t have a long enough bit or enough Z height to cut the entire way through from the top. I considered cutting half-way through from the bottom first and then flipping it over, but I was anxious that I may not have gotten the alignment perfect on my very first CNC guitar. So I decided to just cut as far as I could and finish the rest manually with the bandsaw and a pattern-cutting bit.
One of the primary motivations to get a CNC was due to the propensity for tear out to occur when routing bodies of Ash or Mahagony. I’ve experienced some degree of tear out in just about every body I’ve cut. I’ve tried climb cutting, brand new (and very expensive) spiral bits, and other techniques to eliminate this all without perfect success. Sadly, this body was no exception. Although there was less than 1/4″ left to route and I had bandsawn the edge to as close to 1/16″ as I could, and I was using a brand new spiral upcut bit, I still managed to tear out a fairly sizeable bit of the bottom edge. Ugh!
Fortunately the grain of the Sapele is very straight and uniform. This made it possible to make a nearly invisible fix by routing out a squared-up section and gluing in a matching piece from the offcut. The end result is a nearly invisible fix that will be almost impossible to find after the finish is applied.
Whew.
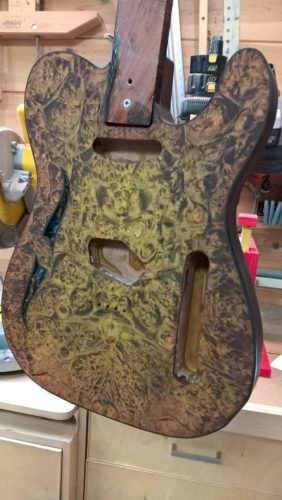
Binding and filling the grain
The binding channel was routed into the body on the CNC as part of the final cut. This left a perfect channel and made for quick work applying the binding. I still had a couple minor gaps where the binding wasn’t perfectly tight to the body. These were filled using some binding pieces dissolved in acetone. A bit of grain fill for the back and the body was ready for finishing.
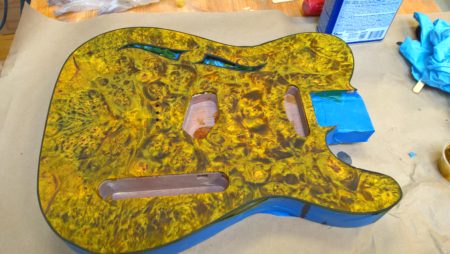
I envisioned this top in shades of yellow, beige, and brown, but didn’t have an exact look in mind. I started the finish by applying black stain over the entire top in order to highlight the burl figuring. This was sanded back and overlaid with amber. At this point it was a matter of experimenting. I mixed up some red-brown with bright red dye and applied this to the edges, feathering in a bit towards the center. At this point I fussed between the yellow and red-brown mix until I was happy with the results.
I’m really liking the rose-colored edge around the yellow/brown center. It should look great with the black hardware I have in mind for this build. Time to turn my attention to the neck as I start the hand-wiped clear coat process on the body.