

- My First CNC Guitar: a Sapele Telecaster
- Finishing Up the Body
- Digital Abalone
- Introducing “Honeybee,” the Sapele-Tele
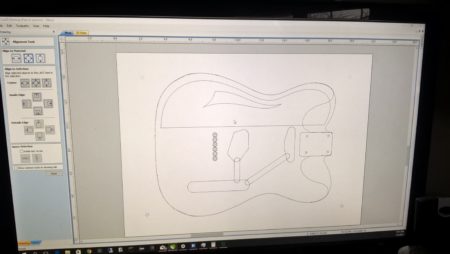
Original drawings created in CorelDraw!
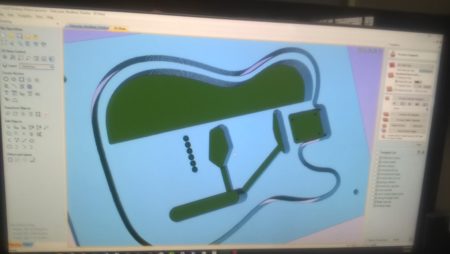
Setting up the tool paths in Vectric Cut2D
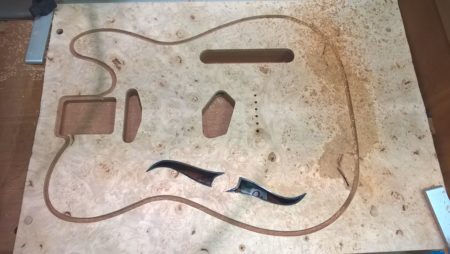
Routing out the chambers in the Sapele base
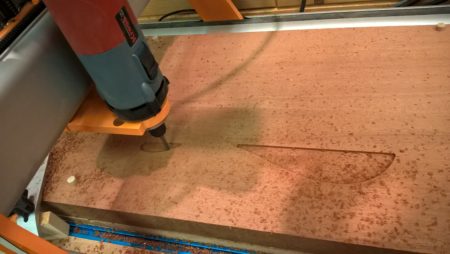
Sound hole cut out of the Maple burl cap
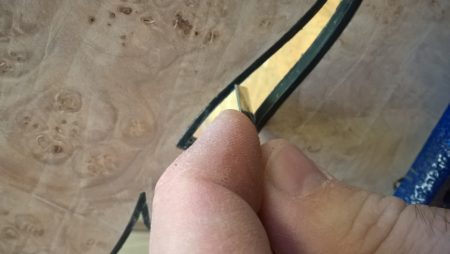
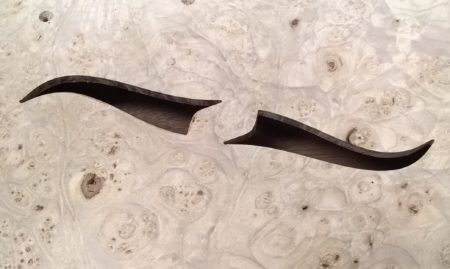
Applying the binding to the sound hole
With the CNC up and running it was time to try it out on my first guitar. I’d already decided the next would be a Telecaster thinline out of Sapele with a Maple cap. A “Sapele Tele.”
I found a PDF online of a classic Telecaster body. This was opened in CorelDraw! where I was able to remove the dimension lines and annotations. I traced the result and after a bit of tweaking wound up with an accurate full-scale Telecaster line drawing complete with pickup cavities, neck pocket, and bridge holes. Because I wanted a “thinline” style Tele, though with classic pickups and hardware placement, I added outlines for body cavities and a sound hole. I also placed reference holes in the corners. These would be used on the CNC for ensuring repeatable placement so I could cut the top and base separately and flip the base over to mill the back as well as the top.
The drawing was exported as a DWG file and brought into Vectric Cut2D. This program is used to specify the toolpaths and generate the G-code for the CNC machine. I carefully plotted out the sequence of cuts and grouped together toolpaths that could be cut in the same file.
First up on the machine was the Sapele base. A single 8/4 board was cut in two and the halves joined, glued, planed, and sanded to 1-1/2″ thickness. After milling the reference holes in the waste board, the roughly 14″ x 22″ blank was placed in the CNC. The primary cuts here were for the body cavities both behind the sound hole and some extra cavities near the tail to remove some weight. The primary cavity took roughly 40 minutes to cut with a 1/4″ end mill. I may try to use Fusion 360 with adaptive clearing on the next one to see if I can speed this process up a bit. Otherwise next time I may cut part way down – enough for a bearing to ride against – and finish up manually. In any case, once this was done, I pushed dowels into the reference holes and flipped the body over, aligning the dowels with the matching holes in the wasteboard and tapping them home. On the back, the string ferrule cups were milled out and the base removed from the machine.
Next up was the 1/4″ Maple burl cap. Once again the reference holes were routed and then the machine was setup to cut out the sound hole. Once complete, the cap was removed from the machine and the binding installed. For this guitar I’ve chosen to bind in black plastic. The curves were a bit tricky to bind, but in the end I was very pleased with the results. The joints closed nicely with no filler needed. One the cement cured, I flushed the binding and glued the cap to the base, again using dowels in the reference holes to perfectly align the two.
After the glue dried, the now single-piece body blank was put back into the machine for final cutting. On this pass the machine was set to cut out the pickup pockets, electronics cavity, neck pocket, neck mounting holes, and string through holes. I also set it to route the binding channel prior to the final passes to release the body from the blank. I should have routed part way through from the back first, as my bit wasn’t long enough to cut the full 1-3/4″ depth. Instead, I left about 1/4″ that I would need to bandsaw and flush route away by hand. I took some video of this process.
Next up is binding the body, filling some knot holes in the burl, filling the Sapele grain, and then dying and finishing this body. I will also turn focus to building the neck, which again I expect to cut out primarily on the CNC.
On the cnc after cutting the pockets and binding channel
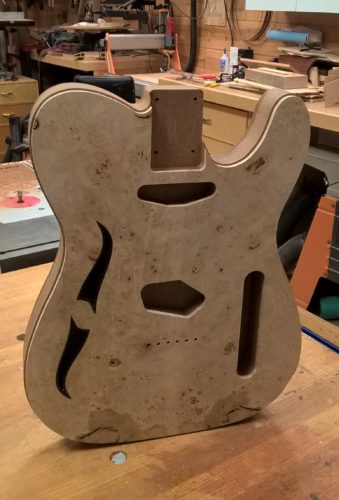
Body cut and ready for binding