Over the last couple months things in the shop have been fairly quiet…mainly due to things in the house being more noisy! Of course, our now 5-month-old son Nathan’s an absolute joy and easily the least-demanding baby of the three. This weekend I snuck away for a bit to put the finishing touches on my new hide-away blade storage rack.
Hidden Blade Storage
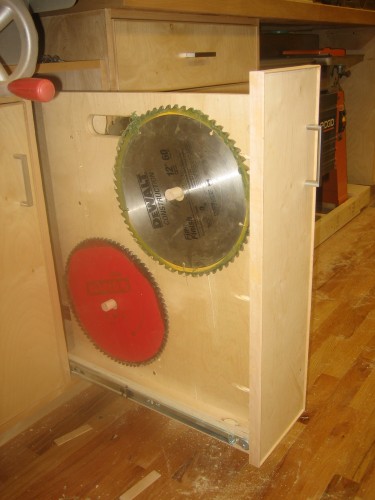
When I originally designed the shop cabinets, I kept the drawer sizes and placements open figuring I’d work the final dimensions out during the build, letting their ultimate contents dictate their sizes. This worked very well, with one notable exception: two tall and narrow openings on either side of the RAS base cabinet. Early on I was thinking that I might mount some narrow drawers for router bits in this location…but the RAS counter overhang made that impractical and they wouldn’t be in a terribly good location for these frequently-accessed accessoies. Early on these holes began attracting my table saw blades and accessories. So I hit upon the idea of a tuck-away blade storage rack. And here it is….
The design is based on this one I found online from Wood magazine. That plan calls for a 60-degree angle, which looks fine in their photos of 7-1/4″ blades/dado chippers, but wouldn’t work in my cabinet as 10″ blades at that angle take up more width than I had (8″). I built mine at 80-degrees — and, even if you don’t need the “tighter” arrangement, if you plan on storing 10″ blades, I’d advise an angle closer to mine. I’ve uploaded my Google SketchUp sketch for my version in case you’re interested. The article also suggests cutting the slots with a bandsaw or jigsaw. I made a quick jig for the router table and cut them with an 1/8″ straight bit…which made for much straighter, smoother and more consistent cuts than you’d ever get by these other means.
Roll-away Jointer
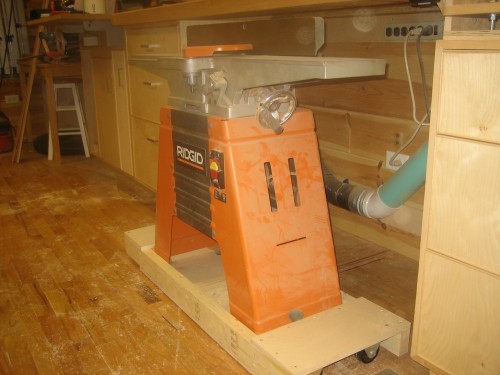
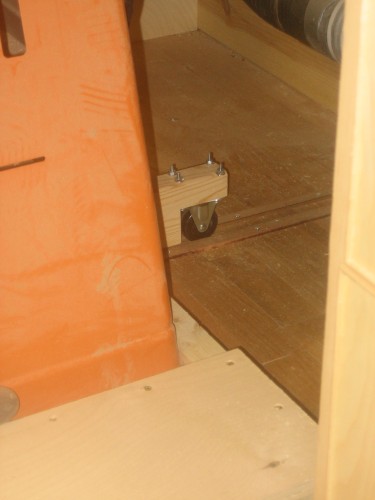
From the beginning I designed my jointer to “tuck” underneath the shared RAS/CMS counter. This was definitely a good decision, but walking the jointer in and out of its cubby was a bit awkward. A few months back I built a mobile base for it based again on plans I found online…this time from a fellow lumberjock. Instead of swivel casters, I mounted rigid ones on my version that would help track the based appropriately. The early version of this used a simple outrigger in the back with a “pin” that rode in a track in the floor. Unfortunately, this was unsatisfactory as the pin would frequently hang up on the floor at any high point — which meant it required more force to more the tool than I’d originally envisioned. A couple weeks ago I set out to remedy the situation. I wound up replacing the pin with a small caster. This did the trick, and I can position the jointer with one hand.


