
- Canjos and Dulcimers and Bears – Oh My!
- Back to Basics
- String it up!
- Starting the Kimball Dulcimer
- Glue Up and Carving the Scroll
- Finishing “Coco Bear” the Appalacian Dulcimer
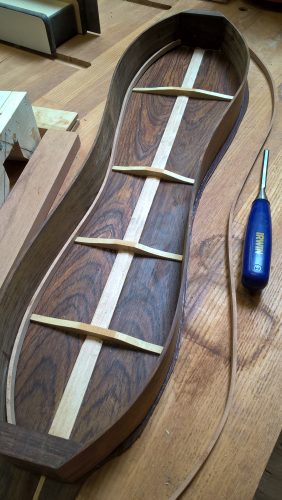
Back braced and glued to sides. Installing the cherry lining.
Joining the back and sides went smoothly. The concern I had here, and in general with gluing Cocobolo, is the oily nature of the wood. I’d read numerous articles and blog posts discussing difficulties with getting the glue to adhere. I followed the advice of several commenters in first sanding/planning the edges to be joined and then wiping the area with acetone. The wood’s oils left a brown residue on the wiping cloth. After that, Titebond III seemed to do the trick. So far I’ve not experienced any failed joints; they appear sound and solid.
In guitars, the bracing is typically Spruce. I’m not sure what they usually use for dulcimers, but as the Cocobolo isn’t in any way typical I figured I’d use what I had on hand – in this case scraps of Maple.
Carving the Scroll
Next up was carving the scroll. I briefly considered a more modern guitar-style head but really wanted a more traditional style instrument – and really wanted to learn how to carve.
To work out how to actually carve the scroll, I turned to the Internet where ultimately I discovered Mary May’s School of Traditional Woodcarving. Among her many video lessons were at tutorials on carving at least 3 different types of scroll. Although I’d watched the beginner lessons, I was too impatient to carve donuts and flowers first. Instead I dove right into the scroll.
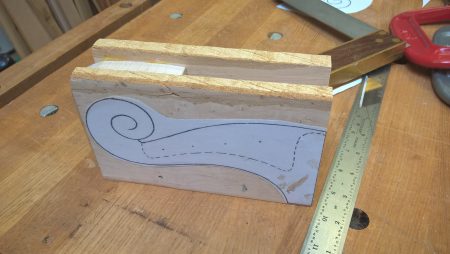
Scroll blank glued from 3 pieces of birdseye Maple.
The Kimball book provided no actual peg head dimensions, but there were a few drawings of common heads. I chose one, scaled it to what looked like a proportional size, and printed it out.
I opted to go with a three-part glue up. By leaving a hollow in the middle of the assembly this allowed me to skip the step of chiseling out the peg box.
The carving went quite well, though I did have to use a bit of CA glue to reattach a chip from the center of the scroll that popped off. I also stopped a bit shy of what I had originally intended – the depth of the scroll is a bit subtler than I’d wanted. However, it was looking really good to me and so I decided to quite while I was ahead!
The carved peg head was attached to the body and reinforced with hardwood dowels before turning to the soundboard.
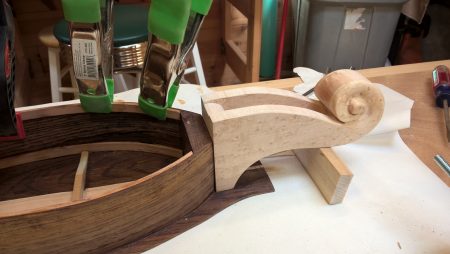
Scroll attached to head block
The Soundboard
Soundboard glued to sides
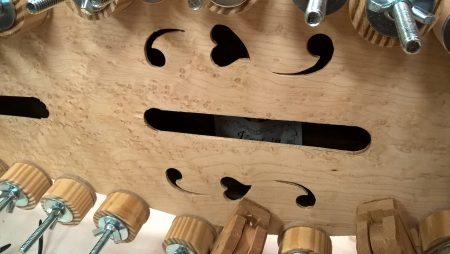
My assistant and I spent quite a bit of time searching the Internet for the right sound hole design. In the end, we decided to go with a riff on the traditional “f” sound hole design by marrying it with a canted heart design – a dulcimer staple.
The actual heart shape was pulled from Microsoft’s “Webdings” font collection. Though I could probably have drawn my own, I knew this fact would drive my Microsoft Windows-hating co-workers crazy.
Mother-of-Pearl Butterfly and Flower Inlays
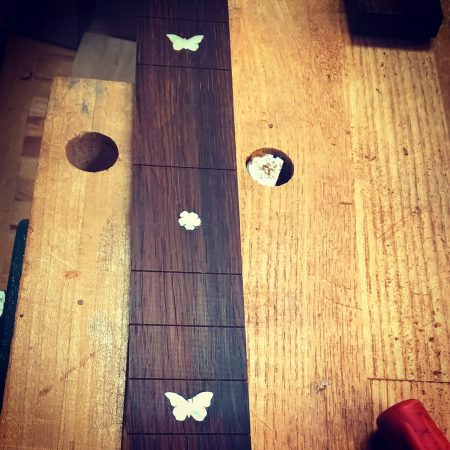
Butterflies and flowers inlay
My very first large scale “fine woodworking” project was a crib and changing table/dresser for my then infant daughter Annalise. These featured my first attempt at inlay – butterflies. As she also happens to be my constant shop companion these days, helping me out with the dulcimer, it seemed fitting to incorporate butterflies into this project as well. After trying, and failing, to cut the shell on my scroll saw, I cut a slot in a piece of scrap plywood and proceeded to hand-cut the abalone. It turned out to be faster and easier than I originally assumed it would be.
Following some very helpful video advice from Blues Creek Guitars, the abalone was glued to the Cocobolo fretboard, scored with an Exacto blade, and routed with a small trim router. The fret slots were cut with my Stewart MacDonald template and table saw blade. I couldn’t have been more pleased with the results.
After gluing the birdseye Maple neck and inlayed and fretted finerboard to the body, it was ready for finishing.
Next up: Finishing and final assembly!
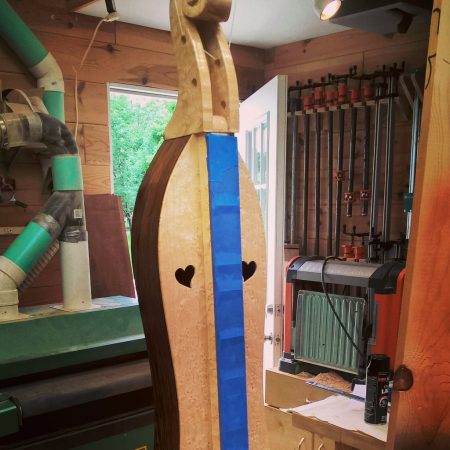
Ready for finishing