

After finishing up the “Back to Basics” dulcimer, I took a few shop days to prepare for the next build. This time was spent building a couple keys jigs/fixtures that I was lacking.
Something I knew I wanted for the next build (and future guitar builds) was some spool clamps. If you’re not familiar, spool clamps are essentially two round wooden disks or dowels lined with cork with a bolt running through the middle. They’re traditionally used to clamp the thin top and bottom pieces to the sides for violins and other acoustic string instruments. The commercially available ones seemed a bit pricey to me – I figured I should just build some of my own.
Though I had cork, I wasn’t keen on hand-cutting it into disks and couldn’t locate any pre-cut ones. I figured round felt pads, like the ones for putting under chair and table legs should work just fine. Not only were they abundant, they were also relatively cheap.
The bolts were also a bit pricey on Amazon.com and in the big box stores. However several blogs pointed me to http://www.wholesalebolts.com/. They had what I needed at great prices with pretty reasonable shipping via USPS flat-rate box. I considered using a hole saw to cut plywood disks for the ends, but ultimately it seemed easier to just slice up a dowel and use a centering jig in the drill press to drill the bolt hole.
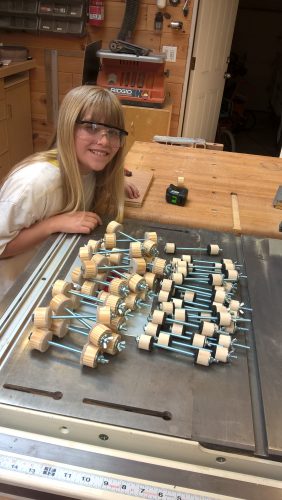
50 spool clamps complete
With my trusty assistant helping out in the shop, we managed to build 50 clamps – (25) 1″ and (25) 1-1/2″ diameter in just a few hours.
Wood – 1, Steam Box – 0
Next was to prep for bending the sides of the hourglass-shaped dulcimer. Although an earlier attempt at bending thin strips of wood with a heat gun went rather well, I still wanted to experiment with steam bending.
I went out and grabbed an Earlex steam generator – really just a wallpaper steamer with an extra brass fitting – and slapped together a spiffy new steam box out of pine boards.
I made myself a bending form out of MDF to match the hourglass dulcimer from the book and tested out the steam bending process on ash and cherry.
The results were pretty awful.
Initially I tried steaming the 1/8″ thick pieces for around 10 minutes. Almost as soon as it was removed from the box, I could feel the stiffness begin to return. I couldn’t seem to get it clamped to the bending form fast enough and wound up with a board with a very subtle bend in it – not even remotely close to the shape on the form. Subsequent attempts at 15 and finally 30 minutes weren’t any more successful. After 30 minutes in the steam box the board came out saturated and feeling like a sheet of soggy cardboard. However, even after drying out clamped to the form for several hours, the “spring back” was so significant it couldn’t be used for an instrument side.
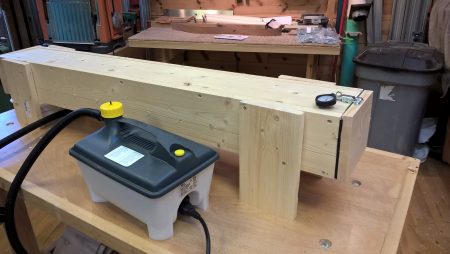
Steam box
Back to Work…
Not wanting to spend any more time on this, I set aside the steam process and began prepping the parts for the new dulcimer.
It was probably 10 years ago when a now defunct internet-based lumber supplier accidentally shipped me roughly 20bf of Cocobolo instead of the Cherry I’d ordered. Since that time it’s been stacked in my shop’s wood storage loft waiting for the right project. Though mountain dulcimers are more typically made from native North American hardwoods like Maple, Cherry, Walnut, etc., I decided this would be a great project for this beautiful Cocobolo.

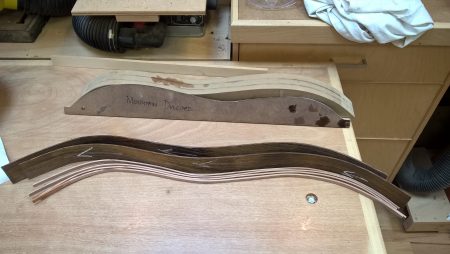
The back planed and scraped
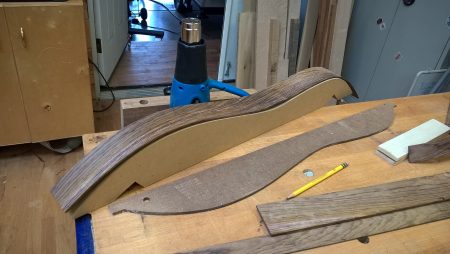
First side bent to shape
The sides and back would be built from this resawn and bookmatched Cocobolo. The top would come from a beautiful piece of birds-eye maple.
My woodslicer blade made quick work of re-sawing both boards, and after a few passes in the drum sander, the sides, back and top pieces were prepped. To add some interest and help tie the top and back together, a decorative maple strip was inserted between the back halves.
Sides and lining bent
Bending the Hourglass
Following my failed attempts at steam bending I’d decided to pull the heat gun back out and bend the sides freehand.
I was pleasantly surprised and pleased by the results. While the gun was out I also bent some strips of Cherry to be used for the lining.
Finally, the bent sides were attached to the head and tail blocks – also of Cocobolo – using a custom-cut clamping block suggested in the book.
Next up: Gluing and bracing the bottom.

Gluing up the head and tail blocks