In the first post of this series, the kids and I built “canjos” following our visit to the Great Smoky Mountains. Besides being a fun “shop time” activity with the kids, this was a prelude to – and preparation for – building our own mountain dulcimer.
I admit I was tempted to purchase a finished dulcimer from Wood-n-Strings dulcimers. They also sold kits including all of the pre-cut pieces and pre-bent sides. However, I also knew I’d rather build one myself and, frankly, I don’t see the point of woodworking kits in general. IMHO kits remove most of the artistry and craftsmanship from the process. If everything’s already perfectly machine-cut, the headstock scroll carved, I’d be little more than the last step on the assembly line. Too much “paint-by-numbers” means very little risk of utter failure – which also means no true pride of real accomplishment, at least for me personally.
Reading Up
Of course, I had no clue how to actually build a proper mountain dulcimer.
Having read several books on acoustic guitar building, I understood the basic construction techniques and concepts such as scale length – or vibrating string length (VSL) as I see it called on the dulcimer forums. But I wanted to find a plan showing how the tuning head and body are typically attached, internal structure of the body, etc.
Thankfully I found the book – “Constructing the Mountain Dulcimer” by Dean Kimball.
This is a very old book (you can tell by the printed BASIC code for calculating fret placement designed to run on a Commodore 64). Many Internet sites sell used or hardcover copies, but Luthier Merchantile International sells ’em new in paperback for only $15.
I also read a blog post describing another old book – the 1981 Reader’s Digest “Back to Basics” that includes plans for a mountain dulcimer. This book is out of print but there are dozens of used copies available online. I grabbed a copy from Amazon and sure enough, there on page 390 is a plan for building your own mountain dulcimer.
Though a traditional hour-glass shaped dulcimer is pictured on the cover, the plans inside the book are for a relatively simple triangular shaped dulcimer. This suited me just fine – I decided I’d build two.

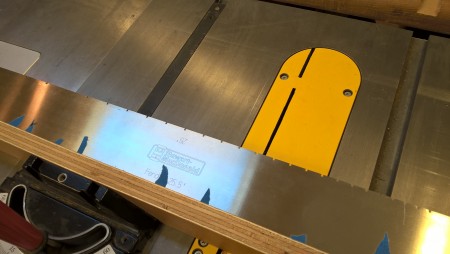
Cutting the fret slots with a template and custom blade. The blue tape is blocking off the “skipped” frets not in the dulcimer’s diatonic scale.
Reader’s Digest Dulcimer
The first one is the simple Reader’s Digest “Back to Basics” dulcimer. The purpose of this build is to gain additional experience fretting an instrument – something I’d yet to tackle on my two prior electrics or my as-yet-unfinished acoustic 6-string.
Following the (hopefully successful) basic build, I’d tackle a more traditional body style per the Kimball book. Through the second I’d gain experience bending wood. Both of these will hopefully lead up to finally finishing my acoustic guitar build.
Fret Not
Fretboards scare me. Not playing them, but building them. The precision required is a bit intimidating to say the least. Measurements are often specified in hundredths of an inch. And if you’re off just a bit, your gorgeous handmade masterpiece will forever play out of tune. Yikes.
To help ensure success and take some of the anxiety out of the process I decided I’d purchase a template.
Stewmac.com sells a very nice metal fret template and table saw blade that I’d picked up a few months back. After getting a somewhat imprecise and inconsistent result using the guide to mark frets with a pencil and hand saw them for the canjos, I figured I’d use the template as intended for the dulcimer – paired with the table saw and a simple jig.
The book specifies a 28″ VSL. Because this will be played primarily by the kids, and because I really wanted to try out my 25.5″ scale template, I adjusted this to Fender-style 25.5″.
Daddy’s Little Girl
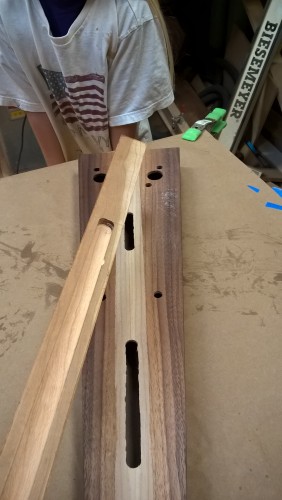
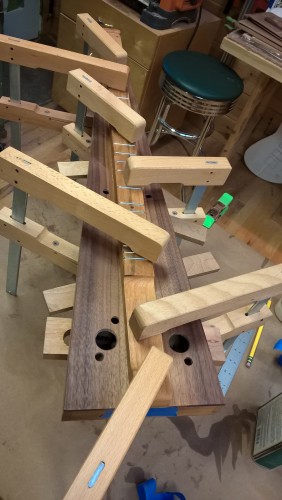
My very “crafty” 10-year-old daughter was eager to help out with this project. So I put her to work doing nearly everything that didn’t require the use of power tools. She performed most of the gluing up, fret installation and beveling, and final finish work. We started on Saturday morning, and by Sunday afternoon the first coats of finish were drying.
Next weekend after a few more coats of finish and a few days’ curing time, we should be ready to buff it out, install the bridge, tail, nut, tuners and string it up!
Next up: how does it sound?


