

- Atomic Age Surfcaster
- Mahogany and Padauk Neck
- Inlaying My New Logo!
- Chain Reaction

Preparing to cut the cap

Gluing up the African Mahogany body

Gluing up the burl Maple cap

Binding complete on the soundhole

Gluing the cap to the Mahogany body
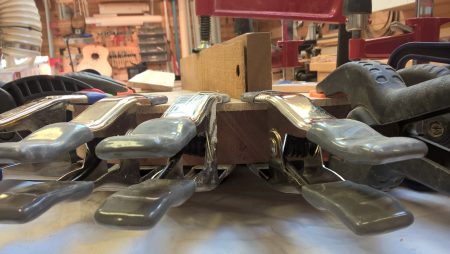
Gluing the cap

Roughing out the pickup and electronics cavity

Visualizing with the gold hardtail bridge
With the charity guitar (the “Wishcaster”) complete, it’s time to start the next build.
Though I still haven’t completed the acoustic, I really want to build another Surfcaster – this time for me.
A few weeks ago I acquired three burl Maple bookmatched caps for the next few guitars. Perhaps it’s the fact that during most of my shop time, the Science Channel is playing in the background, but the burl pattern reminded me of close-up shots of the Sun’s surface. I imagined what this piece would look like dyed in a red-orange-yellow burst.
I decided the theme would be something to do with nuclear fusion, and maybe retro style rockets to go along with the already retro-style Surfcaster. Hence the working name – the “Atomic Age Surfcaster.”
While I continue to hash out the final design details, I started the build process. To cut down a bit on weight, I chose African Mahogany for the body. This wood should also work a bit easier than the harder Ash from the last build. The neck will also be of Mahogany, but feature a birdseye Maple fretboard and a “racing stripe” down the back.
As usual, the first step was to prepare the body blank – plane and joint the 8/4 Mahogany and glue the halves together. The top was jointed and planed as well, and glued up. It took a bit more time to select the appropriate edges of the burl to join that would yield the most satisfactory pattern and banish any blemishes to sections that will be either removed for the electronics cavity, or hidden underneath the pickguard or bridge. The acrylic Surfcaster template makes this task much easier.
I cut the soundhole by hand with a coping saw this time and took a bit of extra care to getting the lines smooth and square, and the corners tight. This is because with the last one, I needed to spend some time filling some small gaps where the binding meets the Maple. The cuts looked good, but minor variances in the edges appear when you attach the plastic binding. The extra care paid off – the binding came out very tight and professional looking. Definitely an improvement.
I used the “body base” template to route out the hollow under the sound hole. Sadly this marked the end of that template – the “fresh” double-stick tape I recently picked up is clearly much stronger than what I’m accustomed to. When I attempted to pry it off the body, the tape held firm and the template cracked. D’oh!
From this point on I started injecting acetone into the space between the template and work piece to prevent this from happening to any more of my templates. Fortunately this template is fairly easy to recreate if and when I make another Surfcaster.
Before gluing on the top, I added a small amount of dark brown dye to sanding sealer to darken the mahogany in the cavity. This will also help seal it to stabilize the body wood. The top was then glued on with Titebond III and clamped with just about every small clamp in the shop.
About the time the clamps came off, I received the gold hardtail string-through bridge from China. I routed out the electronics cavity, first with a forstner bit and then by template routing. I then set the bridge loose on the body to visualize the completed piece and see how well it covers the knots.
You can tell from the pictures that there was one knot that I wasn’t able to remove or obscure. This will be filled with epoxy resin. I may consider dying the epoxy red to add some interest, but otherwise the knot will remain where and essentially as it is.
Think of it as a sun spot.
Now that the body is shaping up, I need to build the neck blank so I can route an appropriately-sized neck pocket. After that the body can be bound and the remaining holes drilled for the output jack and bridge grounding wire.