- Puppet Theater
- Constructing the Frame and Panels
- Building the “Wings”
- The Intarsia Comedy/Tragedy Masks
- Finishing Touches
- Opening Night!
- The “Veronica” Puppet Theater
A New Technique
When I first designed the theater, I knew it needed something in the top arched panel. To me, the most natural thing would be the traditional comedy/tragedy masks. Although I’ve done a number of inlays in the past, it seemed like this called for something more dimensional, like a carving.
Unfortunately, the last time I did any wood carving, we called it “whittling” and used it to make walking sticks and toothpicks at Boy Scout camp. I simply don’t have the tools and more importantly, the carving skills or know-how. However, it occurred to me that I might be able to do some kind of intarsia piece. I own a nice bandsaw and some 3/16″ and 1/8″ blades that I’ve used for inlay work; and wasn’t intarsia basically 3-D inlaying?
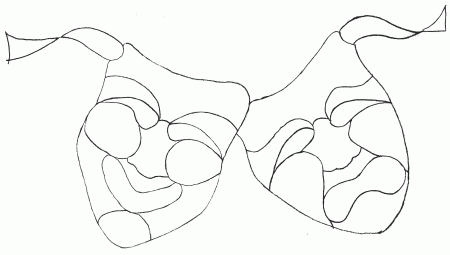
After a number of fruitless Internet searches for templates, it appeared that I’d need to design one myself. Although I’m not much of an artist, I happen to have a sister-in-law who’s quite accomplished. She also has some experience with stained glass design, which dovetails quite nicely with the concept of an intarsia pattern. Kathy used some sketches we found online to create a couple mask patterns for me. After making some modifications to simplify the patterns for my tools and skill level, we ended up with the final design below.
A New Tool
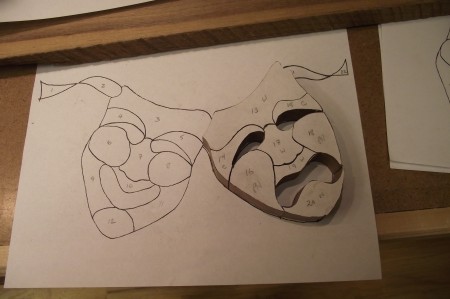
For my first attempt at intarsia, I decided to try to cut out the pattern on a scrap piece of poplar. I glued down the pattern to the blank, mounted a brand new 3/16″ timberwolf blade in the bandsaw, and began to cut. The blade made quick work of it and I was able to make fairly accurate cuts. However, the kerf was simply too wide and ragged. The 1/8″ blade I have is an old generic one from Grizzly that I knew wouldn’t make a smoother cut.
So, what to do?
Naturally, the answer is a new tool! I ran out to Sears and for $100 (10% discount for ordering online for in-store pickup!) picked up a 16″ scroll saw that got fairly consistent and decent reviews. After spending some time warming up to the saw by cutting wavy lines in poplar, I glued the pattern to a slab of walnut and began to cut out the sad face.
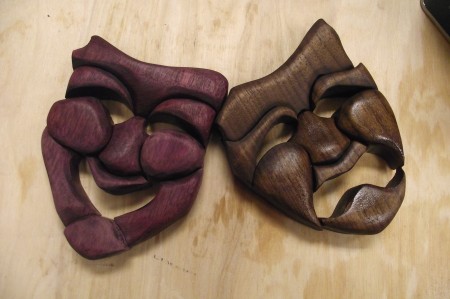
My stationary sander worked very well for shaping the cut pieces and I must admit that it was a blast shaping the contours. The purple heart took a bit more effort than the less dense walnut — and 80 grit paper — to get the shape I wanted, but in an hour or so I had completed the shaping. I had originally considered using different species for the cheeks and eyebrows of each mask, but figured I didn’t have the time or experience to get a good fit. Ultimately I think this looks better anyway.
I read an article online that suggested applying a coat or two of finish to the intarsia pieces before glue-up to prevent the glue from seeping in and showing through the final finish. This sounded like a good idea, so after sanding to 220, I wiped on some tung oil. The next morning I glued the pieces together on a piece of wax paper. I couldn’t be more pleased with the results!
Next steps…
I still need to cut the “ribbons” and mount the whole thing to the birdseye maple panel. After a bit of touch up sanding, the whole thing should be ready for 6 or so coats of tung oil finish.


