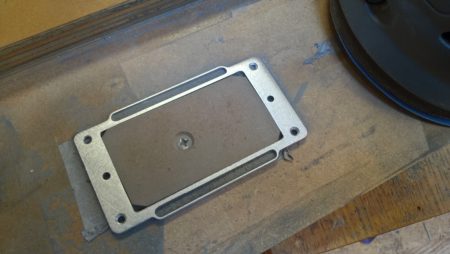
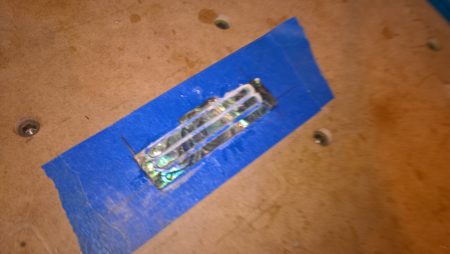
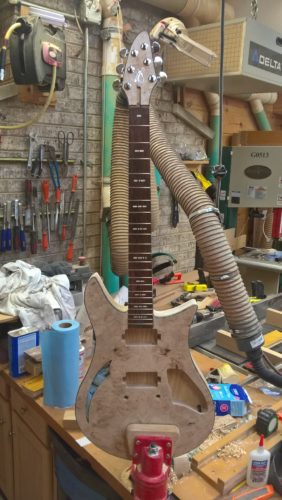
It’s a Duesy, Two

This entry is part 1 of 1 in the series Duesy II

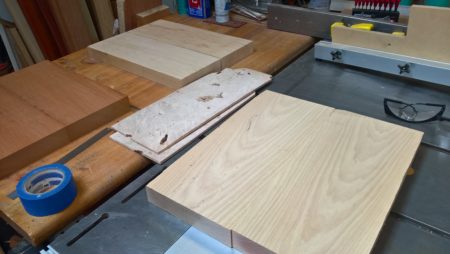
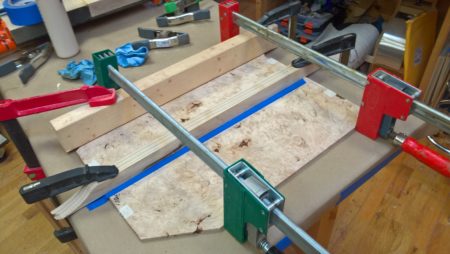
Two bodies: Ash and Maple Burl (Double Dragon) and solid Mahogany

Filling the bridge ferrule holes before redrilling

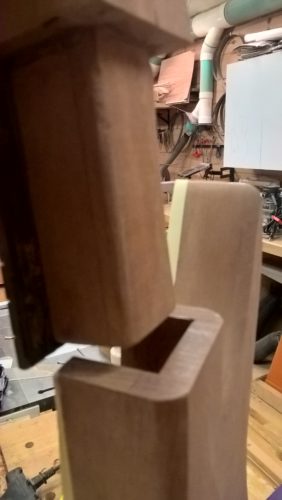
Fine-tuning the tenon to get a perfect fit

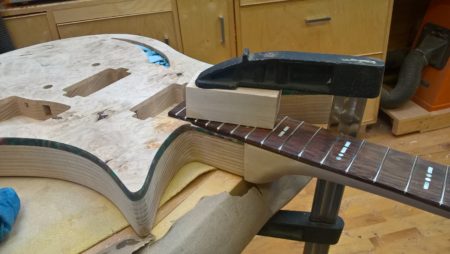
Test-fitting the neck tenon

A perfect fit

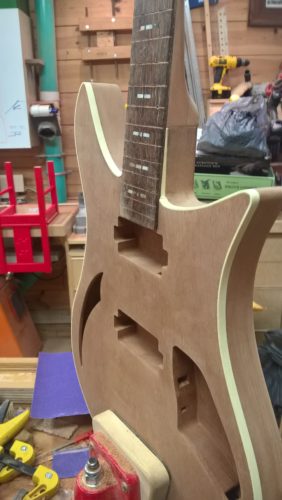
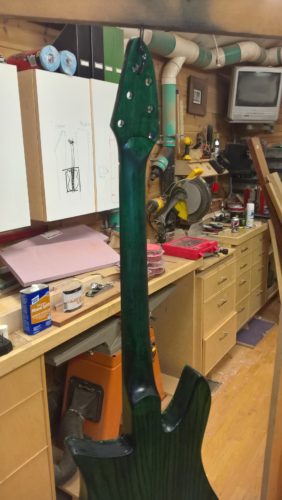
Looking good from the back as well

Very happy with this joint

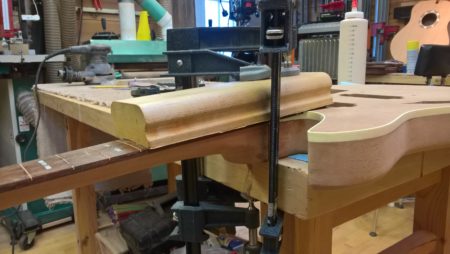
Gluing in the neck

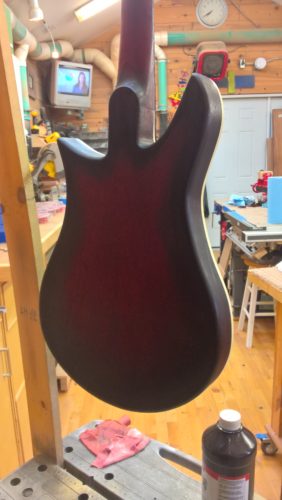
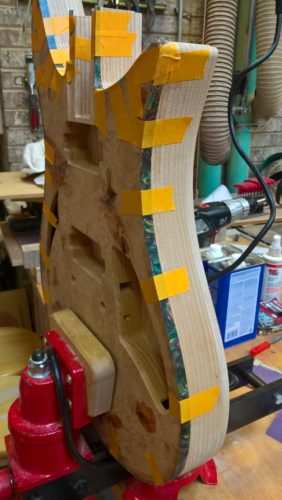
Final sanding and prep before applying stain finish

Front aft applying first coat of Tru-Oil

First coat of Tru-Oil applied

Leveling and dressing the frets

When starting the build for the Double Dragon I had already decided to build a second. One for the raffle and one for me. At the time I wasn’t certain which would be which.

I was down to one Maple burl cap on hand, so one of them would have to feature a “plain” top. I had plenty of beautiful Mahogany in stock, and thought it would be interesting to build the second one in all mahogany. For the cap, I would resaw a thin slice from the body, hollow out the chambers, cut the sound hole, and then rejoin the pieces.

After much consideration, I chose to donate the figured Maple burl-capped guitar and keep the Mahogany one. The Mahogany body was set aside and work beagn on the “Double Dragon.” With the charity event now over, it was time to turn my attention back to the all-Mahogany Double Cat. This one would be for me.

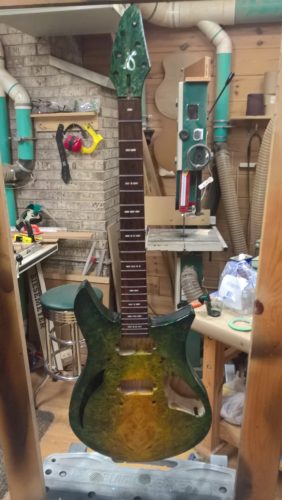
I knew right off that this one would be a deep red-to-black burst finish. I would also use this opportunity to work on my Tru-Oil finishing technique. The Dragon was my first attempt at Tru-Oil, and for a time I thought maybe my last. This time I’d try again and follow a different set of directions.

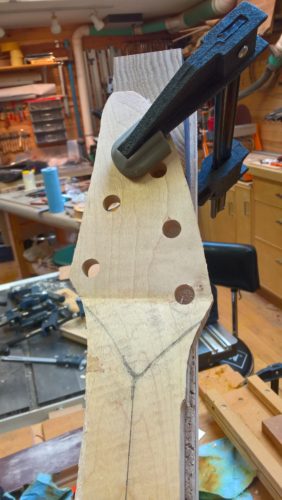
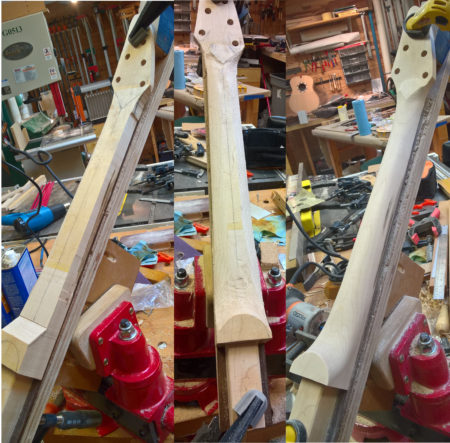
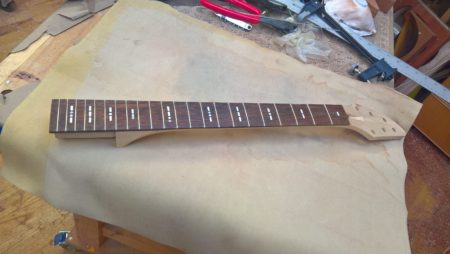
First a neck blank with stacked heel was cut and glued up from Mahogany. I let the CNC cut out the fingerboard, including inlays. I used a tiny .023″ end mill to mark out for the fret slots. They were cut to final depth by hand to save time and wear on the delicate bit. A relatively flat 12″ radius was sanded into the fret board before mounting it to the neck.

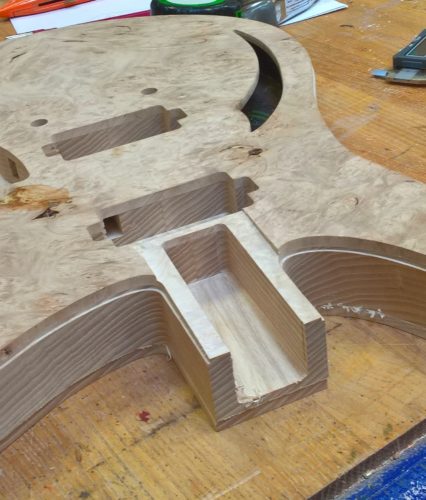
The Double Dragon featured a 3-degree neck angle. Though this seemed like the perfect angle on paper, in reality the bridge barely fit. I managed to get the action dialed in, but couldn’t use the roller bridge I had originally envisioned since it would have raised the strings uncomfortably high. For this guitar I would adjust the angle up to 4 degrees. This would mean recutting the neck pocket top angle, already cut to 3 degrees. I don’t have a router bit of an appropriate length to reach the bottom of the neck pocket, so rather than recut the bottom, a 1-degree shim was inserted.

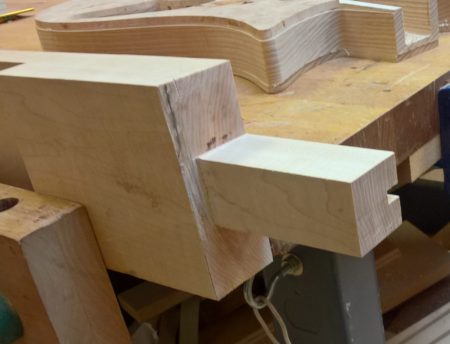
With the pocket angle finalized, it was time to cut the tenon in the neck blank. Looking back on the dragon, another issue here was with the back side of the tenon shoulder. I’d used the table saw and sled to cut the shoulder on the sides and back. This also meant angling the blade 3 degrees for the cut along the back. Unfortunately the cut was a hair off of perfect, so there was around 1/32″ gap to one side of the joint in the back. This required filling to obscure. This time I wanted the joint to be perfect, and so I decided to cut the back carefully by hand.

As seen in the photos, this worked brilliantly. The neck joint came out nice and tight, needing only a few passes with 80 grit to perfect the fit. After the neck had cured, I filled the grain with “Wunderfil” and stained it using Transtint dyes. First a deep red (bright red + black), then black shading around the sides and edges.

Tru-Oil take II
This time I would follow a different plan for the top coat of Tru-Oil. Following the “experts” on YouTube, I applied the first coat thick — basically flooding the surface and rubbing it in. When it started tacking up, I wiped all of the excess off with a new rag. A subsequent 4 or 5 more coats were applied in similar fashion, though much less oil was used for these. The result was a smooth, satin top coat that required only a buff and polish to complete.

The pore filler didn’t quite work to fill all of the grain. I didn’t mind the outcome, but I’m thinking that the power sander I used to remove the fill from the surface also pulled some out of the grain. Either that, or it simply shrank after curing. Either way, this is the next challenge I need to address. With the Maple-capped guitars this isn’t an issue, but getting a smooth, glassy finish on Mahogany will require some additional work.

Next up…finishing it up and trying it out!

Facebook Comments
Categories: Uncategorized, Luthiery, Woodworking, Guitar Building | Tags: , , , , , , , , | Leave a comment

Raffle Update – $14,000 for Make-a-Wish!

This entry is part 6 of 6 in the series Double Dragon

A New Home

As planned, the “Double Dragon” was raffled off at intermission on the House of Blues Chicago mainstage. Make-a-Wish Illinois representative Wande Olude helped draw the winning tickets. This year we sold $7,010 in tickets, which was matched by our coprorate parent Alliance Data Systems, bringing the this year’s donation to $14,020.

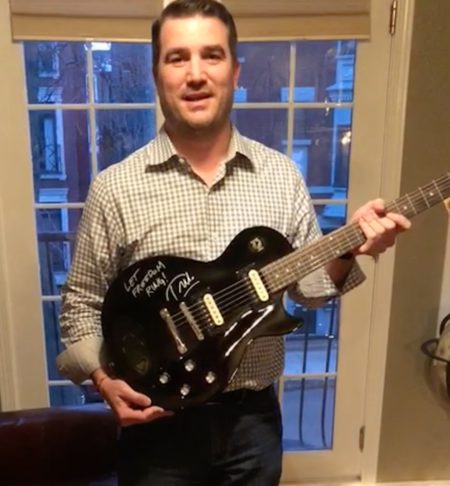
Special thanks as well to Adam Krier (Lucky Boys Confusion, AM Taxi) and Tom Morello (Rage Against the Machine) for their support of this raffle. With their help I was able to offer a second grand prize – a Epiphone LP Studio LT signed by Tom Morello.

Our four-year total now stands at just over $32,000.

Here’s the lucky winner after we handed over the Double Dragon…

And the Tom Morello guitar in the hands of its new owner…

Facebook Comments
Categories: Luthiery, Uncategorized, Guitar Building | Tags: , , , , , , , , , | Leave a comment

Retirement Gift for a Friend, Co-worker, and Bandmate

Original Rogue RA-90 fresh from the box
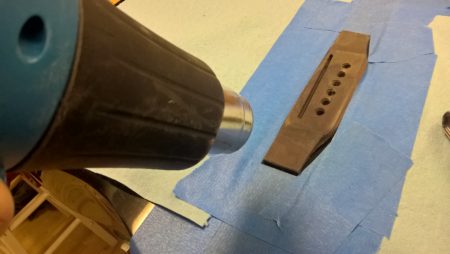
Removing the bridge with a heat gun
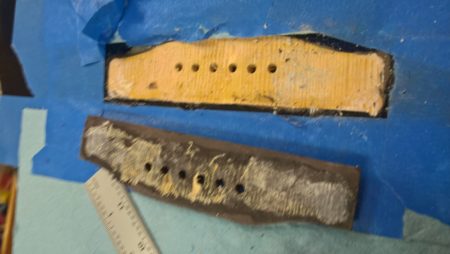
Bridge off

Preparing to transfer the vinyl logo to the guitar body
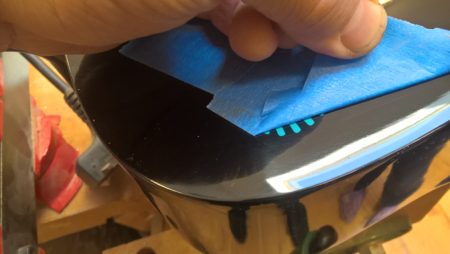
Completing the transfer
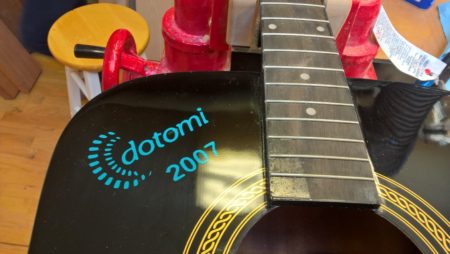
The finished logo transferred to the body
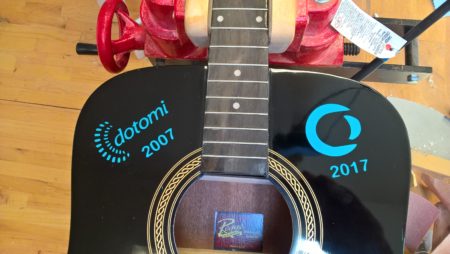
He actually retires in 2018…unfortunately I caught this goof after paint (but was able to fix well enough)

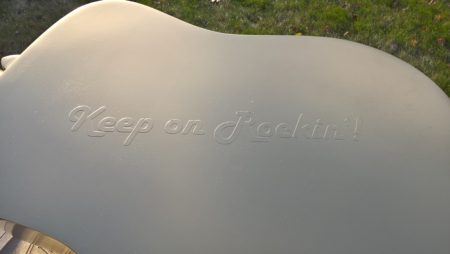
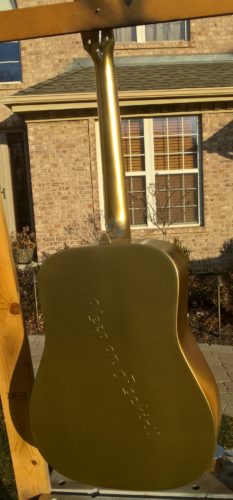
Special message for back
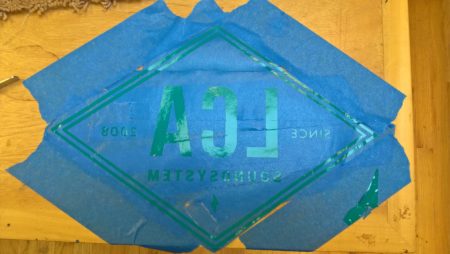
Transferring the large and fairly detailed band logo
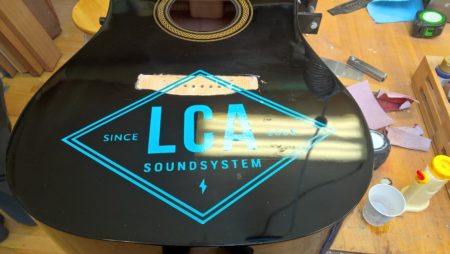
The LCA logo placed – it came out just great.
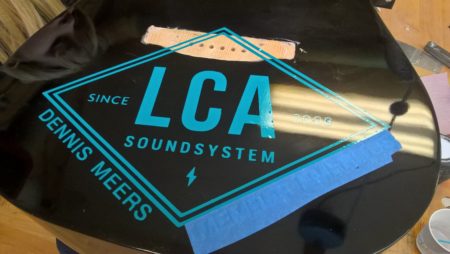
Adding some lettering to the logo
Vinyl decals applied
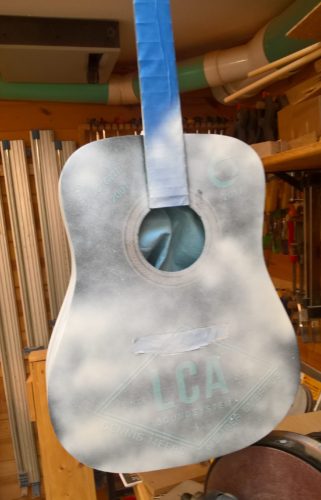
First primer coat
First layer of gold metallic applied
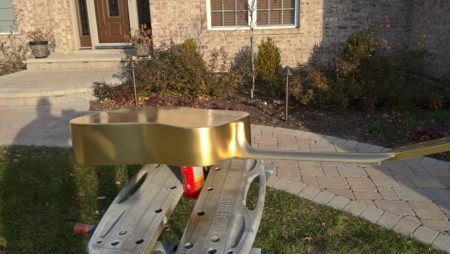
Lookin’ good in gold
Beautiful day for painting a guitar outdoors
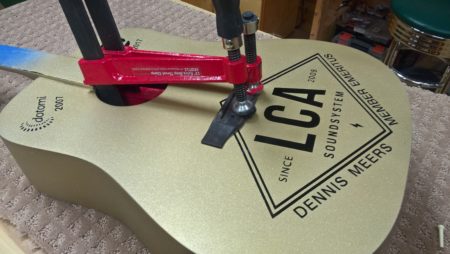
Regluing the bridge

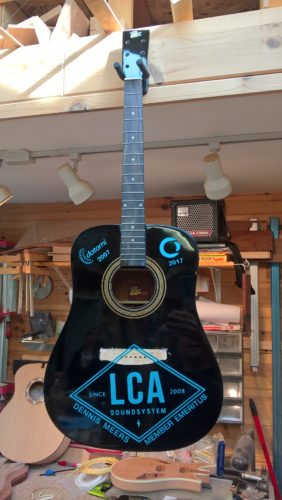
The finsihed guitar

I have the best job ever.

In my job at Conversant not only do I get to work with some of the brightest folks in ad tech and software engineering, I also get to help organize the company band and emcee a gig at the Chicago House of Blues at the end of each year. It’s a dream gig for a software engineer/musician/luthier/recovering-actor (in no particular order).

This year’s party was to be our 10th season and hopefully the best yet. One bittersweet note, however, was that one of our own would be retiring in the early part of 2018. He’s been with the company for the past 10 years and has played acoustic and sang in the band for the previous 3.

We would need to give him a proper LCA Soundsystem (for ‘low cost alternative’) sendoff!

Conversant President Ric Elert had a great idea he’d borrowed from a School of Rock in his area: we’d paint a guitar gold, have the band members sign it, and present it to him on stage at the big show. Brilliant!

I volunteered to put this together. Naturally I wouldn’t want to use a nice/expensive guitar — this wasn’t to be played afterall. When a craigslist search turned up nothing appropriate, I figured I’d need to buy something new if I was to have it done on time. Fortunately Guitar Center had the perfect fit – a Rogue RA-090 Dreadnought on sale for about $55.

I figured I could use the CNC to cut out vinyl graphics to apply. However, rather than applying the vinyl to the top of the painted guitar, it would be significantly more durable to use it as a paint mask or stencil. One of the challenges I’ve discovered in working with adhesive vinyl for stenciling is that some finishes — especially newly-painted areas — will pull up with the vinyl when removed. The best approach then would be to mask off the original presumably well-cured laquer or poly factory finish with the graphics, and then paint over that with gold. Once the vinyl was removed the factory finish would appear and define the lettering.

I decided to purchase one in gloss black.

Designing the graphics

I knew two things when I started on the design – it would feature a large band logo in the lower bout, along with his name and the words “Member Emeritus.” Turning to CorelDraw, I began by importing a photo of a typical dreadnought guitar and tracing it to create a vector drawing. Comparing the drawing to the real guitar, there were some slight measurement differences between the soundhole and bridge, but they were close enough for design purposes and I’d be applying the vinyl by hand for placement, so the design just had to be close enough to allow for the look I wanted.

As the company had changed names twice since Dennis joined, I thought it would be fun to also include the original logo/name and year on one side of the upper bout, and the final logo and retirement year on the other. As he’s also known for his awesome Neil Young impersonation on the song “Keep on Rockin’ in the Free World,” the guitar would also feature the words “Keep on Rockin'” on the back.

Removing the bridge

Another thing I realized early was that I would need to remove the bridge. The diamond-shaped logo would be far too small if confined to the are behind the bridge. Plus, having the graphic cross the bridge just looked cooler. It would be more difficult to cut the logo in 2 parts to try and maintain the illusion of going under the bridge rather than just removing the bridge and letting the graphic span the gap. Though I’d never removed a bridge, I’ve read about it, seen videos and presentations about it, and spoken with many professional luthiers. I knew it could be done — and what better chance would I have to try this out for the first time than a guitar that was going to be painted anyway. There was no chance I’d ruin the finish on the top. However, I also decided I would make this a learning experience and do the job as if this were a real client’s guitar that required the finish to remain pristine.

I masked off the areas around the bridge to protect from the heat and used a heat gun to heat the bridge and carefully “goo-ify” the glue. First thing I noticed was this bridge appeared to be made out of “white wood” or similar soft wood stained a rosewood brown. What can you expected for $50, right? Once the bridge felt hot enough, a feeler gauge was worked in from the end and slowly used as a wedge to separate the bridge from the body. It took some time and patience, but the bridge finally gave. I did mar the finish at one end, but not so bad as to be noticable if this were to be left unpainted. So not a bad first attempt.

Cutting the vinyl

The vinyl sheets I have are just under 12″ square. After I was satisfied with the size and placement of the graphics on the virtual guitar, I efficiently arranged the individual components on a 12″ x 12″ square. The completed design was exported as a DXF from CorelDraw and imported into Vectric Cut2D. Vectric has an engrave option used to create a tool path for UCCNC. I installed the drag knife into the CNC, stuck a vinyl square to an adhesive Cricut pad, and cut it out. See the video at the bottom if you’re curious what this looks and sounds like.

Gilding the Rogue

The cut graphics are then transferred to the work piece using blue painter’s tape. Strips of tape — enough to cover the entire design — are carefully applied to the top of the vinyl sheet just over the part to be transferred. By slowly peeling the tape back, I’m able to lift up the cut bits, and with a little bit of help from an eXacto blade and tweezers, leave behind the stuff I don’t need. There’s generally a bit of touch up required afterward to remove unwanted small bits of vinyl like the inside of the letter’s ‘a’ or ‘o’ or other small hollow areas.

The tape holding the adhesive vinyl is then applied directly to the surface and smoothed, burnished so the vinyl adheres securely. You can then slowly peel back the painter’s tape, leaving the vinyl behind. This bit is somewhat tedious at times to ensure the right placement and good adhesion. Once the vinyl touches the surface, that’s generally that so to speak. You won’t be able to reposition without risking damaging the vinyl graphic. If you take your time, however, the process works just great.

To ensure good paint adhesion, a layer of Bullseye white spray primer was applied. Here I lucked out. Even though this was early December, we got a gift of a bright and sunny weekend with temperatures in the upper 50’s to low 60’s. It would be possible to paint this outside. Once the primer dried, I applied a couple coats of metallic gold, and then topped that with a couple layers of glitter gold to give it a nice sparkly appearance. At this point I’m very excited as the guitar is looking just beautiful in the sunlight.

The one remaining question — would the vinyl come off cleanly or would it take the paint with it along the edges?

The next day the vinyl was slowly and carefully peeled back to reveal the black finish underneath. This is another tedious job requiring eXacto blades and tweezers. The main concerns were either scratching the paint surfaces and peeling up the gold along with the vinyl. Thankfully neither of these things happened. I had already tested an area of the original finish to ensure the vinyl adhesive wouldn’t pull it up, so I felt good about that. However I hadn’t been able to test pulling up vinyl under multiple layers of Rustoleum. It worked, whew!

After cleaning up any adhesive residue the vinyl left behind with denatured alcohol and a cotton swap, it was time for a couple coats of clear shellac. Again, the beautiful weather worked in my favor here and I was able to apply several layers outside in the sun. The guitar was then hung up inside the shop and allowed to cure.

Finishing it up

Once everything was sufficiently dry, the bridge was reglued, the tuners re-installed. The next day it was ready to be restrung with a fresh set of Martins (it may not be played, but I wanted it to be ‘playable’) and packed up. I’d already tested Sharpie paint markers on the finish. These worked great and dried quickly, so would be perfect for signing.

It was at this time I realized a mistake I had made. Although this was 2017, and we’d be presenting it to him in 2017, his actual retirement would be in 2018. I would need to turn the ‘7’ under the Conversant logo into an ‘8’ using a black marker. Happily this turned out just fine and isn’t immediately obvious without close inspection.

The guitar was brought into the Chicago offices and band members — past and present — were invited to sign.

Presentation

Company President Ric Elert presented the guitar to him during the intermission witnessed by a packed house of Conversant employees. Dennis says he plans to hang the guitar in his music room. And with his now “emeritus” status formally granted by the company prez, we expect him to continue to perform with the band for years to come!

We didn’t perform “Rockin’ in the Free World” again this season. But who knows, perhaps next year the LCA’s own Neil Young will once again grace the
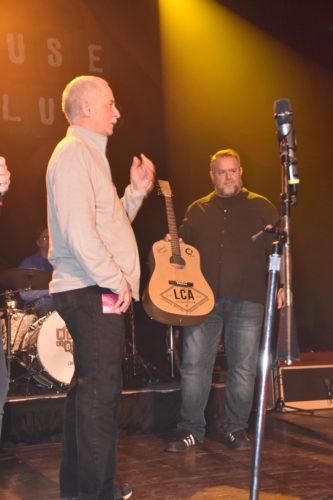
Ric Elert (right; holding guitar) presents Dennis (left) with the completed guitar

House of Blues stage.


Facebook Comments
Categories: Luthiery, Uncategorized, Guitar Building | Tags: , , | Leave a comment

Raffle Ready

This entry is part 5 of 6 in the series Double Dragon

Headstock with custom abalone-inlaid truss rod cover.

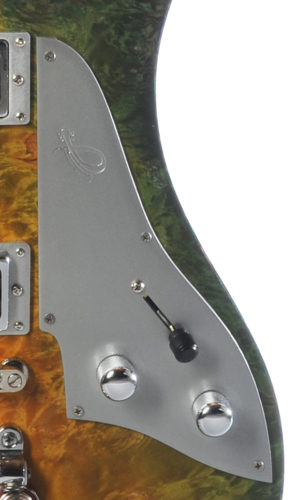
pickguard closeup

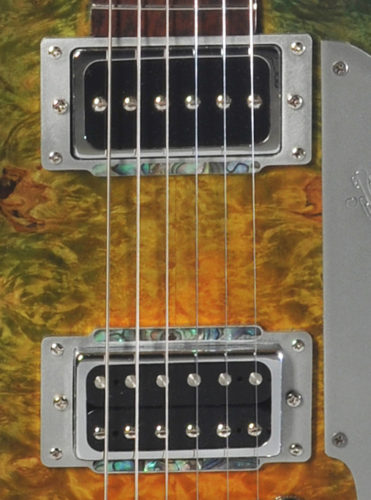
closeup of pickup rings

Once the finish was sufficiently cured, I spent an afternoon sanding and buffing it out. This part I generally dread as I’m always anxious about sanding through the finish. No matter how slowly I go, when you’re wet sanding, the finish usually looks fine until after you remove the sandpaper and dry it off. Only then do the dull or faded spots appear.

This guitar’s finish isn’t flawless, and I was unable to attain the mirror-like sheen all the way around as I wanted. If there were time before the big raffle I’d apply another few coats and buff this out again. That said, the instrument itself came out well and plays very well after I set it up.

As I’ve done for the past few guitars, I crafted the nut from a sample block of black Corian. This stuff really works great and polishes up nicely as well. This time instead of simply measuring for the strings, I used the CNC to cut me a string spacing gauge. Another great use of a CNC machine – tool making. Time to wire her up!
Electronics

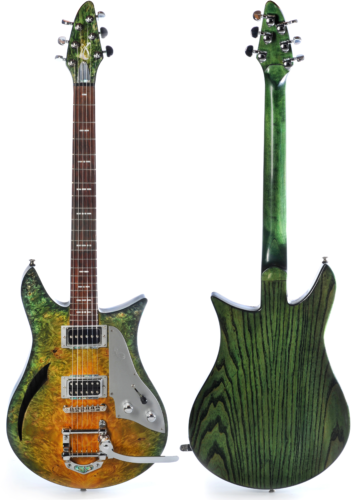
Just like the Double Cat it’s based on this guitar features a P90 in the neck position and a humbucker at the bridge. For controls it keeps things simple with a single volume control, tone control, and 3-way pup selector switch. I prefer it simple like this. On my personal Surfcaster build I added a push-pull switch on the volume control that flips from parallel to series wiring. This effectively acts as a booster and works really well. But beyond something like that, I’m all about the KISS principle.
I found a wiring diagram that purports to be for the Double Cat and decided I’d use this as my guide. It features 3 separate caps of different values and some interesting wiring of the humbucker. The results worked, though I’m a bit disappointed at the tonal variety — there’s not much difference between the tone in the first (neck-only) and second (neck+bridge) selector positions. The tone is great. I played for about an hour ranging from clean tones to metal and feel this guitar can cover the range nicely. I may however review the wiring and test out a few different capacitor options to see if I can get a bit more variety.

I managed to get some video (see below) of my son and the guitar player from my band testing out the Dragon. Not the best quality or their best work, but gives at least a sense of the guitar’s tone. You’ll have to take my word on the sound quality for heavier rock…definitely achieves a beefier tone when called upon.

After a quick trip to the photographer for its “glamour shots” it was time to bring this baby into the office and put it on display. Raffle tickets are on sale with the winner chosen from the stage at the Chicago House of Blues on December 14th.

My son trying out the finished Double Dragon

Completed double dragon


Facebook Comments
Categories: Woodworking, Luthiery, Guitar Building | Tags: , , , , , , , , , , | Leave a comment

Custom Dragon Hardware

This entry is part 4 of 6 in the series Double Dragon

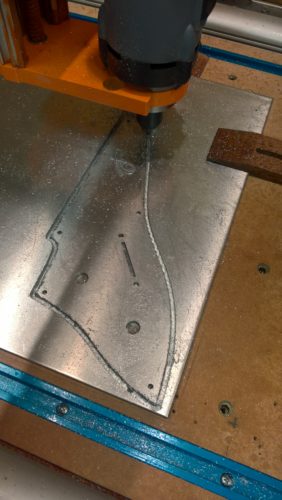
Cutting the aluminum pickguard on the CNC

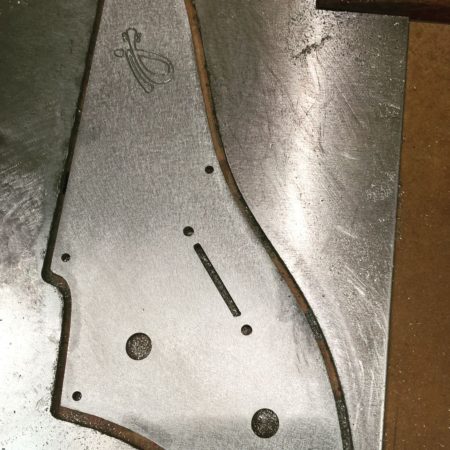
Finished cutting, lightly sanded before removing from CNC

Sanding the pickup ring

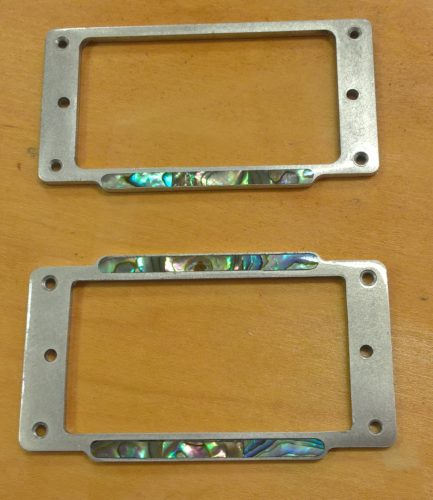
Abalone inlay pieces cut out, waiting to be installed in the pickup rings

Completed pickup rings

Back when I first acquired the CNC, I also purchased some sheets of thin plywood, vinyl, and aluminum of varying thickness. My plan was to experiment with cutting these materials immediately after assembly to learn just what it could — and couldn’t — do. I instead wound up diving headlong into cutting wood and building guitar bodies. The aluminum sat idle in a corner for the better part of a year.

In considering the options for the Double Dragon hardware, I looked around at my stock of pearloid pickguard sheets, black and white acrylic, and wood, until my eyes set on the 1/8″ aluminum stock. After some time reviewing videos and reading articles on aluminum milling it was time to give it a go.

Dialing it in

I learned early on that aluminum is far touchier and less forgiving than wood. THe 1/8″ endmill was definitely up to the task, however my earliest cuts were too deep, resulting in poor performance and finally a broken bit. Subsequent attempts succeeded in making a usable part, however the bit pulled up long ribbons of material and generated signficant heat. I responded by slowing down my feed rate. Further research indicated this was probably the exact opposite of what was needed here to produce nice, small, heat-dissapating chips. I limped through cutting the pickguard with this process. The end result is solid, but it required significant sanding and cleanup.

The smaller pickup rings required more precision to get the inlay edges right, so I would need to get this process a bit more refined. In the end I found that I could get much better results with very shallow passes — around .002″ or less — at a high feed rate (sorry, don’t have the rates I used handy). The 1/4″ 2-flute bit used for final cutout did an amazing job at ejecting nice aluminum chips and leaving a clean and shiny cut edge. The 1/8″ bits weren’t quite as perfect, but the results I managed with these bits was ultimately safisfactory.

Abalone inlays

I thought it would be a nice touch to add some “bling” to these pickup rings. As usual, I used doubled-up lengths of blue 2″ masking tape on the waste board and then CA glued the abalone to that. My 1/16″ coated Kodiak endmill has no trouble cutting shell in the past and this time was no exception. Once these were cut, they were glued into place with thin CA and the assemply mounted to a jig for sanding.

At first I was thinking I might powder-coat the aluminum. I bought a poweder-coating system several months ago and was looking for a project to try it out on. However, I couldn’t find a color I liked. Chrome seemed a good option, though maybe too shiny for the pick guard. I decided to sand these down with ever finer grits of sandpaper and basically stop whenever I liked the result. 1500 was the winner — it resulted in a very smooth and clean, yet matte, finish.

I applied a few coats of spray poly for protection and set them aside until it was time for installation.

Facebook Comments
Categories: Guitar Building, Luthiery | Tags: , , , , , , , , | Leave a comment

Dragon’s breath

This entry is part 3 of 6 in the series Double Dragon

quick preview before dying

preparing to dye the back

Dragon’s breath dye job

Preparing to apply finish

finish curing

Once the guitar was out of the clamps with the neck permanently secured, it was time for finishing it up. The neck joint was flushed with scrapers and sandpaper, and the entire guitar was given a good sanding down to 220. I’d already applied some finish to the inside of the sound hole and so this area was stuffed with paper to prevent any dye from dripping inside.

I spent a long while contemplating the finish on this guitar. Duesenberg offers the Double Cat in a Fire-burst (yellow-red) and black gloss paint finish. I considered red for this guitar, but was thinking I wanted something a bit different. Originally I tried a blue-green burst, but I couldn’t get it quite right.

Ultimately I settled on a yellow-green “dragon’s breath” finish ala PRS. I wound up applying, sanding off, and reapplying a few times until I was reasonably satisfied with the result. As anticipated, the Maple neck proved the most troublesome as Maple tends to blotch. I considered keeping the neck natural, but I didn’t think that would look right either. I’m not sure I’d repeat this finish without some additional experimentation and tweaks. In the end, however, after much fussing, I was happy with the back and satisfied with the cap.

Tru-Oil vs. Formby’s

For my last 3 or 4 guitars, I’ve hand-rubbed around 20 coats of Homer Formby’s “Tung Oil Finish”. I’ve been reasonably pleased with the results. However I haven’t seen or met any others using this finish. Almost to a person they’re using Tru-Oil. I decided for this guitar I would give it a try. It’s slightly cheaper than Homer Formby’s and readily available.

Once the dye had sufficiently dried, I began hand-rubbing on layers of Tru-Oil. As usual, I applied roughly 15 coats of finish to the guitar. Here’s where I should’ve read the directions. I rubbed it on similar to how I’ve used Homer Formby’s in the past. What I failed to do with this one is to apply a very heavy first coat and wipe it completely off the surface. Instead I wiped thin coats on, allowed them to dry, and scuff sanded between.

In the end this required significant wet sanding to level everything off. The Tru-Oil didn’t seem to sand as well for me as the Homer’s. I was able to buff out the back fairly well, but spent considerable time again fussing with the top. The end result is more of a semi-gloss finish than the high-gloss I was aiming for. However I was concerned that I’d wind up buffing through if I continued, and this guitar is on a tight deadline. If I’ve some time before the big give-away, I’ll work on rubbing in another coat or two of finish.

For now, its time to let this one sit for a bit and then install the hardware and hear how she sounds!

Facebook Comments
Categories: Luthiery, Woodworking, Guitar Building | Tags: , , , , , , , , , | Leave a comment

Carving the Dragon’s Neck

This entry is part 2 of 6 in the series Double Dragon

cleaning up neck mortise angle

cutting the neck tenon

ready for carving

before, during, after

completed neck ready for glue-in

faux abalone binding

body bound

neck and body united

The CNC cut a 3-degree angled neck pocket on its final pass. The bottom of the pocket came out great. Unfortunately I screwed up the top edge, which came out rough. Thankfully this wasn’t a huge issue – I pulled out my neck pocket routing jig and manually cleaned up the top. CNCs are great tools, but they’re not “drop the wood in and press the button” easy…there are still plenty of ways to wind up with firewood.

Neck and fretboard

The neck blank was glued-up while the body was being cut out, and so it was time to cut the matching tenon. I’ve never had great luck with getting perfect alignment here, definitely requires patience, planning, and the right touch. For this guitar, the tenon fit snug – requiring a bit of scraping to fine tune. I was left with a small gap on the bottom angled toward one side. I fussed a bit with the tenon, but in the end resorted to gluing a shim in place to close the gap. Hopefully I’ll get this perfect on the next one. Thankfully it’s merely cosmetic and won’t effect the durability, playability, or tone. Once dyed it should be barely noticable by a careful observer.

I let the CNC cut the fretboard and route out the inlay pockets and matching mother-of-pearl. I’ve done this by hand before, and while the pockets aren’t that bad, hand-cutting tiny MOP pieces is a major headache. Cutting the stuff with a jeweler’s saw is pretty easy; holding onto the tiny pieces during and after is the hard part. I’ve successfully cut numerous tiny bits of abalone and pearl only to lose them in the sawdust on the floor afterward. All it takes is a poorly-timed exhale and the piece is lost forever. Frustrating!

Next it was the usual – route out a channel for the truss rod, press in the fret wire, and glue the fretboard in place.

Carving the neck profile

Now for the fun bit, and the part that I feel has the greatest impact on playabilty — carving the neck profile. This neck is significantly different from the previous 3 bolt ons. This neck features a curved heel and a quasi volute. First step was roughing out the blank on the bandsaw.

From there it was all hand tools — gouges, chisels, rasps, files, and cabinet scrapers. I own a spokeshave, but have never really had much luck with it. I typically will mark the center line and then use a course rasp to make a shallow “V” profile from the center to the edge. Once I manage to work all the way down the neck, from the center line to the fretboard, I’ll switch to a finer rasp, file, or scraper. I’ve used a small hand plane as well with mixed results.

In this case, I also needed to carve out the heel. Carefully following the pencil line, I used a “V” gouge to define the heel curve. Then a combination of gouges and rasps to get the basic shape right.

This past summer at GAL 2017, I attended an interesting talk by Stephen Marchione on shaping necks by hand. One key takeaway was the measurement he uses for neck thickness at the first fret. It was mainly geared towards acoustic guitars, but according to Stephen, the ideal measurement at the 1st fret is 22mm. He claims that this is a key to a neck that pretty much all players will like. I’ve used 19mm before on my favorite Telecaster build and that feels great to me, so I figured I’d essentially split the difference on this one.

Once I get past rasps and into scrapers, and finally sandpaper, I begin a process of frequently unclamping the neck and “trying it out.” There’s no better way than to guage the feel of a neck than actually running your hands up and down it. You can feel the smallest bumps and irregularities that may be difficult or impossible to see. I think this is where being a player can make a big difference.

Binding the body

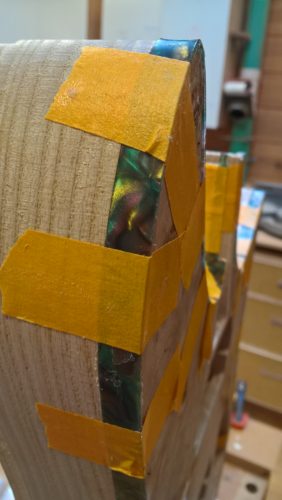
Before mating the neck and body, the body binding needs to be installed. For this guitar I selected a faux abalone celluloid binding 5/16″ wide by about 1/16″ thick. I’ve been using Stewmac’s Bind-ALL for this purpose fairly successfully, though I’ve been considering trying plain acetone as I’ve seen other luthiers use.

The acetone is a solvent for the celluloid and effectively melts the surface which welds it into the wood. However, it takes longer to adhere and requires more tape and a closer eye on the process as I can imagine the binding shifting behind you as your progress. However, excess Bind-ALL can soak into the wood and make it very difficult to get a good finish. If you don’t wipe, scrape, sand off ALL of the cement, you wind up with nasty splotches near the binding that won’t accept any stain or finish. Ask me how I know.

The stuff’s also very messy to work with. Ultimately though, I chose the Bind-ALL once again for better or worse and will be diligent in removing any and all squeeze-out.

Body, meet neck

The glue-in process was pretty straightforward — apply glue, slide the neck into position ensuring a tight, close fit, then clamp. Time for some sanding, finish work, and the electronics.

Facebook Comments
Categories: Woodworking, Guitar Building, Luthiery | Tags: , , , , , , | Leave a comment

Starting Work on the “Double Dragon”

This entry is part 1 of 6 in the series Double Dragon

Body blanks glued up. Ash in the fore is for the Double Cat. Upper left is the blank for the all-Mahogany Double Cat. The upper-middle piece is Alder for a Telecaster body I cut for a coworker.

Maple burl cap bookmatched pieces glued up.

Foam carved on CNC to test model

Cutting the Ash body blank

Selecting the cap grain

Completed body

Cousins

Getting Started

After a summer-long hiatus, it was time to get back into the shop for the next guitar project. I needed to build the next charity guitar for our 4th annual guitar raffle to benefit Make-a-Wish. The first of these was a copy of a Gibson SG Junior in 2014. Last year’s guitar was a Charvel Surfcaster dubbed the “Wishcaster.” Including a generous company match, we’ve raised and donated $18,000 to Make-a-Wish Illinois. This year I’m hoping we can double our previous 3 year total.

Inspiration

I keep a couple guitar “encyclopedias” at my desk at work that I like to peruse on occasion, looking for interesting designs to either copy or inspire my own custom work. Over the summer I discovered Duesenberg guitars’ “Double Cat” and fell instantly in love with the design. If you’ve seen my recent stuff, you’ve no doubt noticed I have an affinity for semi-hollows. This is mainly for the visual aesthetic – I just love the look of this style. And the Double Cat is a real looker. I assume it derives its name from the combination of the double cutaway body and the single cat’s eye sound hole in the upper bout. Naturally it’s a semi-hollow. But I was also drawn to the Bigsby-style tremolo and the combination of P90 neck pickup with a humbucker at the bridge. What unique tones this thing must produce!

The trickiest bit to this build would definitely be in the neck/body joint. It would need to be angled due to the tune-o-matic style bridge. And the double cutaway style means there’s a relatively long tenon that would need to be cut SG-style, with a long shoulder extending from the 19th or 20th fret to the 16th fret.

Digital Version

Unlike last year’s Surfcaster, I was unable to locate any measured drawings online for this guitar. Instead I used photos, the largest I could find with the most direct top-down view. Importing this into CorelDraw, and taking note of the advertised 25.5″ scale length, I was able to scale the drawing and adjust as much as possible for distortion. This was digitally traced, manually cleaned up, and finally tweaked until I was happy. The hardware was placed appropriately in the drawing to locate the holes and everything was organized into layers to be imported into Cut2D for generating the toolpaths for the CNC.

Because this is a semihollow, I also added reference holes in each corner to allow me to both flip the part over and cut the top and base independently. Dowels are inserted into these reference holes on the waste board, main body blank, and Maple burl cap to keep everything properly positioned in relation to the CNC home coordinates.

Cutting it out

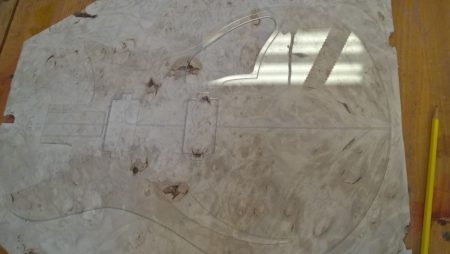
Once I was satisfied with the model, a full-size version was cut from stiff insulating foam to confirm. At this point the waste board is attached to the bed, reference holes cut, and then the prepared body blank cut on the CNC. The Ash body for this guitar is fairly heavy, so an additional chamber was cut on the lower bout for extra weight relief. I cut an acrylic template of the top to aid in selecting the best grain orientation of the maple burl cap. One of the coolest things about having a CNC is how easy and fast it is to make a perfectly accurate template like this.

I married the Maple cap to the Ash base, and once the glue dried, brought the entire assembly back to the CNC for a final route. The CNC was used to cut the pickup and electronics pockets, plus the holes for the bridge posts. It cut the channel for the binding as well. Finally, the neck mortisse was cleared out at a 3-degree angle.

While I was at it, I repeated the process with a solid Mahogany version. Next up: binding the body and start on the neck.

Facebook Comments
Categories: Woodworking, Guitar Building, Luthiery | Leave a comment

Lap Steel in a Day

Summer fun list

We have an annual tradition in our house of making a “summer fun list.” Towards the end of the school year, we all sit down and take turns coming up with activities we’d like to do during summer vacation. The list usually includes stuff like “Picnic” or “Christmas in July” or “Sundae Sunday.” This year two of the ideas listed were “Build a Guitar Day” and “Wacky Instruments Day.”

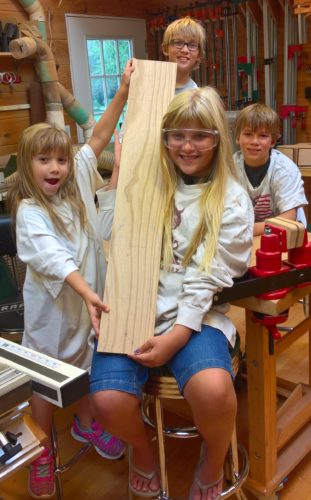
Now shop day is a common thing in our house – on a rainy weekend day when the shop’s fairly clean and not packed with half-completed projects, the kids and I will dream up a project or two and work on them together. We’ve used this time in the past to build simple musical instruments like cajons and “canjos.” This time I figured we’d cross both items off and work on a “wacky guitar” together in the shop. Originally I had assumed we’d do something with PVC pipes or other atypical material. But after some discussion, we decided that what our basement music room really needed was a lap steel guitar. So we decided to build a “wacky” one.

Off to the shop…

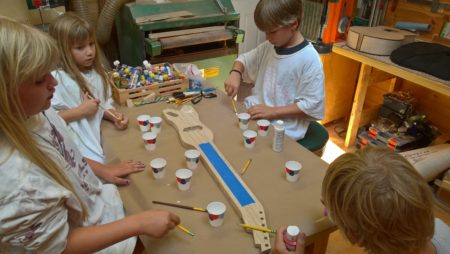
The kids and I selected a nice Ash board, some leftover guitar parts including a humbucker pickup, fender-style bridge, 6 inline tuners and set to work. The concept was “Pegasus” – though as you can see it’s more impressionist than realism. They drew the outline together and each child selected one bit to paint.

I was seriously impressed at the way they worked together on this with very little conflict or disagreement. And the end result is a true work of playable art!

I can’t wait for our next group project.

pickup and electronics cavities routed

Nate taking a turn at the sander

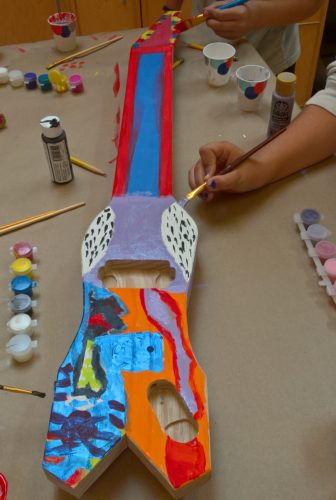
They collectively decided on a design and then divided the painting duties up into sections for each to paint

Pegasus wings painted

Painting complete; ready for clear coat

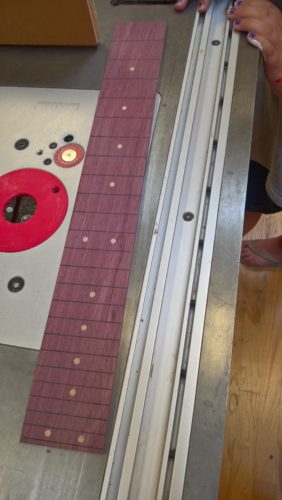
Purpleheart fretboard with dowels for dots

Facebook Comments
Categories: Guitar Building, Luthiery | Tags: , , , , , , | Leave a comment

Introducing “Honeybee,” the Sapele-Tele

This entry is part 4 of 4 in the series Sapele Tele

After a few false starts, first with the headstock finish, next with the body, I finally managed to wrap this project up. I’ve been playing it for a few weeks now at rehearsal and plan to play it in my next gig. Here are the glamour shots fresh from the photographer.

The specs:
Body: Sapele base with Maple Burl cap; black binding on top of body and sound holes.
Neck: Maple, hand carved profile; 25.5” scale length
Fingerboard: Birdseye Maple with Abalone fret markers
Finish: Black/Yellow/Red dye with hand-rubbed high gloss Tung Oil top coats
Pickups: Fender N3 Noiseless

Facebook Comments
Categories: Guitar Building, Luthiery | Tags: , , , , , , | Leave a comment