

- Starting Work on the “Double Dragon”
- Carving the Dragon’s Neck
- Dragon’s breath
- Custom Dragon Hardware
- Raffle Ready
- Raffle Update – $14,000 for Make-a-Wish!
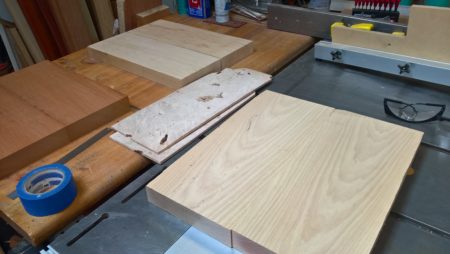
Body blanks glued up. Ash in the fore is for the Double Cat. Upper left is the blank for the all-Mahogany Double Cat. The upper-middle piece is Alder for a Telecaster body I cut for a coworker.
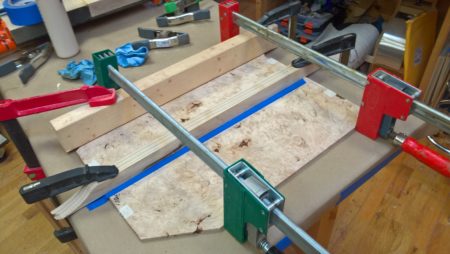
Maple burl cap bookmatched pieces glued up.

Foam carved on CNC to test model

Cutting the Ash body blank
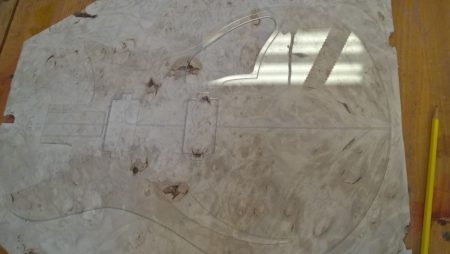
Selecting the cap grain

Completed body

Cousins
Getting Started
After a summer-long hiatus, it was time to get back into the shop for the next guitar project. I needed to build the next charity guitar for our 4th annual guitar raffle to benefit Make-a-Wish. The first of these was a copy of a Gibson SG Junior in 2014. Last year’s guitar was a Charvel Surfcaster dubbed the “Wishcaster.” Including a generous company match, we’ve raised and donated $18,000 to Make-a-Wish Illinois. This year I’m hoping we can double our previous 3 year total.
Inspiration
I keep a couple guitar “encyclopedias” at my desk at work that I like to peruse on occasion, looking for interesting designs to either copy or inspire my own custom work. Over the summer I discovered Duesenberg guitars’ “Double Cat” and fell instantly in love with the design. If you’ve seen my recent stuff, you’ve no doubt noticed I have an affinity for semi-hollows. This is mainly for the visual aesthetic – I just love the look of this style. And the Double Cat is a real looker. I assume it derives its name from the combination of the double cutaway body and the single cat’s eye sound hole in the upper bout. Naturally it’s a semi-hollow. But I was also drawn to the Bigsby-style tremolo and the combination of P90 neck pickup with a humbucker at the bridge. What unique tones this thing must produce!
The trickiest bit to this build would definitely be in the neck/body joint. It would need to be angled due to the tune-o-matic style bridge. And the double cutaway style means there’s a relatively long tenon that would need to be cut SG-style, with a long shoulder extending from the 19th or 20th fret to the 16th fret.
Digital Version
Unlike last year’s Surfcaster, I was unable to locate any measured drawings online for this guitar. Instead I used photos, the largest I could find with the most direct top-down view. Importing this into CorelDraw, and taking note of the advertised 25.5″ scale length, I was able to scale the drawing and adjust as much as possible for distortion. This was digitally traced, manually cleaned up, and finally tweaked until I was happy. The hardware was placed appropriately in the drawing to locate the holes and everything was organized into layers to be imported into Cut2D for generating the toolpaths for the CNC.
Because this is a semihollow, I also added reference holes in each corner to allow me to both flip the part over and cut the top and base independently. Dowels are inserted into these reference holes on the waste board, main body blank, and Maple burl cap to keep everything properly positioned in relation to the CNC home coordinates.
Cutting it out
Once I was satisfied with the model, a full-size version was cut from stiff insulating foam to confirm. At this point the waste board is attached to the bed, reference holes cut, and then the prepared body blank cut on the CNC. The Ash body for this guitar is fairly heavy, so an additional chamber was cut on the lower bout for extra weight relief. I cut an acrylic template of the top to aid in selecting the best grain orientation of the maple burl cap. One of the coolest things about having a CNC is how easy and fast it is to make a perfectly accurate template like this.
I married the Maple cap to the Ash base, and once the glue dried, brought the entire assembly back to the CNC for a final route. The CNC was used to cut the pickup and electronics pockets, plus the holes for the bridge posts. It cut the channel for the binding as well. Finally, the neck mortisse was cleared out at a 3-degree angle.
While I was at it, I repeated the process with a solid Mahogany version. Next up: binding the body and start on the neck.