

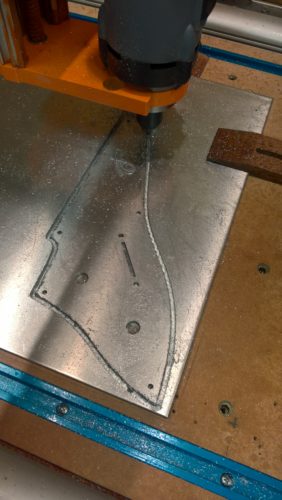
Cutting the aluminum pickguard on the CNC
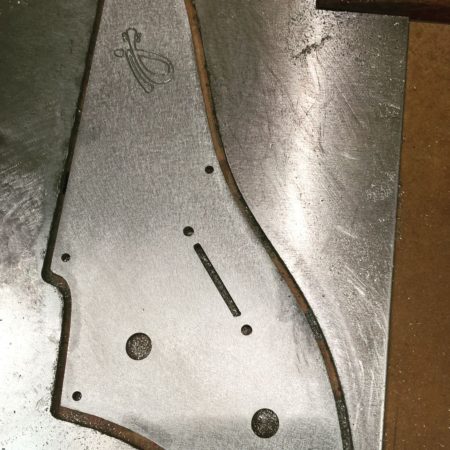
Finished cutting, lightly sanded before removing from CNC
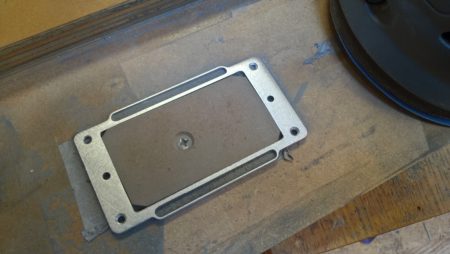
Sanding the pickup ring
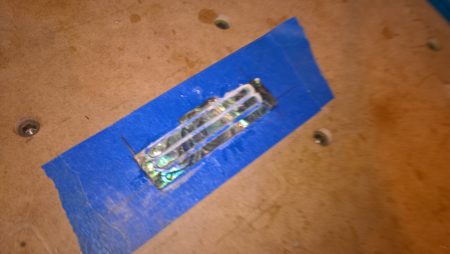
Abalone inlay pieces cut out, waiting to be installed in the pickup rings
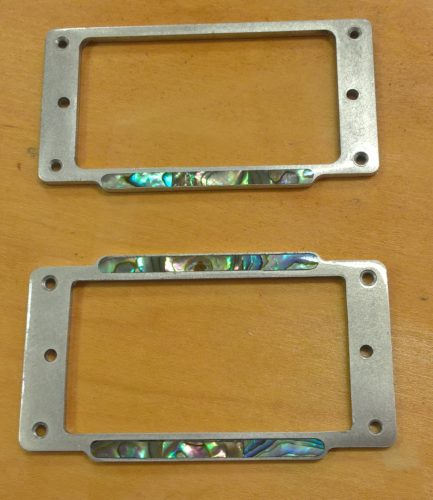
Completed pickup rings
Back when I first acquired the CNC, I also purchased some sheets of thin plywood, vinyl, and aluminum of varying thickness. My plan was to experiment with cutting these materials immediately after assembly to learn just what it could — and couldn’t — do. I instead wound up diving headlong into cutting wood and building guitar bodies. The aluminum sat idle in a corner for the better part of a year.
In considering the options for the Double Dragon hardware, I looked around at my stock of pearloid pickguard sheets, black and white acrylic, and wood, until my eyes set on the 1/8″ aluminum stock. After some time reviewing videos and reading articles on aluminum milling it was time to give it a go.
Dialing it in
I learned early on that aluminum is far touchier and less forgiving than wood. THe 1/8″ endmill was definitely up to the task, however my earliest cuts were too deep, resulting in poor performance and finally a broken bit. Subsequent attempts succeeded in making a usable part, however the bit pulled up long ribbons of material and generated signficant heat. I responded by slowing down my feed rate. Further research indicated this was probably the exact opposite of what was needed here to produce nice, small, heat-dissapating chips. I limped through cutting the pickguard with this process. The end result is solid, but it required significant sanding and cleanup.
The smaller pickup rings required more precision to get the inlay edges right, so I would need to get this process a bit more refined. In the end I found that I could get much better results with very shallow passes — around .002″ or less — at a high feed rate (sorry, don’t have the rates I used handy). The 1/4″ 2-flute bit used for final cutout did an amazing job at ejecting nice aluminum chips and leaving a clean and shiny cut edge. The 1/8″ bits weren’t quite as perfect, but the results I managed with these bits was ultimately safisfactory.
Abalone inlays
I thought it would be a nice touch to add some “bling” to these pickup rings. As usual, I used doubled-up lengths of blue 2″ masking tape on the waste board and then CA glued the abalone to that. My 1/16″ coated Kodiak endmill has no trouble cutting shell in the past and this time was no exception. Once these were cut, they were glued into place with thin CA and the assemply mounted to a jig for sanding.
At first I was thinking I might powder-coat the aluminum. I bought a poweder-coating system several months ago and was looking for a project to try it out on. However, I couldn’t find a color I liked. Chrome seemed a good option, though maybe too shiny for the pick guard. I decided to sand these down with ever finer grits of sandpaper and basically stop whenever I liked the result. 1500 was the winner — it resulted in a very smooth and clean, yet matte, finish.
I applied a few coats of spray poly for protection and set them aside until it was time for installation.