Finishing Touches

This entry is part 5 of 7 in the series Puppet Theater

An Old Coat Rack

When I was a kid, I used to spend a fair amount of time in the garage playing with my dad’s “tools.” I use quotes because I believe his entire collection consisted of little more than a handsaw, an old bright orange Sears power drill, and a few random screw drivers. Needless to say, he didn’t spend a great deal of time building things — but I made the best use I could of this assortment.  I fondly recall one Christmas cobbling together a coat rack for my parents made of 2×2’s and a few brass wood screws.

This early piece came to mind as I began work on the next phase — a Puppet Tree.

The Puppet Tree

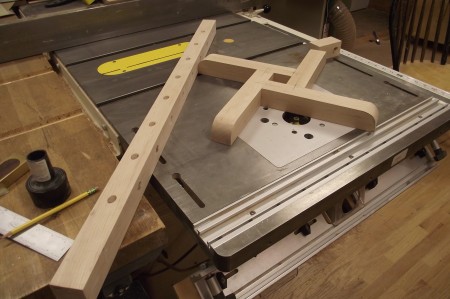
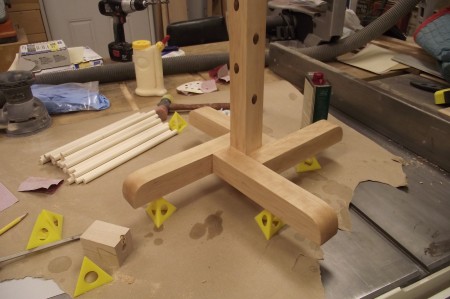
On one of her frequent visits to Costco, my wife discovered a number of sets of hand puppets. Unable to decide on which to buy, she did the only logical thing — and came home with all 32 of them! So naturally we’d need somewhere to put them all. We started discussing where to attach a bin or basket or fabric bag to the theater, but after some Internet searches, we settled on the idea of a rack or tree. Once again I borrowed heavily from a commercially available product, estimating measures from a small graphic. I had some 8/4 Ash left over from a cutting board project that would fit the bill perfectly. I also decided to replace the square base in the commercial model with some feet made of the same Ash arranged in a pinwheel.

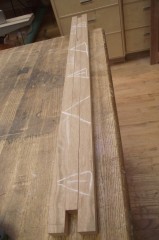
Base and center pole

Assembled for finishing

Applying the Finish

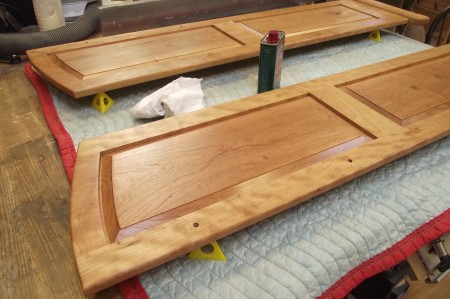
Nothing terribly special here, just wiping on a few coats of my current favorite finish: Homer Formby’s Original Tung Oil finish. After using mainly Waterlox and Watco finishes for the past few years, I must say that I’ve grown fond of the results and ease of use of the Homer Formby stuff I can pick up at the blue big box guys. I used to use Waterlox, but the smell of their Tung Oil finish seems to last forever. Pieces finished with this stuff can be moved into the house immediately after it cures without fear poisoning the kids!

Finishing the sides

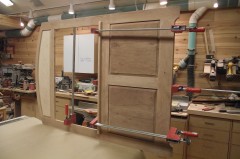
The front hung out to dry

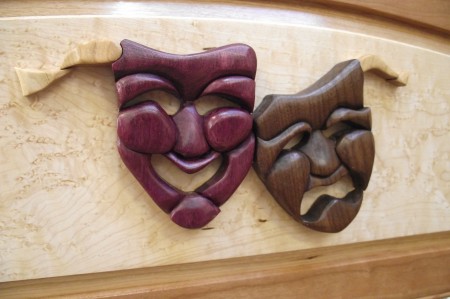
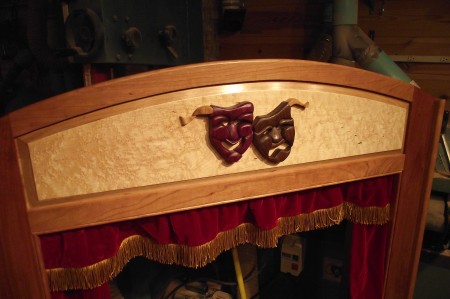
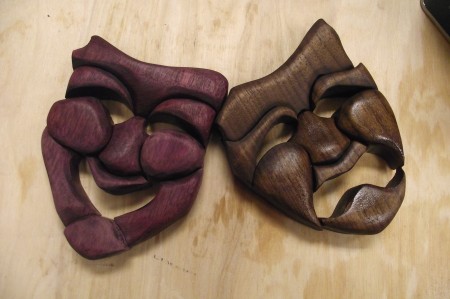
Intarsia masks applied and finished

Putting it Together

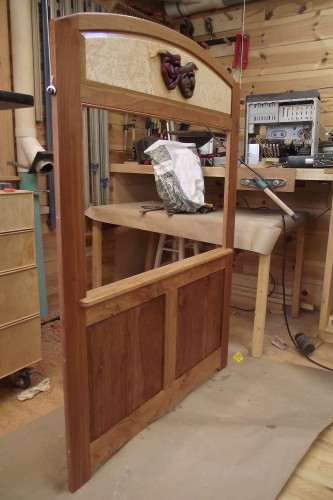
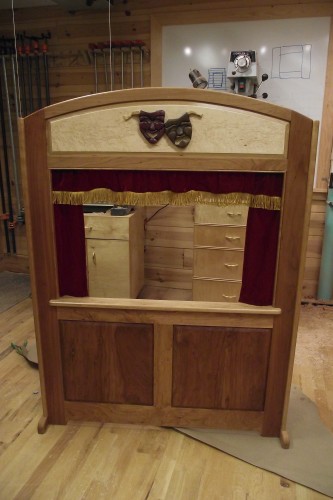
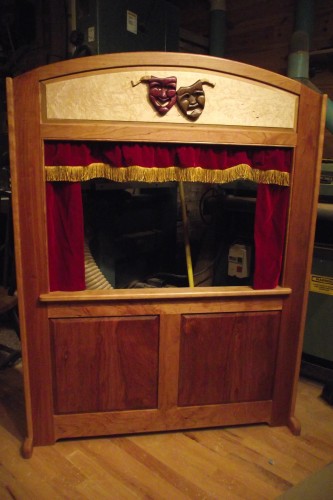
With the final coat of finish dry and sanded out, I decided to put it together and install the curtains Lisa completed and dropped off a few days ago. Yeah, I think it came together well.

Assembled with curtains

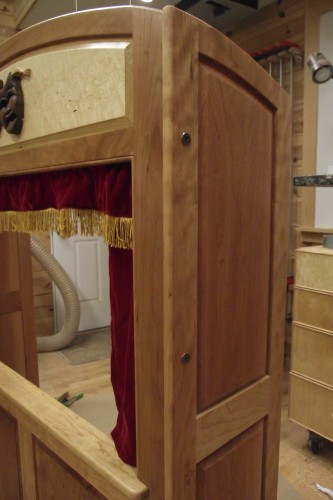
RTA hardware installed

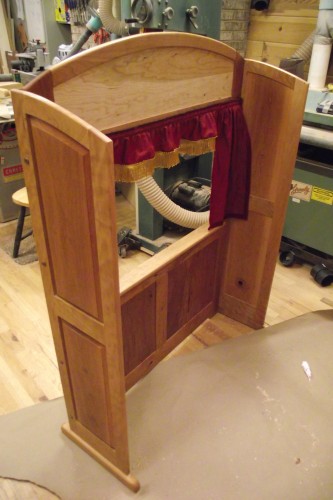
A view from backstage

Some theater lighting

I really love how the masks look!

Facebook Comments
Categories: Uncategorized | Tags: , , , , , , | Leave a comment

The Intarsia Comedy/Tragedy Masks

This entry is part 4 of 7 in the series Puppet Theater

A New Technique

When I first designed the theater, I knew it needed something in the top arched panel. To me, the most natural thing would be the traditional comedy/tragedy masks. Although I’ve done a number of inlays in the past, it seemed like this called for something more dimensional, like a carving.

Unfortunately, the last time I did any wood carving, we called it “whittling” and used it to make walking sticks and toothpicks at Boy Scout camp. I simply don’t have the tools and more importantly, the carving skills or know-how. However, it occurred to me that I might be  able to do some kind of intarsia piece. I own a nice bandsaw and some 3/16″ and 1/8″ blades that I’ve used for inlay work; and wasn’t intarsia basically 3-D inlaying?

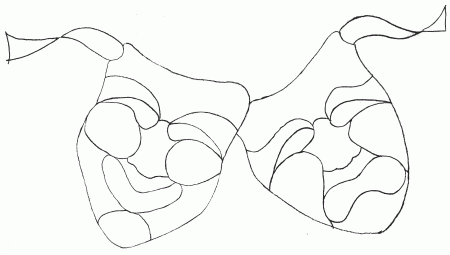
After a number of fruitless Internet searches for templates, it appeared that I’d need to design one myself. Although I’m not much of an artist, I happen to have a sister-in-law who’s quite accomplished. She also has some experience with stained glass design, which dovetails quite nicely with the concept of an intarsia pattern. Kathy used some sketches we found online to create a couple mask patterns for me. After making some modifications to simplify the patterns for my tools and skill level, we ended up with the final design below.

Final Intarsia Pattern (click to download full-size)

A New Tool

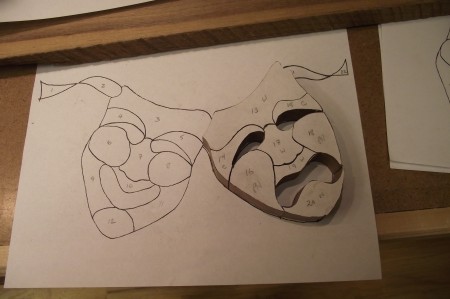
For my first attempt at intarsia, I decided to try to cut out the pattern on a scrap piece of poplar. I glued down the pattern to the blank, mounted a brand new 3/16″ timberwolf blade in the bandsaw, and began to cut. The blade made quick work of it and I was able to make fairly accurate cuts. However, the kerf was simply too wide and ragged. The 1/8″ blade I have is an old generic one from Grizzly that I knew wouldn’t make a smoother cut.

So, what to do?

Naturally, the answer is a new tool! I ran out to Sears and for $100 (10% discount for ordering online for in-store pickup!) picked up a 16″ scroll saw that got fairly consistent and decent reviews. After spending some time warming up to the saw by cutting wavy lines in poplar, I glued the pattern to a slab of walnut and began to cut out the sad face.

"Tragedy" cut from walnut on my new scroll saw

My stationary sander worked very well for shaping the cut pieces and I must admit that it was a blast shaping the contours. The purple heart took a bit more effort than the less dense walnut — and 80 grit paper — to get the shape I wanted, but in an hour or so I had completed the shaping. I had originally considered using different species for the cheeks and eyebrows of each mask, but figured I didn’t have the time or experience to get a good fit. Ultimately I think this looks better anyway.

The masks cut, shaped, with a first coat of tung oil

I read an article online that suggested applying a coat or two of finish to the intarsia pieces before glue-up to prevent the glue from seeping in and showing through the final finish. This sounded like a good idea, so after sanding to 220, I wiped on some tung oil. The next morning I glued the pieces together on a piece of wax paper. I couldn’t be more pleased with the results!

Next steps…

I still need to cut the “ribbons” and mount the whole thing to the birdseye maple panel. After a bit of touch up sanding, the whole thing should be ready for 6 or so coats of tung oil finish.

Craftsman 16" scroll saw

Facebook Comments
Categories: Uncategorized | Tags: , , , , , | Leave a comment

Building the “Wings”

This entry is part 3 of 7 in the series Puppet Theater

Now We’re Getting Somewhere

The front came out so nice, I’ve updated the design to include frame-and-panel side wings instead of plain edge-banded cherry ply as I had originally envisioned. It’s been a busy couple of weeks and there hasn’t been much shop time available, but I’ve scraped together enough hours — usually after bedtime — to finally cut, shape, and assemble the side panels (the theater’s “wings”) and prop the whole thing up. Now we’re getting somewhere!

Framed again

One of the coolest things about this particular project has been the wood. I purchased a pile of cherry on sale some time ago and it’s been sitting mostly idle since. So far, I’ve had no trouble finding the perfect board for each step of the way. And when I say perfect, I mean more than just color and grain. The frames for the sides were out of one board and the panels for both came entirely out of another — with almost zero off cut beyond basic squaring and trimming. Dude. I don’t think I’ve ever used a rough board so completely. I usually don’t make patterns, but as the sides called for mirror image curves, I figured it was a good idea in this case.
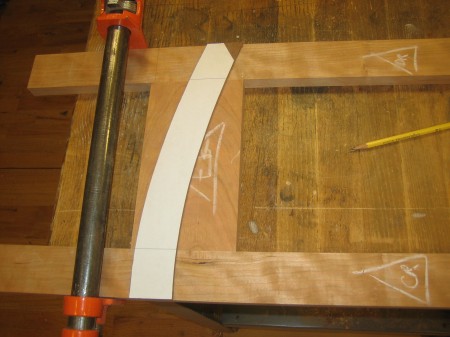
Tracing the curve pattern
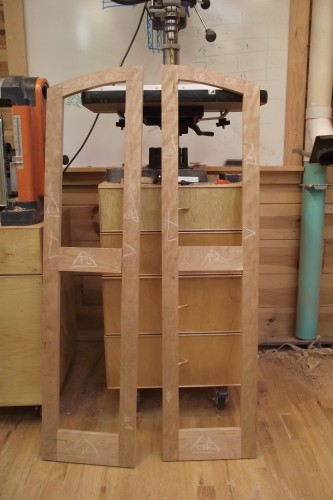
Test Assembly of the Domino Joints

Knot a Problem

Knots can add a lot of interest to a piece. Ever since I built a dresser for my son Nathan, and was stuck using a board with a large knot in it for the top, I’ve come to actually seek them out for projects like this. This knot in a side panel is about the size of a silver half dollar on the back and results in a 3/4″ long slit in the front that goes straight through. Somewhere along the line I came across an article, or online post, or something that suggested filling large knots with epoxy. It worked so well for Nate’s dresser, I’ve been using the technique ever since. After it hardens, the light may still bleed through, but there’s no way this knot hole will ever chip out or expand. Thanks to whomever I stole this idea from!
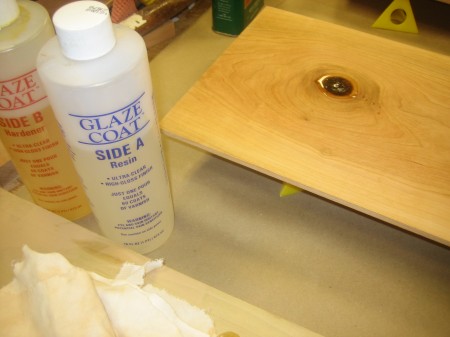
Filling a large knot with epoxy

Glue up

Don’t Take a Bow…

My biggest fear with this piece is that during a more animated production, it’ll tip forward onto the audience. The wings are 12″ wide, but they don’t extend very far beyond the front of the stage. I figured it would be a good idea to build some chunky feet for them to stand on — and extend them a couple inches beyond the front. As with everything else for this project, I just happened to have the perfect piece of cherry leftover from an end grain cutting board. Once again, the Festool Domino made quick work of the mortise and loose tenon joints that would have taken far longer to do any other way.

Truth be told, I’m still a bit concerned. The feet will certainly prevent accidental tipping under normal use, but my 2 and 3-year-old boys can get rather…um…dramatic at times. I’m wondering if maybe I need to anchor this piece to the floor?!?
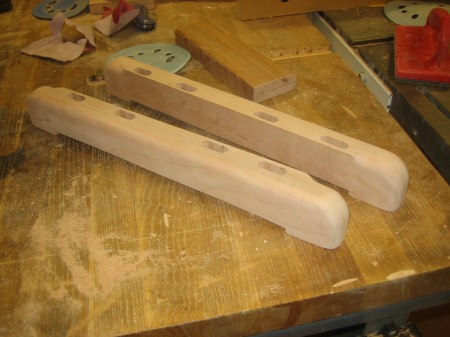
Feet for the wings shaped and mortised

Test Assembly

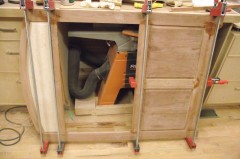
After attaching the feet, I was anxious to finally see the whole thing assembled. The puppet theater is designed to knock down for transport and storage, so I drilled some holes in the sides of the front to accept threaded inserts. The plan is then to drill matching holes in the wings and use 4 hex head RTA-style screws on each side to hold it together. The last time I used this technique was for the cherry crib I built for my youngest son from purchased plans. I had an issue with the threaded inserts tearing out the top layer of the cherry as the very course threads bit. I’m going to experiment a bit this time to see if using a slightly larger hole and/or chamfering the rim of the hole will eliminate or at least significantly lessen the problem.
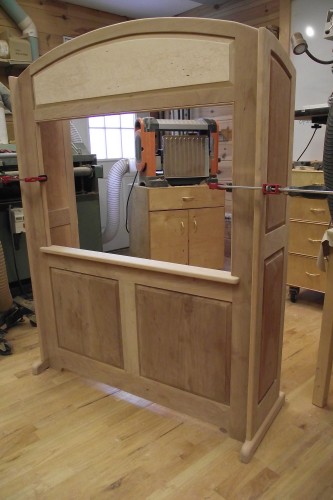
Testing the assembly with Wings clamped to the stage

Next Steps…

The design calls for comedy/tragedy masks in the center of the birdseye maple panel. I’ve done quite a few inlays, but this time I’m thinking intarsia would be more appealing. However, I’ve never tried intarsia before, so this should be interesting, and hopefully a great learning experience. I’ve pre-finished the panels (single coat) and have been sanding to 220 all along, so everything’s pretty much ready to begin applying the tung oil finish. There’s also the curtains my wife’s best friend is making, and the felt backdrop and scenery pieces my sister-in-law’s working on. Finally, I’m planning to build a “tree” to hold the over 30 puppets my wife has already purchased from Costco.

Two weeks to go before the big reveal on Christmas morning…it should all be ready!

Facebook Comments
Categories: Uncategorized | Tags: , , , , | Leave a comment

Their First Woodworking Show

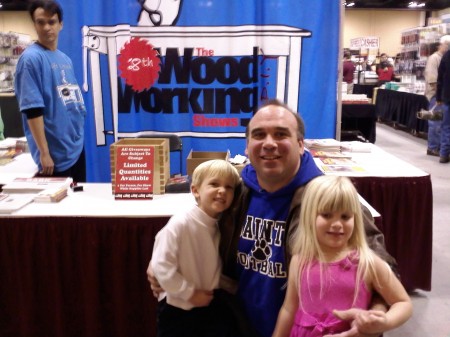
The annual woodworking show is this town weekend and I was determined to stop in to pick up some basic supplies that I can’t typically find locally in bulk. I thought it might be fun to bring the older two kids along. This turned out to be a great idea as the show ended up being more about them!

The main attraction for the kids were the booths from the local clubs and associations. The Fox Valley woodworkers and DuPage Woodworkers club members paid extra attention to them, one giving them small handmade puzzles. Others went out of their way to welcome them and treat them to friendly smiles and intriguing projects. A member of Chicagoland Scrollers took the prize by giving out some wonderful little wooden toys the kids played with for the entire hour long ride back home.

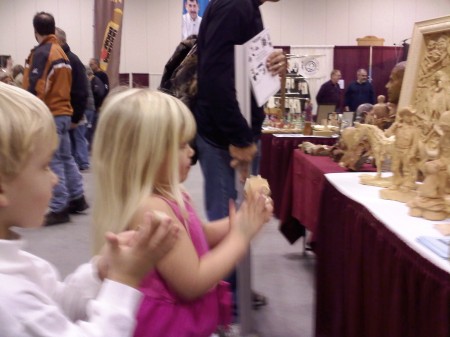
Looking at some intricate carvings

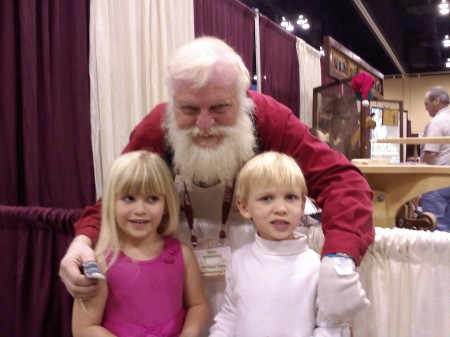
We even met Santa Claus at the show! He was kind enough to give out some candy and write down their Christmas wish lists!

Everyone Knows Santa Claus is a Woodworker!

What a great way to spend a cold and rainy December day! Hopefully they’ll want to come back with me next year!

Facebook Comments
Categories: Uncategorized | Tags: , , , | Leave a comment

Constructing the Frame and Panels

This entry is part 2 of 7 in the series Puppet Theater

Birdseye Maple on Cherry

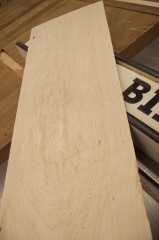
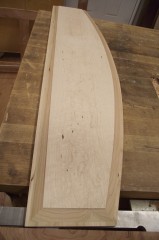
The design for the top panel calls for birdseye maple. It seemed a shame to use my only piece of birdseye maple up on just one project. I decided to resaw the board. A few passes through my old Grizzly G1066 sander later and I had a beautiful 3/32″ sheet of birdseye maple veneer. Because this is going to be used for a raised panel, I had to decide on the substrate. One technique I’d seen and had always wanted to try was using a different species substrate in a raised panel. The rest of the piece was cherry and I figured this would make for a really sweet contrast.

3/32" Birdseye Maple Veneer from the G1066

Completed Raised Panel of Birdseye Maple Laminated over Cherry

Assembly & Glue-up

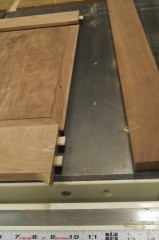
Last Spring I picked up a Festool Domino at my local Woodcraft. Shortly after, my wife gave birth to our 4th child and the shop was essentially shuttered for the next several months. Now I’m finally getting a chance to play with it — and it definitely lives up to it’s press. The frame went together like a dream, about as fast as using a biscuit cutter, while working on much narrower members and holding together well without clamps during test assembly. These were by far the fastest mortise and loose tenon joints I’d ever created. The front panel went together clean and tight.

Test Assembly of the Domino Joints

Glue-up

Setting the Stage

No theater can be complete without a stage. This one extends 1″ beyond the sides and 1″ front and back. Rather than nibble away a notch on each side of the stage, I figured it’d be easier to rip the board in three sections, cut the middle piece shorter, and glue it back together. The result looks great with no visible glue line and, after a bit of touch up with a chisel, fit perfectly. After sanding the piece to 220, I ran a bead of glue on the frame and stage and clamped ’em together. Since it’s long grain to long grain, and a pretty good fit, no joinery should be necessary.

Notching the Stage

Sanded to 220, the Stage Glued In Place

Next Steps…

I’ve made a few tweaks to the design so that instead of using some left over cherry ply, I’ve decided to make matching frame-and-panel pieces for the sides. I may also build some beefy runners for the bottoms to ensure it doesn’t tip forward. I can’t wait to craft the comedy and tragedy masks and apply the first coats of tung oil to the birdseye!

Facebook Comments
Categories: Woodworking | Tags: , , , , , | Leave a comment

Puppet Theater

This entry is part 1 of 7 in the series Puppet Theater

The other night my wife’s best friend’s daughter stopped by to help out with the kids while we ran some errands and completed some chores. She showed them a new game. They spent the evening in the basement hiding behind a blanket draped over a couple chairs, putting on puppet shows with the numerous dolls and stuff animals scattered about the basement.

They’ve been putting on puppet shows nearly every day since…which sparked an idea for a Christmas present/project: A Puppet Theater!

After a couple hours searching the web for ideas and sketching out some plans on SketchUp, I produced a design and began preparing the wood.

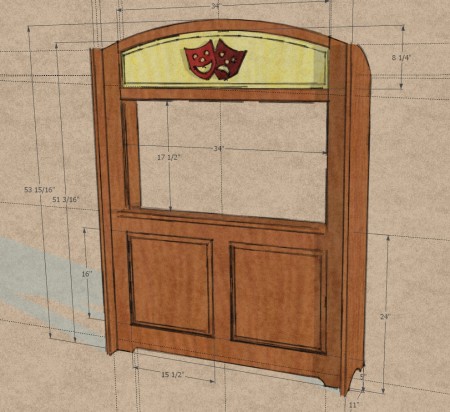
Puppet Theater Design in SketchUp

Puppet Theater Design in SketchUp

I have a couple hundred board foot of beautiful cherry I got on special last year and a really nice piece of birdseye maple a friend gave me in trade for a big block of Ash he needed.

Thanks, Ali!

Click Here to Download the SketchUp File

A nice piece of birdseye Maple

A nice piece of birdseye Maple

The cherry boards glued up for the bottom raised panels

The cherry boards glued up for the bottom raised panels

The top curve on vellum

The top curve on vellum

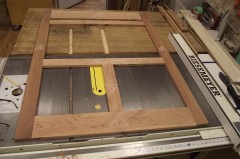
Frame prepped and laid out

Frame prepped and laid out

Facebook Comments
Categories: Woodworking | Tags: , , | Leave a comment

DuPage Woodworkers Pay a Call

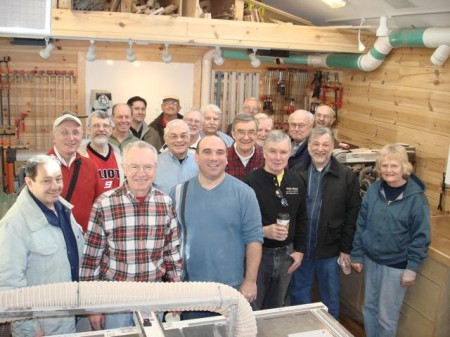
I had the distinct honor of hosting the DuPage Woodworkers as they toured my shop this past weekend. I had a great time talking about the shop and sharing ideas with the club members.

I had a blast meeting you all! Thanks!

Photo3

Facebook Comments
Categories: Woodworking, Workshop Addition | Tags: , , | Leave a comment

Framed!

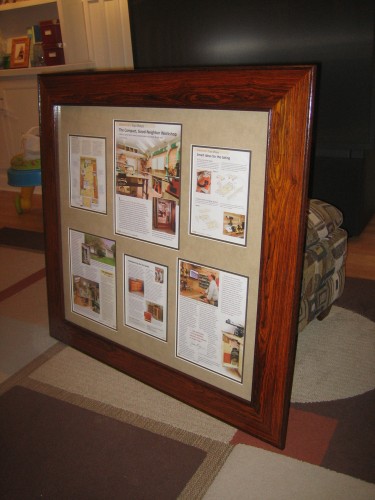
It’s been a very busy past couple of months. I’ve built a couple more mantels that I still need to post some pics of and in my “day job” we’ve moved offices…which meant a great deal of planning and work on setting up a new server room. I also had the Woodcraft Magazine article matted. Clearly it wouldn’t do to purchase a frame for an article about a woodshop, so I whipped one together in the shop.

IMG_8895

The base frame is popular veneered with resawn Cocobolo and trimmed with Panga-Panga. The Cocobolo’s been sitting around the shop, around 20 or so bd ft that was misshipped to me some years ago. I figured this was as good a use as any! The frame itself isn’t terribly intricate, but this was only the second project I actually designed in the shop “on the fly.” It was a great deal of fun and I think it came out rather nice. The finish is a bit rough since I really wanted to deliver it on a specific date and had to rush in the end..but I think it works.

IMG_8896

Facebook Comments
Categories: Woodworking | Tags: , , , , , | Leave a comment

The Staub Mantle

It’s been a bit crazy around here.

Work (at my “real job”) has been hectic and busy …a good thing…, I’ve started back to school to finally finish a software engineering degree ...another good thing…, and now I’ve been contacted by a designer specializing in fireboxes and mantles who’s sending work my way …a very good thing.

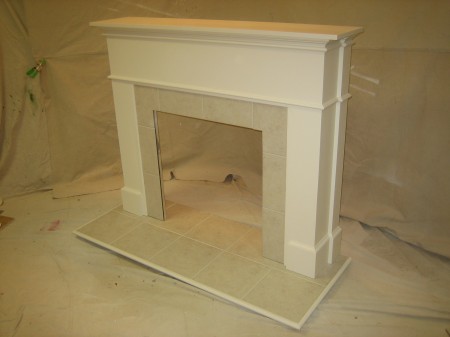
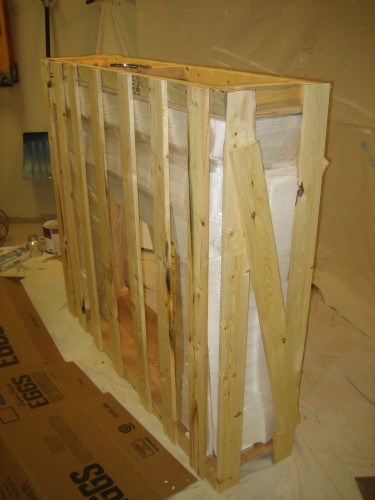
The first piece she sent me is called the Staub Mantle. This is a painted piece, more of what I would consider carpentry than fine woodworking, but it was a fun piece to build nonetheless. One of the best parts of this particular job was it gave me an excuse to finally buy an Earlex HV5000 HVLP sprayer (review to come) to paint it. Since it was shipped, I had to crate is up as well…another first for me.

I think it came out pretty well…

Staub Mantle

Staub Mantle

Crated

Crated

Facebook Comments
Categories: Woodworking | Tags: , , , | Leave a comment

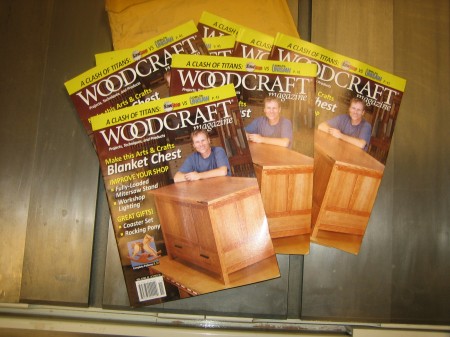
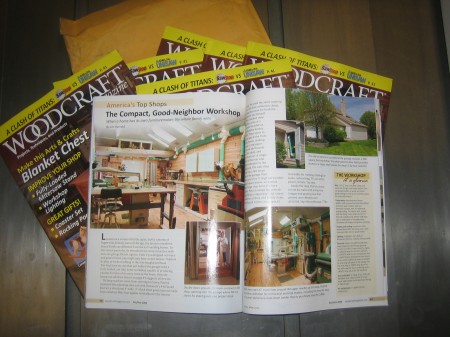
The New Woodcraft Magazine is Here!

On Friday afternoon I arrived home to find a package containing 10 freshly-printed copies of the Oct/Nov Woodcraft Magazine which includes the feature story on my shop!

It went something like this:

Navin R. Johnson: The new phone book’s here! The new phone book’s here!
Harry Hartounian: Boy, I wish I could get that excited about nothing.
Navin R. Johnson: Nothing? Are you kidding? Page 73 – Johnson, Navin R.! I’m somebody now! Millions of people look at this book everyday! This is the kind of spontaneous publicity – your name in print – that makes people. I’m in print! Things are going to start happening to me now.
[the Sniper points to Navin’s name in the phone book]
Sniper: Johnson, Navin R… sounds like a typical bastard.

I was especially happy to see this issue includes an article comparing the Saw Stop and new Delta Unisaw…should be a pretty popular issue.

IMG_8573

IMG_8574

Facebook Comments
Categories: Workshop Addition | Tags: , , | Leave a comment