Assembling the Circle-X Panels

This entry is part 3 of 6 in the series X-Men Bunk Bed

Fits and Starts

The last couple weeks have been crowded with both personal and professional activities. I’ve had to work in found time, an hour here, an hour there. My next task was to fit the upper and lower bouts of the “X”s with their panels.

Finishing the Wedges

The pie wedges are cut from 1/2″ cherry plywood, stained to match the poplar hardwood used elsewhere. Though it seems a shame to stain cherry, the cheaper plywood readily available to me was pretty poor stuff and, well, I wasn’t 100% certain I wasn’t going to use cherry for the rest of it when I got it…so, that’s where we are. In any case, I figured it’d be far easier to stain and finish the panels before they were glued into place in their MDF frames. After a bit of experimentation, I settled on a two part process of penetrating stain topped with a gel stain. Then I went to the big box and wound up buying a single can of Minwax® Polyshades and using that instead. It does a very nice job of obscuring the poplar and hiding the green, though my attempts to brush it on with a foam brush left me less than satisfied. I wound up wiping it on instead, which produced far superior results. Definitely a time-saver, and I think they came out great, no?

Staining the plywood wedges

Notching for Entry

I must admit to being a bit concerned about notching out the top for the entry. I considered leaving the top as-is since I’m fairly certain it wouldn’t be at all difficult to climb over the end. However, it simply didn’t look right that way and it would probably get old having to slide over the arc. In any case, I dry fit the assembly on top of the full-size drawing and laid out the notch.

To my amazement it came out essentially dead-on. Sometimes you get lucky!

Laying out the top bunk entrance

Top corner cut out

Trim for knock out finished and dry fit

Assembling the Panels

With relatively stable MDF frames and plywood panels, it seemed safe to glue the panels in place instead of trying to float them. They’ll also provide extra strength to the relatively weak MDF structure. The glue-up went smoothly. The posts are here to help align all the parts; I plan to mortise and drill for the rail assembly and stain them before gluing the panels permanently between them. Now I’ve just got to figure out exactly how I’m going to join the rails. Although I’ve purchased some metal knock-down bed-rail hangers, I have concerns both about the possibility of a child on the lower bunk pushing the top rail up and out, and the holding power of screws holding in the end grain. I’m leaning right now toward using these plus a single long bolt through the post into a barrel nut in the bed rail to keep it together. The problem with that is I absolutely loathe barrel nuts – I can never get them to line up just right. I’ll keep mulling this over….any ideas?

Center panel glued up and set aside with posts for safe-keeping

Facebook Comments
Categories: Furniture | Tags: , , , , | Leave a comment

The Headboard and Footboard Part I, Making Xs

This entry is part 2 of 6 in the series X-Men Bunk Bed

Laying out the Ends

Typically I find a detailed SketchUp drawing to be sufficient for my builds. For this project, however, I felt the need to do a full-size drawing to lay the components out on. After drafting an end on a 4×8 sheet of MDF,  I started ripping down another MDF sheet to 6″ wide strips. After much thought, the easiest way to build the edge-beveled, circle-inscribed Xs would be to cut the strips, bevel the edges on the table saw, and then cut the compound joints to put them together. I’d alternate the full-length ones to provide strength. After ripping and beveling the MDF strips, I drilled holes in the middle of two of them and, using a nail for a pivot, lay them out on the full-size plan.

Laying out the first "X" on the full-size drawing

Compound Angles

Cutting the compound angles necessary to join the shorter pieces in the center properly required setting both my tenoning jig and the table saw blade at different angles. Rather than try to calculate this, I just drew lines and lined things up by eye, plus a bit of trial and error. I was very lucky — it all came together much faster and easier than I thought it would. The completed joints came out very tight. It’s almost a shame that this core of MDF will be coated with my favorite rubberized compound when finished. Because of the texture, there’s a lot of room for slop here — but these joints would actually work as raw hardwood.

Both the jig and blade were angled to make the cut

The joint was a bit tricky to cut, but I really dig the result

Gluing up the "X"

Completed joint out of the clamps

 Top and Bottom Arcs

The design calls for the “X”s to be inscribed within a 60” diameter top and bottom arc. These were fairly easy to cut, but I was reminded precisely why I so rarely work with MDF. What a mess!

Cutting the top and bottom arcs

Arcs cut and ready

MDF dust everywhere...ugh

Inscribing the “X”

My biggest concern here was that I would cut the arc improperly and not be able to get the top and bottom to sit square with the side posts. Fortunately things worked out just perfectly here, even with my jury-rigged arc cutter (having misplaced my large adjustable one).

Trimming and radiusing the X ends


Ready for my Festool domino to join the pieces

Second "X" ready for joining

Next Steps…

Next up will be cutting the legs, and fitting the cherry ply wedge panels that fill the top and bottom spaces. As mentioned above, the MDF pieces will be  coated with a rubbery compound and then painted. However, the wooden panels and legs will be stained and finished. Therefore I’ll cut the joinery with the festool domino, dry fit both ends, and then disassemble for finishing. One of the ends will also be cut down at the top back corner where the steps will meet the end. So far this has been a messy but interesting build!


Facebook Comments
Categories: Uncategorized | Tags: , , , | Leave a comment

A Bunk Bed for My Superheroes

This entry is part 1 of 6 in the series X-Men Bunk Bed

UPDATE

Based on some excellent feedback, I’ve made some changes to the design. The front rail was a bit troublesome from both a design and stability perspective. I’ve replaced it with 1-1/4″ tube steel posts extending from the head and foot of the top bunk, with angles that mimic the back “X”.


UPDATED DESIGN – The updated safety rail
UPDATED DESIGN – front view

What do you think of the changes?


Nightcrawler

With four kids and only three bedrooms, not counting the master, we knew early on that someone was going to have to ‘double up.’ Now that they’re ages five and three, we decided that they were ready. So, how to fit two young boys into a 11′ x 10′ room? Bunk beds!

Gambit

I wanted something that was fun and would captures the boy’s imagination while maintaining a sense of style and taste that could last for years. My boys followed what I assume to be a fairly common progression. First there was Spider-Man. And while he is still a favorite, through the 80’s “Spider-Man and His Amazing Friends” they were introduced to Iceman and ultimately some of the other X-men. The instant Nathan saw Wolverine, he was hooked. So an X-Men-inspired design would definitely be a hit.

Professor X

For inspiration the wife and I sat down to one of the modern X-Men movies. The actual inspiration for the design didn’t arrive until the very last scene with Patrick Stewart seated in his high-tech wheel chair in the wood paneled school. Seemed like a great idea to marry the high-tech curvy and angular lines of the chair with the old-world style frame and panel. So I sat down with SketchUp and began drafting out a plan.

Beast or Dazzler?

And here’s the completed design. You be the judge…beast or dazzler?

The completed bed design

A view from the front

Side view off drawers and X-panel

Facebook Comments
Categories: Woodworking, Furniture | Tags: , , , , , , , | Leave a comment

The Rosette

This entry is part 4 of 6 in the series Building an Acoustic Guitar

The soundhole rosette is an aesthetic embellishment that provides an excellent opportunity for the luthier (or newbie like myself) to leave his distinctive impression on the finished instrument. Consequently I spent much time considering the design for the rosette on my first guitar build. Although I’ve significant experience inlaying wood, I’ve never worked with abalone or mother of pearl as is commonly used. In researching materials, I discovered just how pricey abalone and “abalam” blanks are – ouch!

However, while perusing a local Michael’s crafts store, I discovered some packaged “mosaic shell tile,” which though designed for mosaic work, were clearly real shell, albeit in smallish 1/2″ – 3/4″ square tiles. And at about $1 and oz, significantly cheaper than “Abalam” blanks. I spent much of my first day experimenting with this material to see just what I could do with it with the tools on hand.

Inexpensive shell tiles from Michael's

the Design

By midday one thing became clear – radiusing these small tiles to form a ring simply wasn’t going to work with stuff on-hand. I spent some time crafting a jig,  but my stock bandsaw blades simply weren’t going to cut it, literally or figuratively. Turning to my scroll saw, I found that 25tpi blades would work acceptably. Though they didn’t offer the kind of precision I’d prefer, I thought I’d give it a shot. So I worked out a design that required relatively simple, straight cuts in the shell. The design would consist of a walnut ring cut with my new trim router and shop-made circle jig. I’d then cut some diamond-point triangular rays in the ring into which I’d inlay some of the shell pieces.

Cutting the ring halves in a walnut blank using my new adjustable circle jig

Walnut halves cut ready for glue up

Flushing the walnut ring

Previewing the design

Routing out for the shell pieces

The ray edges inlayed

Finishing the edges

Because the shell was cut square, the bottom edges naturally didn’t follow the smooth curve. To fix this, I decided to route a 1/16″ ring on the inner and outer edges of the rosette. In this space I inserted strips of a mahogany veneer and white paper card stock. I essentially chose the material because it happened to fit nicely into the space and I thought the white of the card stock would produce a nice thin line. Basically the entire thing was then saturated in CA glue and then planed, scraped and sanded flush.

If you were paying attention to the earlier photos, you undoubtedly noticed the distinct blue coloring on the smaller inner shell pieces. What I failed to realize when I initially installed them was that this color was merely a dye applied to the surface of the tile. It scraped right off when I began flushing the surface. Thankfully I noticed this during a test scraping after only inlaying the first tile, and ultimately wasn’t surprised when everything turned white in the end.

Routing the channel to finish off the ring edges

Inserting the veneer and paper strips

Mostly done

One of the unfortunate things I didn’t anticipate was the way a couple of the point edges would chip when hit by the router bit. The router worked very smoothly and the bit cut without a hint of the transition between wood and shell. Unfortunately though a couple of the sharp points  at the end of the shell chipped instead of cutting cleanly. I should have cut a bit further in to clean this up, however I failed to notice this at the time. Consequently I’ll need to fill in these couple of small cavities before moving forward. Not a huge deal, but it does distract a bit from the finished look at this point.

The completed rosette

Some time off…

My next move on this build will be to cut, install, and shape the soundboard bracing. However this will need to wait as I have a couple boys, ages 3 and 5, in immediate need of a bunk bed! So the guitar will sit for a bit while I tackle a this (physically) much larger and more practical project.


Facebook Comments
Categories: Guitar Building | Tags: , , , | Leave a comment

The Soundboard and Back

This entry is part 3 of 6 in the series Building an Acoustic Guitar

Back to work I took some time off guitar building to spruce up the shop and make some much needed improvements. Also, with the parents visiting for the week, the shop was occupied for a time with more pressing matters…

Gramma helping the older kids paint their bird houses on my new workbench

Alterations This weekend I was finally ready to get back to the build. Since carving the heel on the first neck (maple), I’ve learned that William Cumpiano has posted some significant updates to his landmark book.  He’s changed the recommended method of joining the neck to the body. Instead of pinning with a peg driven through slightly offset holes, he now recommends using common barrel bolts used in RTA furniture. Unfortunately the holes for this style of assembly are best drilled prior to cutting the tenon and carving the heel. So a bit of retrofitting was necessary to make this work. I also discovered that the most appropriate size for the barrel bolt hole is 10mm, which meant ordering a drill bit and waiting a few days for it to arrive.

Retrofitting the neck tenon

Carving the second heelFor the first neck, I basically just went at it with a rasp until it looked about right. For the cherry neck I figured I’d follow the book’s specific step-by-step directions. I learned two things from this experience. First, my chisels weren’t as sharp as I thought they were. Second, mastering this technique is going to require a good deal of practice. Although far from perfect, I think it should work.

Second heel block carved (wiped with mineral spirits to preview finish)

the SoundboardI purchased three of the most inexpensive sitka spruce soundboard sets from Stewmac.com for $20 each. I figured it would be best not to learn on expensive wood. After looking at the pieces I received, I’m not sure why I’d order anything else. They all look great to me and one of them features some rather interesting and beautiful rays. I chose the least interesting one to start with. Although Cumpiano goes to some length in his book about the superiority of a hand-planed joint edge, I couldn’t see taking the time to craft even a basic shooting board when I have a sharpened and recently setup jointer at the ready. So I tried machine jointing the boards. After setting it up to take thin shavings, and taking a few light passes, I wound up with a light-tight, near invisible joint. Although I can appreciate the affinity some have for hand tools, sometimes it just seems to make more sense to take advantage of modern technology. I feel the same about thicknessing the plates. The book goes to some detail about how to use a toothing plane followed up with a standard plane to properly thickness the soundboard and back. For me, however, nothing beats running them through my 24″ dual drum sander a few times until the desired dimension is achieved. Much, much faster.

A sitka spruce soundboard joined, thickness sanded, and rough cut to shape

The BacksFor these first guitars I decided to use stock lumber I have lying around the shop. Fortunately I happen to have a rather nice piece of walnut that I resawed into bookmatched plates for one of the guitars. The cherry neck will be part of an all cherry guitar — so I sliced up a piece of cherry into four book matched plates that I’ll be able to build two guitars from. One of them had a sizable knot that unfortunately broke out during planing. I’ve put that set aside for now, but I think I’ll ultimately just patch it with a small  patch and epoxy, perhaps hidden by an inlay design of some sort, and use it for a future guitar.

Resawn walnut for back

The cherry backs

Next steps… I ended the afternoon a bit earlier than planned — basically because I wasn’t prepared for the next step: the rosette. I’m still working out the basic design. I’m thinking of trying my own technique for building the rosette. I’ve assembled a bunch of components for the rosette, including some shell tiles. The typical method for shaping these involves building a simple though somewhat involved jig that will certainly require a couple evening’s work. I’m not exactly sure I’m ready to commit to that quite yet. Also, rather than constructing the rosette piece-by-piece on the actual soundboard, I am seriously considering inlaying it into a separate  scrap board and then cutting it out to inlay it as a single piece. It seems safer that way, and a couple of the design ideas I have would be far easier to execute if it were done on scrap. It’s just a thought at this point however, so I may change my mind in the coming days.

Facebook Comments
Categories: Woodworking, Guitar Building | Tags: , , | Leave a comment

Some Long Overdue Shop Upgrades

Although I’m rather anxious to make progress on the acoustic guitar project, the recent departure of a close family friend caused me to shift gears briefly to build them a going away present. During the glue-up process, I was frustrated by the lack of suitable bench space. My old glue up table was a $50 IKEA pine piece that bit the dust some time ago…and I hadn’t yet gotten around to replacing it. From the start of the shop design process I had envisioned a mobile assembly/work bench that could tuck under the counter when not needed. I decided that before getting back to the guitars, I needed to make some long overdue shop improvements, starting with this new assembly bench.

Out with the old

I bought my current Sears Craftsman table saw during a floor-model sale some time ago. Because of a minor mix-up during pickup, the manager had offered a “make good” deal on a few other floor models, marking them down even further. For some reason (probably NYW), I’d always wanted a radial arm saw. And the price was hard to pass up, so I brought it home along with the table saw. Ultimately, after a number of attempts at setting this thing up, I was never happy with it. There was clearly something off with the lift mechanism in the main column. After years of literally collecting dust and taking up valuable workspace, I figured it was time to throw in the towel on this tool and make better use of my limited resources.

The radial arm saw (and old IKEA table in the background)

You can see the white board with drill press cabinet in the background

Better use

Last year I’d picked up an inexpensive 16″ scroll saw for doing intarsia and inlay work. This $100 saw has already seen far more use than the radial arm saw and was sorely in need of a permanent home. The hole was plenty big enough to fit both this saw and my benchtop drill press that has been mounted to a rolling cabinet for years. So I moved the DP and scroll saw to their new home, removed the casters from the old rolling cabinet, and slid it underneath my main workbench to use as hand tool storage. I’m loving this new arrangement.

Drill press and scrollsaw mounted and hooked up to dust collection

Two new benches

Removing the DP cart freed up signficant wall space in the back of the shop where I had a large white board hanging. Because it was previously behind the drill press (and portable planer), this white board saw somewhat limited use. Shortly before the Woodcraft photo shoot, I had built some storage cabinets faced with white boards, which have turned out to be incredibly useful. Consequently I no longer need dedicate so much extra wall space for a white board. I figured this would be a fine place for another bench. However, it would need to collapse to free up the floor space for larger assemblies. Now that I had a plan, it was time to design the benches and put ’em together!

Doors and 2×4’s

I considered building the new benches out of laminated Ash or Maple.  Ultimately I decided this would take far too long and cost a bit too much. I needed something that I could put together relatively quickly that would provide a flat, heavy, solid work surface and hold up to years of abuse. I recalled reading some reports of woodworkers using doors for work tables. This seemed like a great idea. Because I would need to cut it down to something well under 30″ x 80″, and because I want to be able to clamp things securely on the surface, I would need to use solid core doors. I found a couple in stock at the big blue store where, over the phone, an employee was willing to sell me the worst two he could find in stock as “scratch and dent,” at a reasonable discount. So I quickly picked up a couple doors and a handful of the best 2×4’s I could find and set out to turn them into a couple work tables.

Mobile Workbench

Because I needed to cut the doors down to roughly 56″ x 26″, the raw edges required banding. The “stuffing” was a kind of particle board, though lighter and less cohesive than the stuff I’m accustomed to working with. I’m guessing there’s a special name for it but I just don’t know what it is. In any case, it clearly wouldn’t suffice to simply glue some hardwood edges to the stuff. Biscuits wouldn’t cut it either — they were far too small. This is where my Festool Domino came in handy — I was quickly able to insert some 10mm x 50mm dominos in the raw edges to join with some 1″ poplar edging. Worked like a charm and should hold for as long as the tables are in service.

The new benches may be used individually or ganged together

Spot for small F-clamps during glue-ups

Mobile bench tucks under existing counter

Collapsible Workbench

The collapsible bench on the back wall is identical in size and height to the mobile version. It is held up by two swing out 2×4 legs that fold in flat to the wall, allowing the bench top to drop down on a couple heavy-duty hinges. One of the most interesting things about this back bench is the door was skinned with a piece of curly luan. In my theater days we used luan for building basic flats. I don’t ever recall seeing any with curly grain, though I suppose I probably never noticed as we typically painted over them with latex instead of clear poly. So this was a real treat and makes for a rather interesting-looking work bench.

New collapsible work surface

Folds flat to the wall for storage

Curly Luan

 Future expansion…

I was initially planning on building a new clamp rack (you can never have enough clamp racks!) to fill the space above the collapsible bench, however while taking these pictures a new thought occurred to me. Because this back wall is also an outside wall, I’m currently considering cutting a hole in it and installing a vent fan to make this area into a pop-up spray booth. I’ve been setting up a temporary booth in the garage when needed, however it is a cumbersome, time-consuming process that I can only do in the warmer months. I could collapse the table for large items or install a lazy susan on it for smaller pieces. Now I just need to read up on the proper way to put one together!

Facebook Comments
Categories: Jigs & Tools, Remodeling, Woodworking, Workshop Addition | Tags: , , , , , , , , , | Leave a comment

The Neck

This entry is part 2 of 6 in the series Building an Acoustic Guitar

Shaping with a rat tail file

My lovely wife spent her weekend watching the kids and provided me with nearly two full days of shop time. In the intervening days I’d decided I wanted to build one of the guitars from cherry. I have a rather large stockpile and had read somewhere that Martin made/makes a “sustainable” series out of cherry, so it can’t be all that bad an idea, right? I’ll just set aside one of the two maple blanks for later and replace it with a new cherry one.

Another impressive touch are those laminated “racing stripes” in guitar necks, so I figured I’d try this as well. After pulling a nice looking cherry board from the stack I quickly cooked up another neck blank. For this one I would slice the blank up into three sections, insert some thin strips of purple heart, and glue it all back together.

This one went together fairly quickly and I was ready for the next stage. Per the book, I would glue a spline into the slots in the neck, covering the embedded truss rods. This spline is then planed/scraped flush.

Veneering the Headstock

Although steel string guitars traditionally feature a single 1/16″ veneer on the headstock, I wanted to use some of the nice figured veneer sheets I bought at the last woodworker’s show. Because I’d used purple heart for the racing stripes, I decided to sandwich a 1/16″ piece of purple heart in between the veneer sheet and head. Although it most likely will be hidden behind purfling, there’s a chance I’ll leave the purple heart edge exposed in at least one of them.

Cherry and purple heart sandwich

For one of the veneers, I “borrowed” an idea I got from another guitar builder’s blog post and created a two-toned effect by inlaying a wedge-shaped piece in the middle of the head. Although I’m pleased with the results, I focused almost exclusively on the vertical alignment and neglected to check how well-centered the piece went on. The result is that the lamination is noticeably off center. Ultimately I don’t think it will detract all that much from the final piece — and as this is meant to be a learning project anyway, consider this “lesson learned.”

I wanted to keep the headstock shape relatively simple. The pattern from the Cumpiano book was a bit too simple for my taste, however, so I made some minor modifications. I’m not sure it’s my favorite design, but it should work pretty well. I drilled for the tuning machines, cut the basic shape on the bandsaw, and sanded the headstock to its final shape.


Not exactly veneer tape, but it worked

Head drilled and cut

Shaping the Heel

I’ve been looking forward to this part of the process for some time. Most of the projects I’ve tackled to date featured nearly entirely machine-cut components. Even the hand-cut parts were essentially square, comprising straight lines and angles.

The heel, however, features smooth contours and significant hand-carving. Although I really had no clue what I was doing, I drew out some guide lines, touched up the sharp on my hand tools, and pretended that I did. And it was fun! First was roughing the curve on the bandsaw. Simple enough. Next, I started with my new low-angle block plane, narrowing the heel close to it’s final width at the fret board. The next step featured the 1″ and 3/4″ chisels to slope the sides down toward the heal cap. I’m guessing this would have been much easier with mahogany as opposed to the hard maple of this neck. I soon switched to a curved rasp, which made rather rapid  work of wood removal. Switching to a rat tail, per Steve Dickie’s video series helped refine the final curve. I used a scraper and some course sand paper to finish it up.

There’s a bit more refinement I’d like to do yet, but I needed to call it a weekend. I’m still working on designs for the headstock inlay. At this point I’m considering forgoing an inlay on the maple neck and moving forward with the soundboard. After shaping the heel on the cherry neck, I may spend some time on a significant inlay on this one and then set it aside while I complete the bulk of the work (and hopefully make the bulk of any mistakes) on the maple one. Then again, I might just soldier on with both guitars instead. We shall see…

Carving the heel

Completed heel carving


Facebook Comments
Categories: Guitar Building | Tags: , , , , , , | Leave a comment

Building an Acoustic Guitar

This entry is part 1 of 6 in the series Building an Acoustic Guitar

A few years back I was conversing with a co-worker and fellow guitar player. Aware I was an amateur woodworker, he suggested I build a guitar. “Luthiery requires special tools and skills…training. Naw, I couldn’t do that,” I said.

Google search.

Fast forward to last year when essentially out-of-the-blue I recall this conversation and start thinking — could I? It didn’t take long to find numerous examples online of folks like me, some with no formal shop and less woodworking experience, building beautiful custom acoustic guitars. So I thought, “why not?”

Have you considered, maybe, boxes?

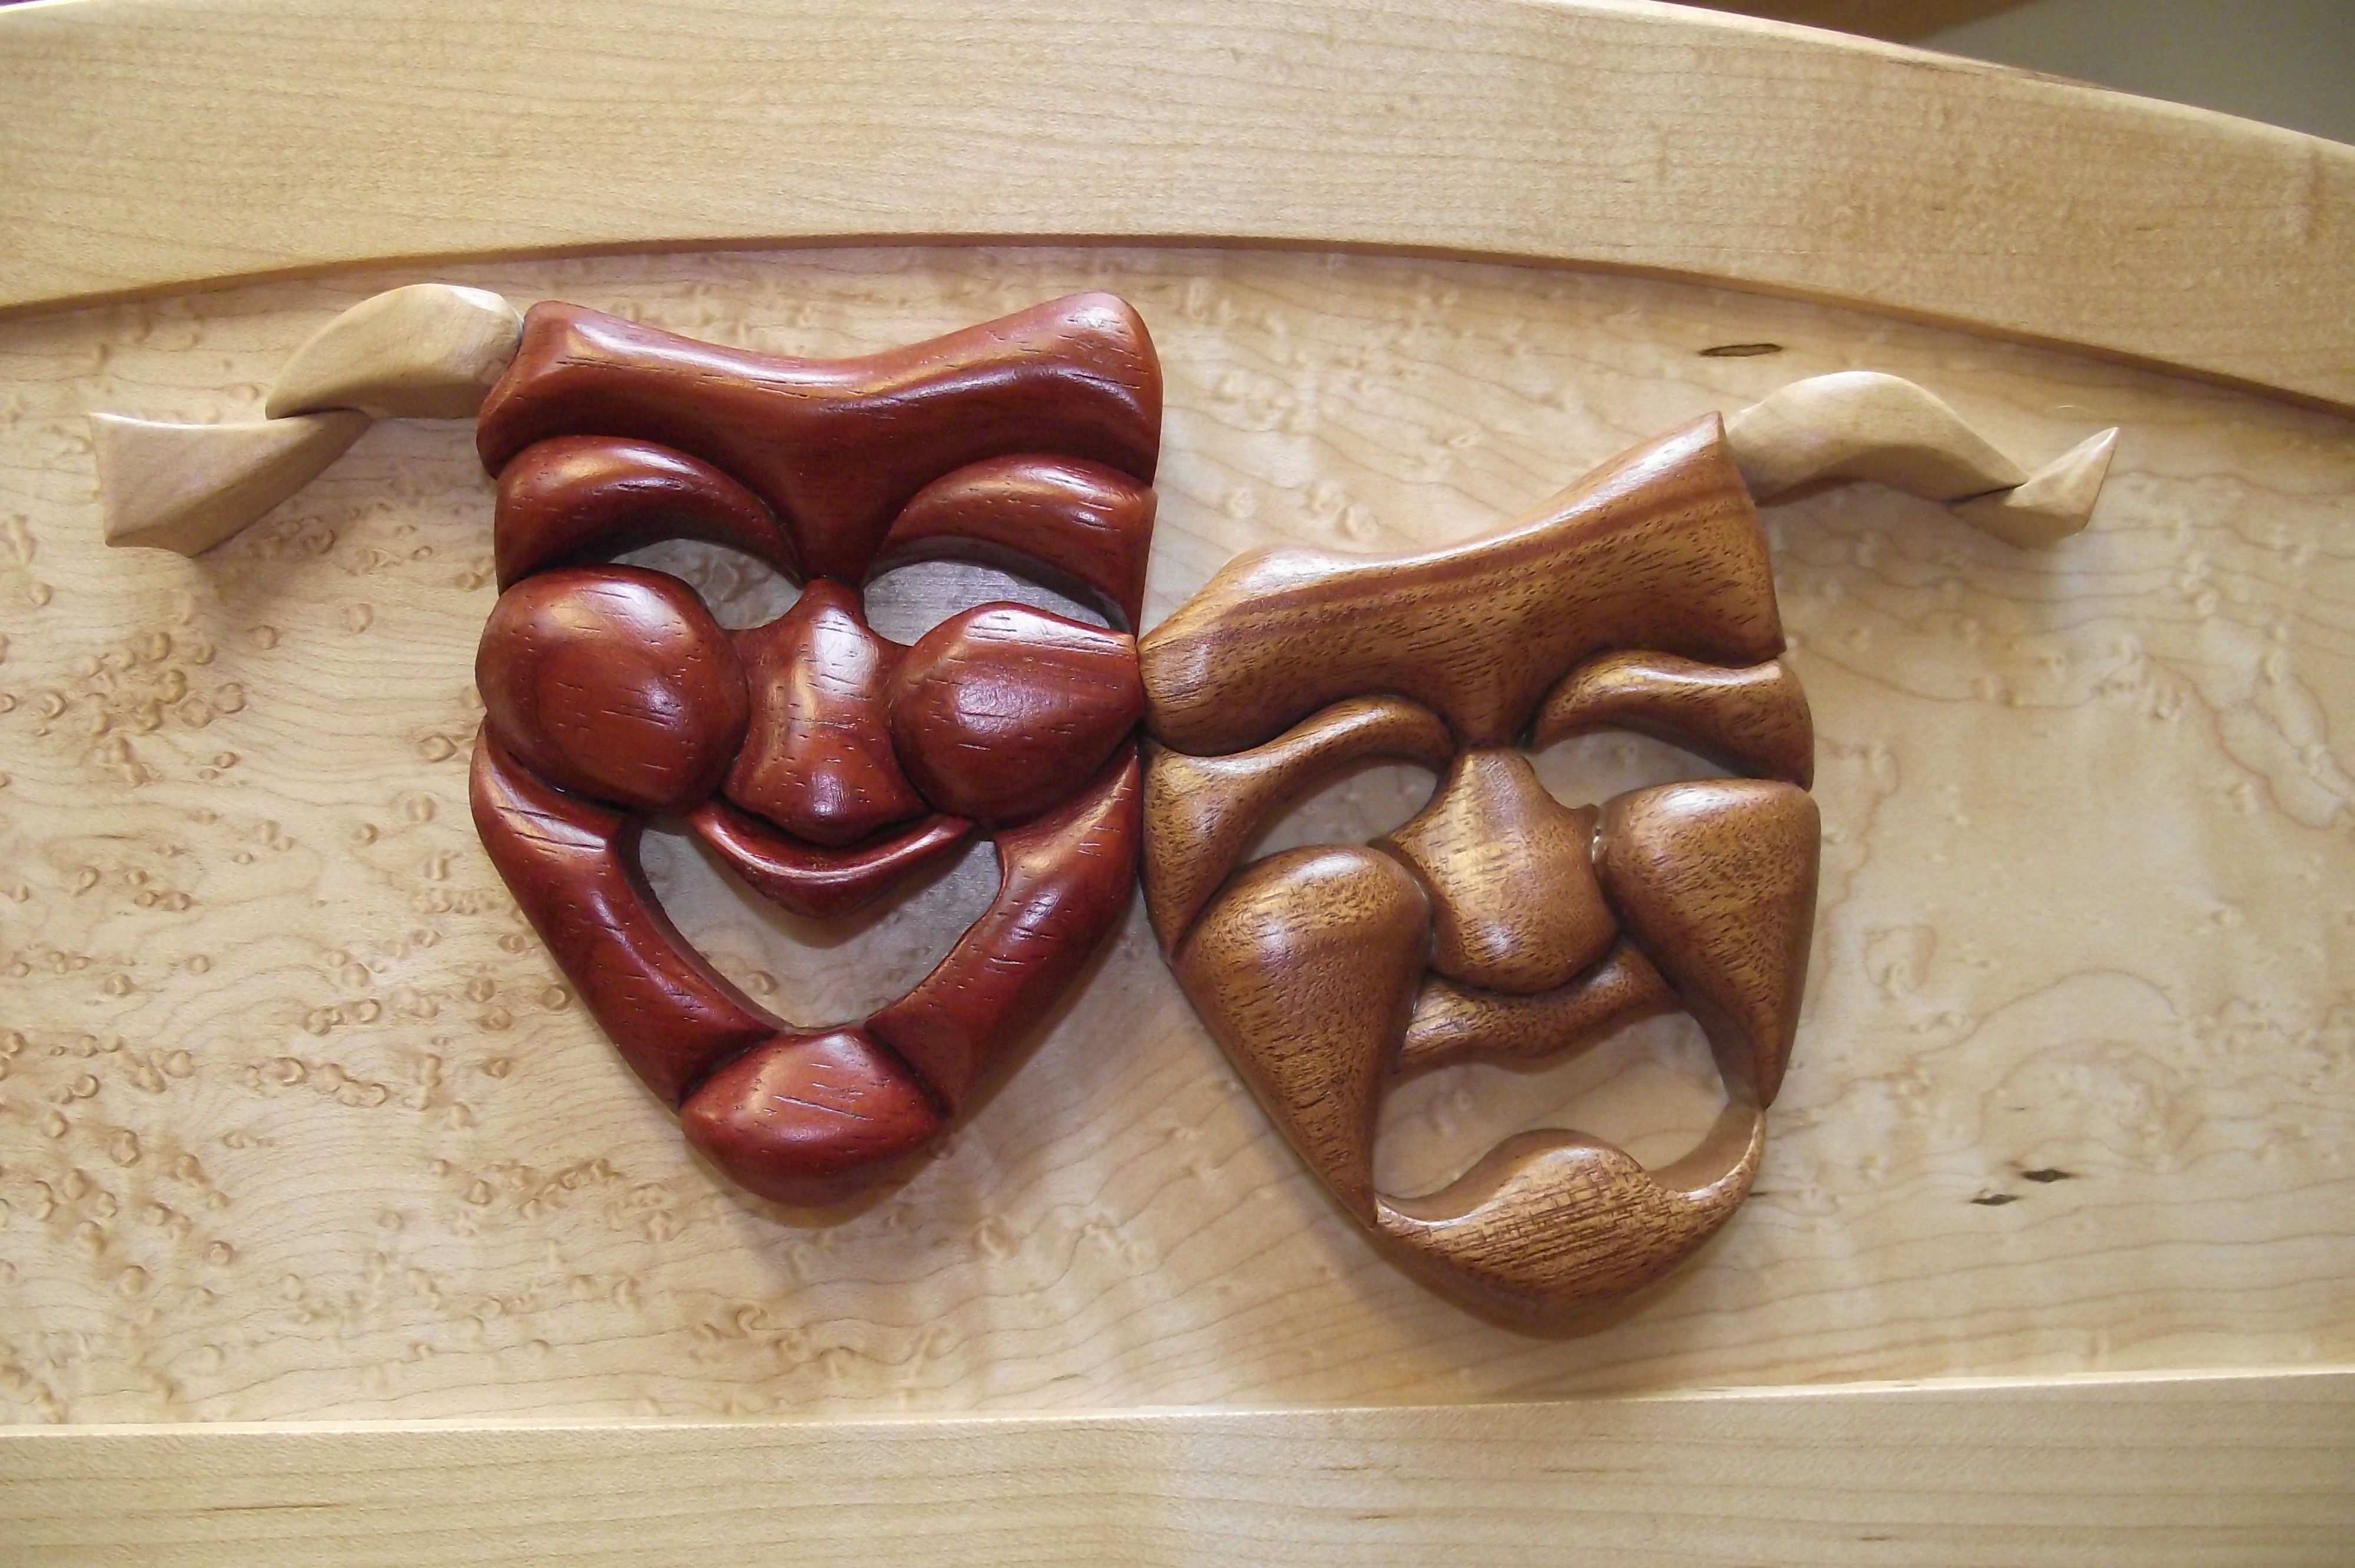
One of the things I like most about the idea of building guitars is their relatively small size and raw material requirements. The majority of my projects to date have been cribs and dressers that tend to overwhelm my small 300 sq. foot shop. Building these require significant planning so I don’t wind up painting myself into a corner, or more accurately behind a large, heavy cherry dresser! I’ve often admired the work of many of the folks in the LumberJocks.com community who specialize in small, ornate wooden boxes. The skill, patience, and artistry involved is sizable though the end product is anything but. I considered trying my hand at one, going as far as to draw some designs and pick up a cheap grinder for doing some wild shaping work. However in the end, though I’m sure I’ll get to it some day, they just don’t interest me all that much; and although I feel fairly confident in my design abilities I don’t think I could come close to matching many of the others I’ve seen.

The Plan

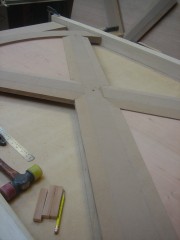
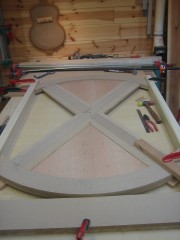
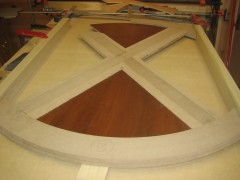
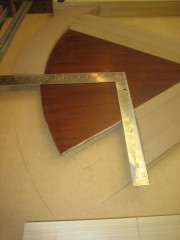
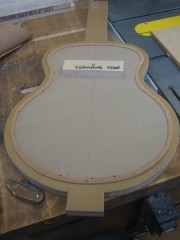
It didn’t take long to discover that the book “Guitarmaking: Tradition and Technology” by Jonathan Natelson and William Cumpiano (frequently discussed simply as “the Cumpiano book) was essentially the core curriculum. So I bought and read it, twice. The authors’ build process is centered around a guitar-shaped workboard. After settling on a style (Martin Grand Auditorium),  I cut the shape out of acrylic and then used that to build the board. Being unable to get my hands on a Martin, I purchased the body layout online and had it printed out on a large format copier.

I knew I’d also need some additional specialty supplies. I have a reasonable stock of suitable wood. However I didn’t have any tone woods well-suited for the top and internal bracing. Although I did find an example of someone doing excellent work with domestic American hardwoods, I wanted to maximize the likelihood of having a decent, playable instrument at the conclusion of the process — so I placed an order with Stewart-MacDonald for some cheap sitka spruce tops, bracing, a couple truss rods, and some other incidentals.

The completed workboard

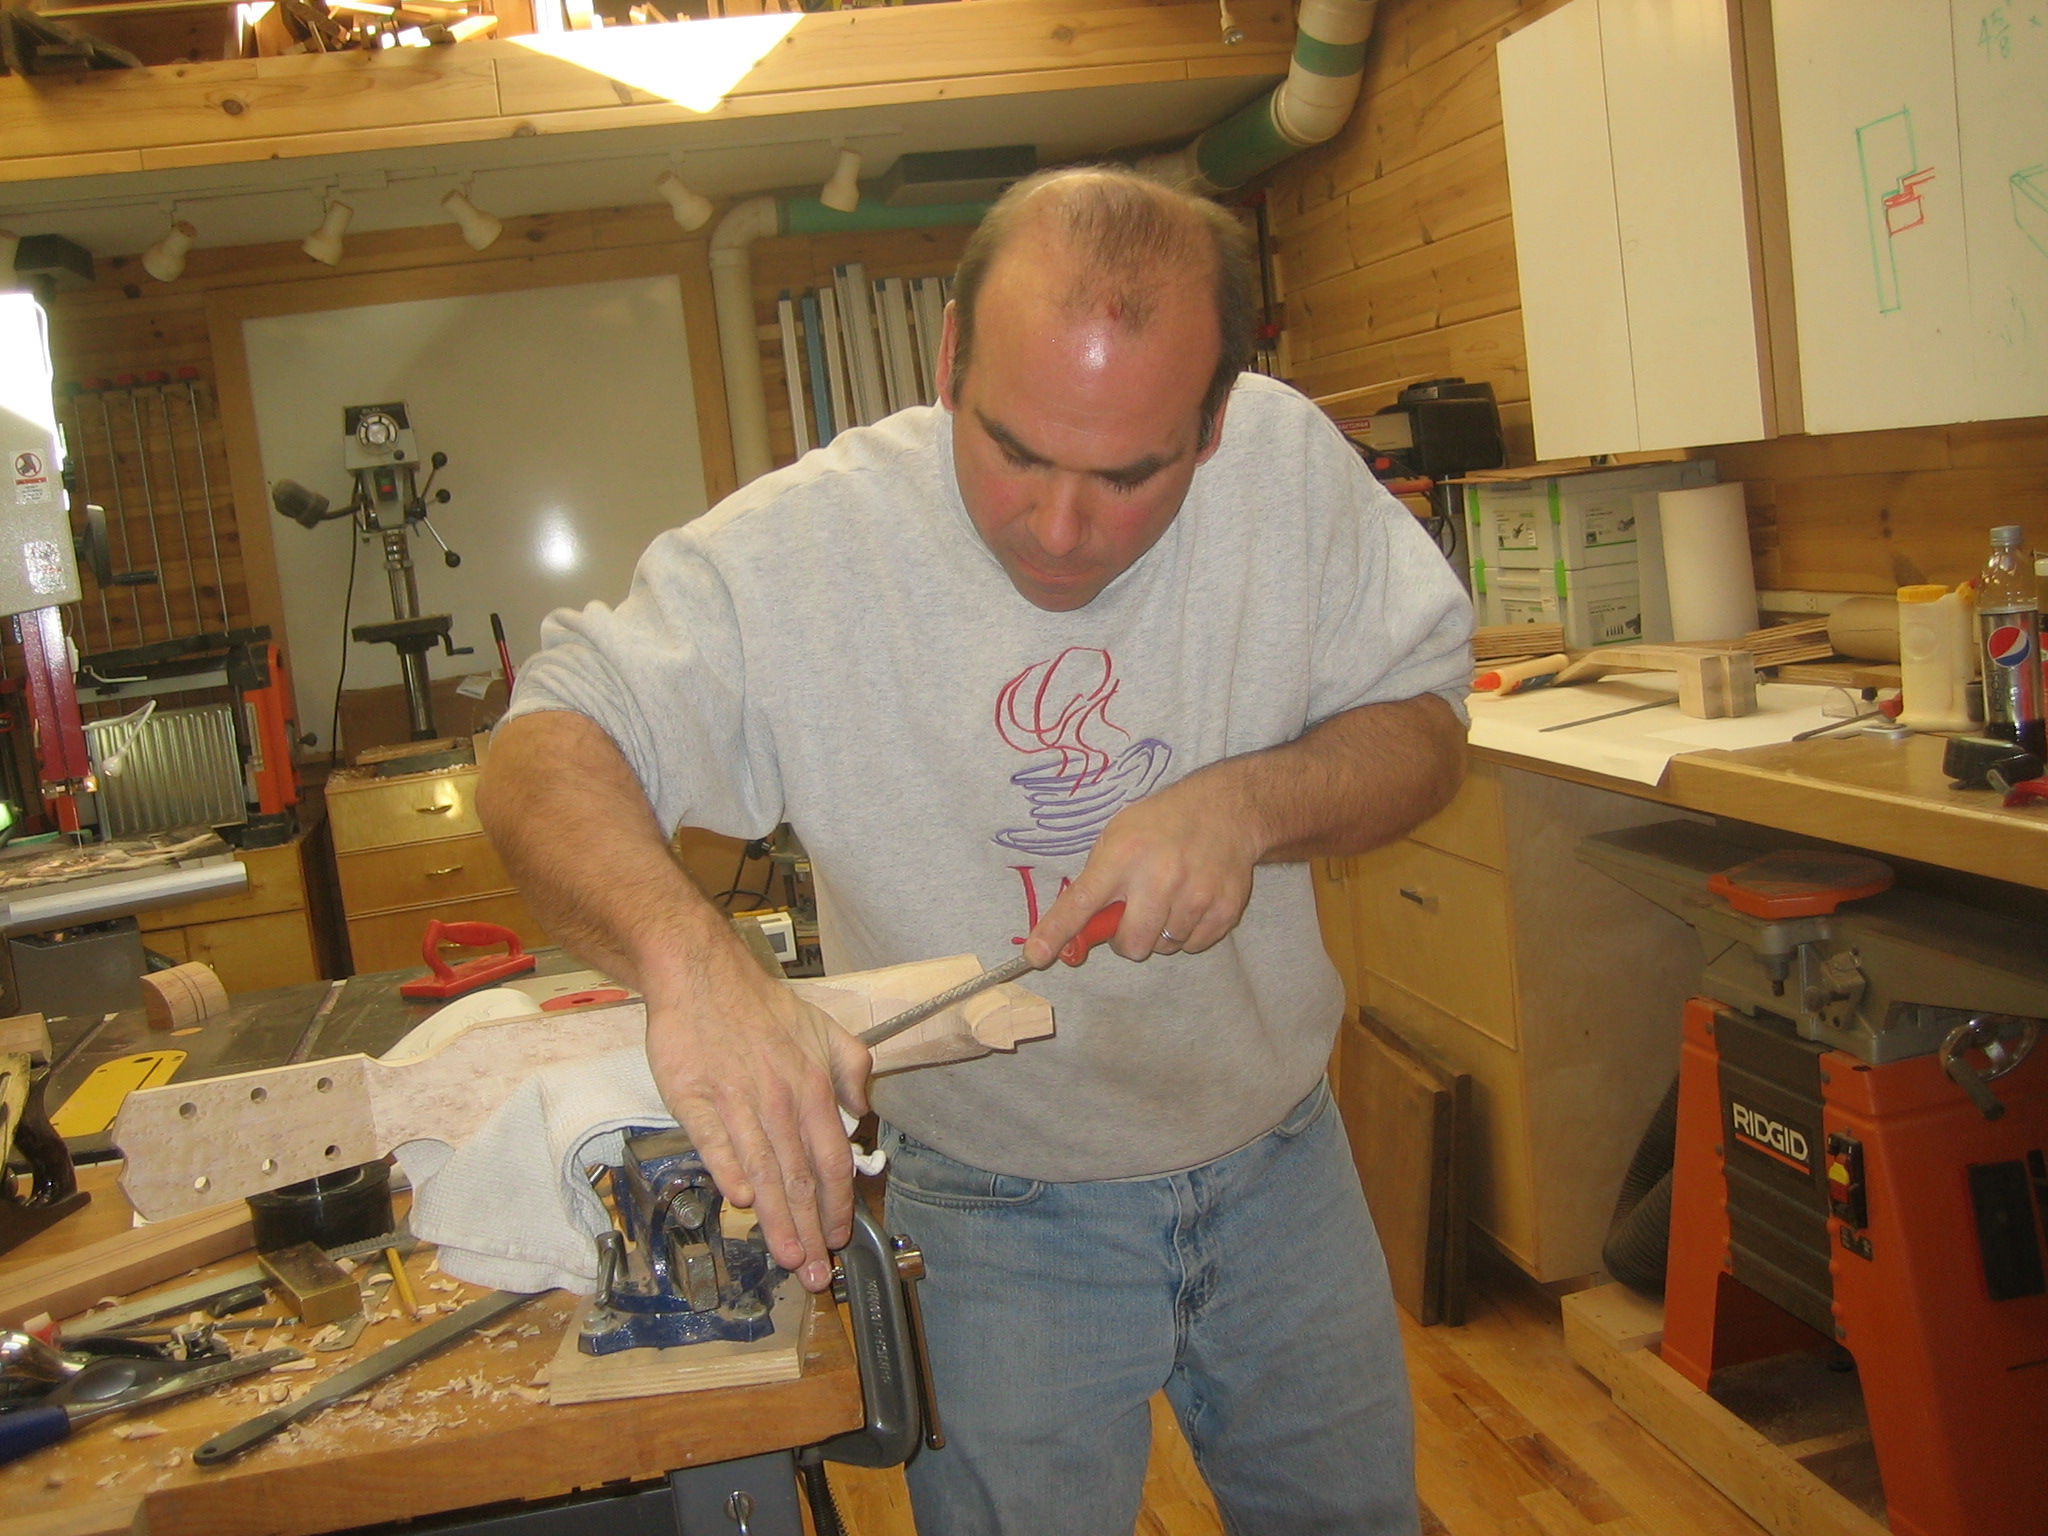
I lack any experience building guitars — or for that matter, any type of stringed instrument. However, as I see it my biggest challenge in this process will be overcoming my tendency toward impatience. I love seeing a project come together; and, with the exception of my personal safety, if I see a quicker way to accomplish something I’ll typically take it even if it means risking screwing it up. To be fair,  part of this urgency comes from the fact that I have very little “shop time” available to me — with four young kids, a full-time job, and frequent additional distractions and obligations, I try to make the absolute most of every moment in the shop. So a big concern was I would spend six plus months working on a guitar only to screw something up dramatically near the end of the build. My hedge against this: build more than one in parallel! I figure I might screw up one, but two, or three? Far less likely. Of course, there’s always the risk when working in parallel of making the same boneheaded move on all of them. So I’m actually going to work it in sections and complete a section from start to finish on the least attractive piece as practice for the next. Hopefully I’ll catch any issues with the first one before doing the same on subsequent pieces.
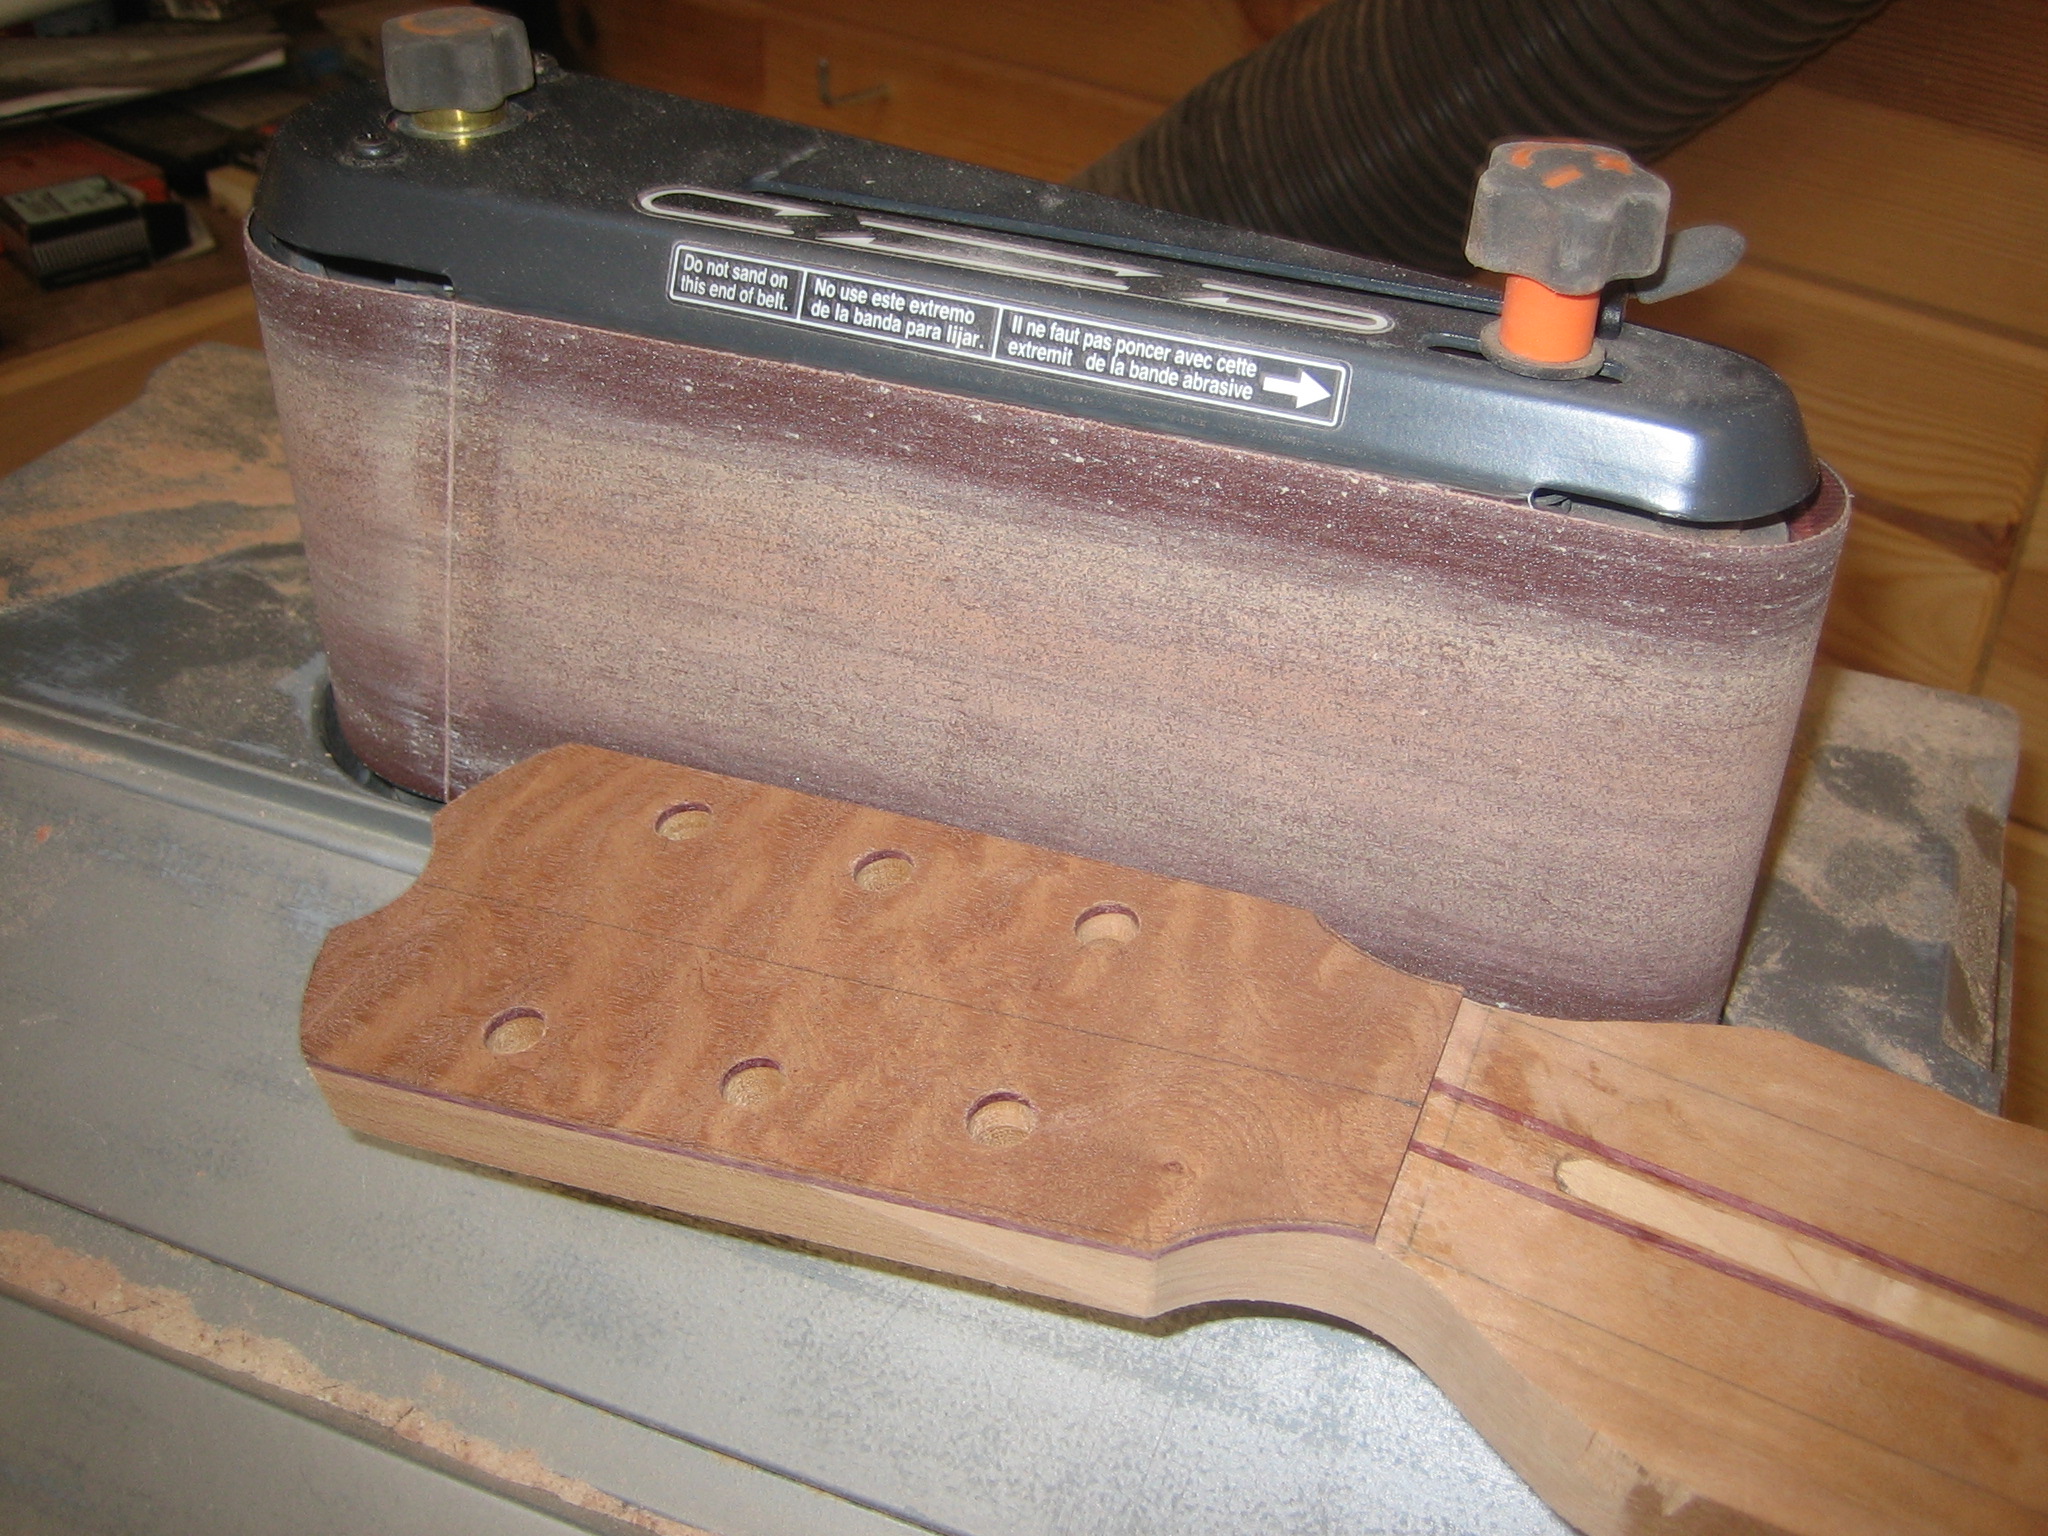
Building the neck

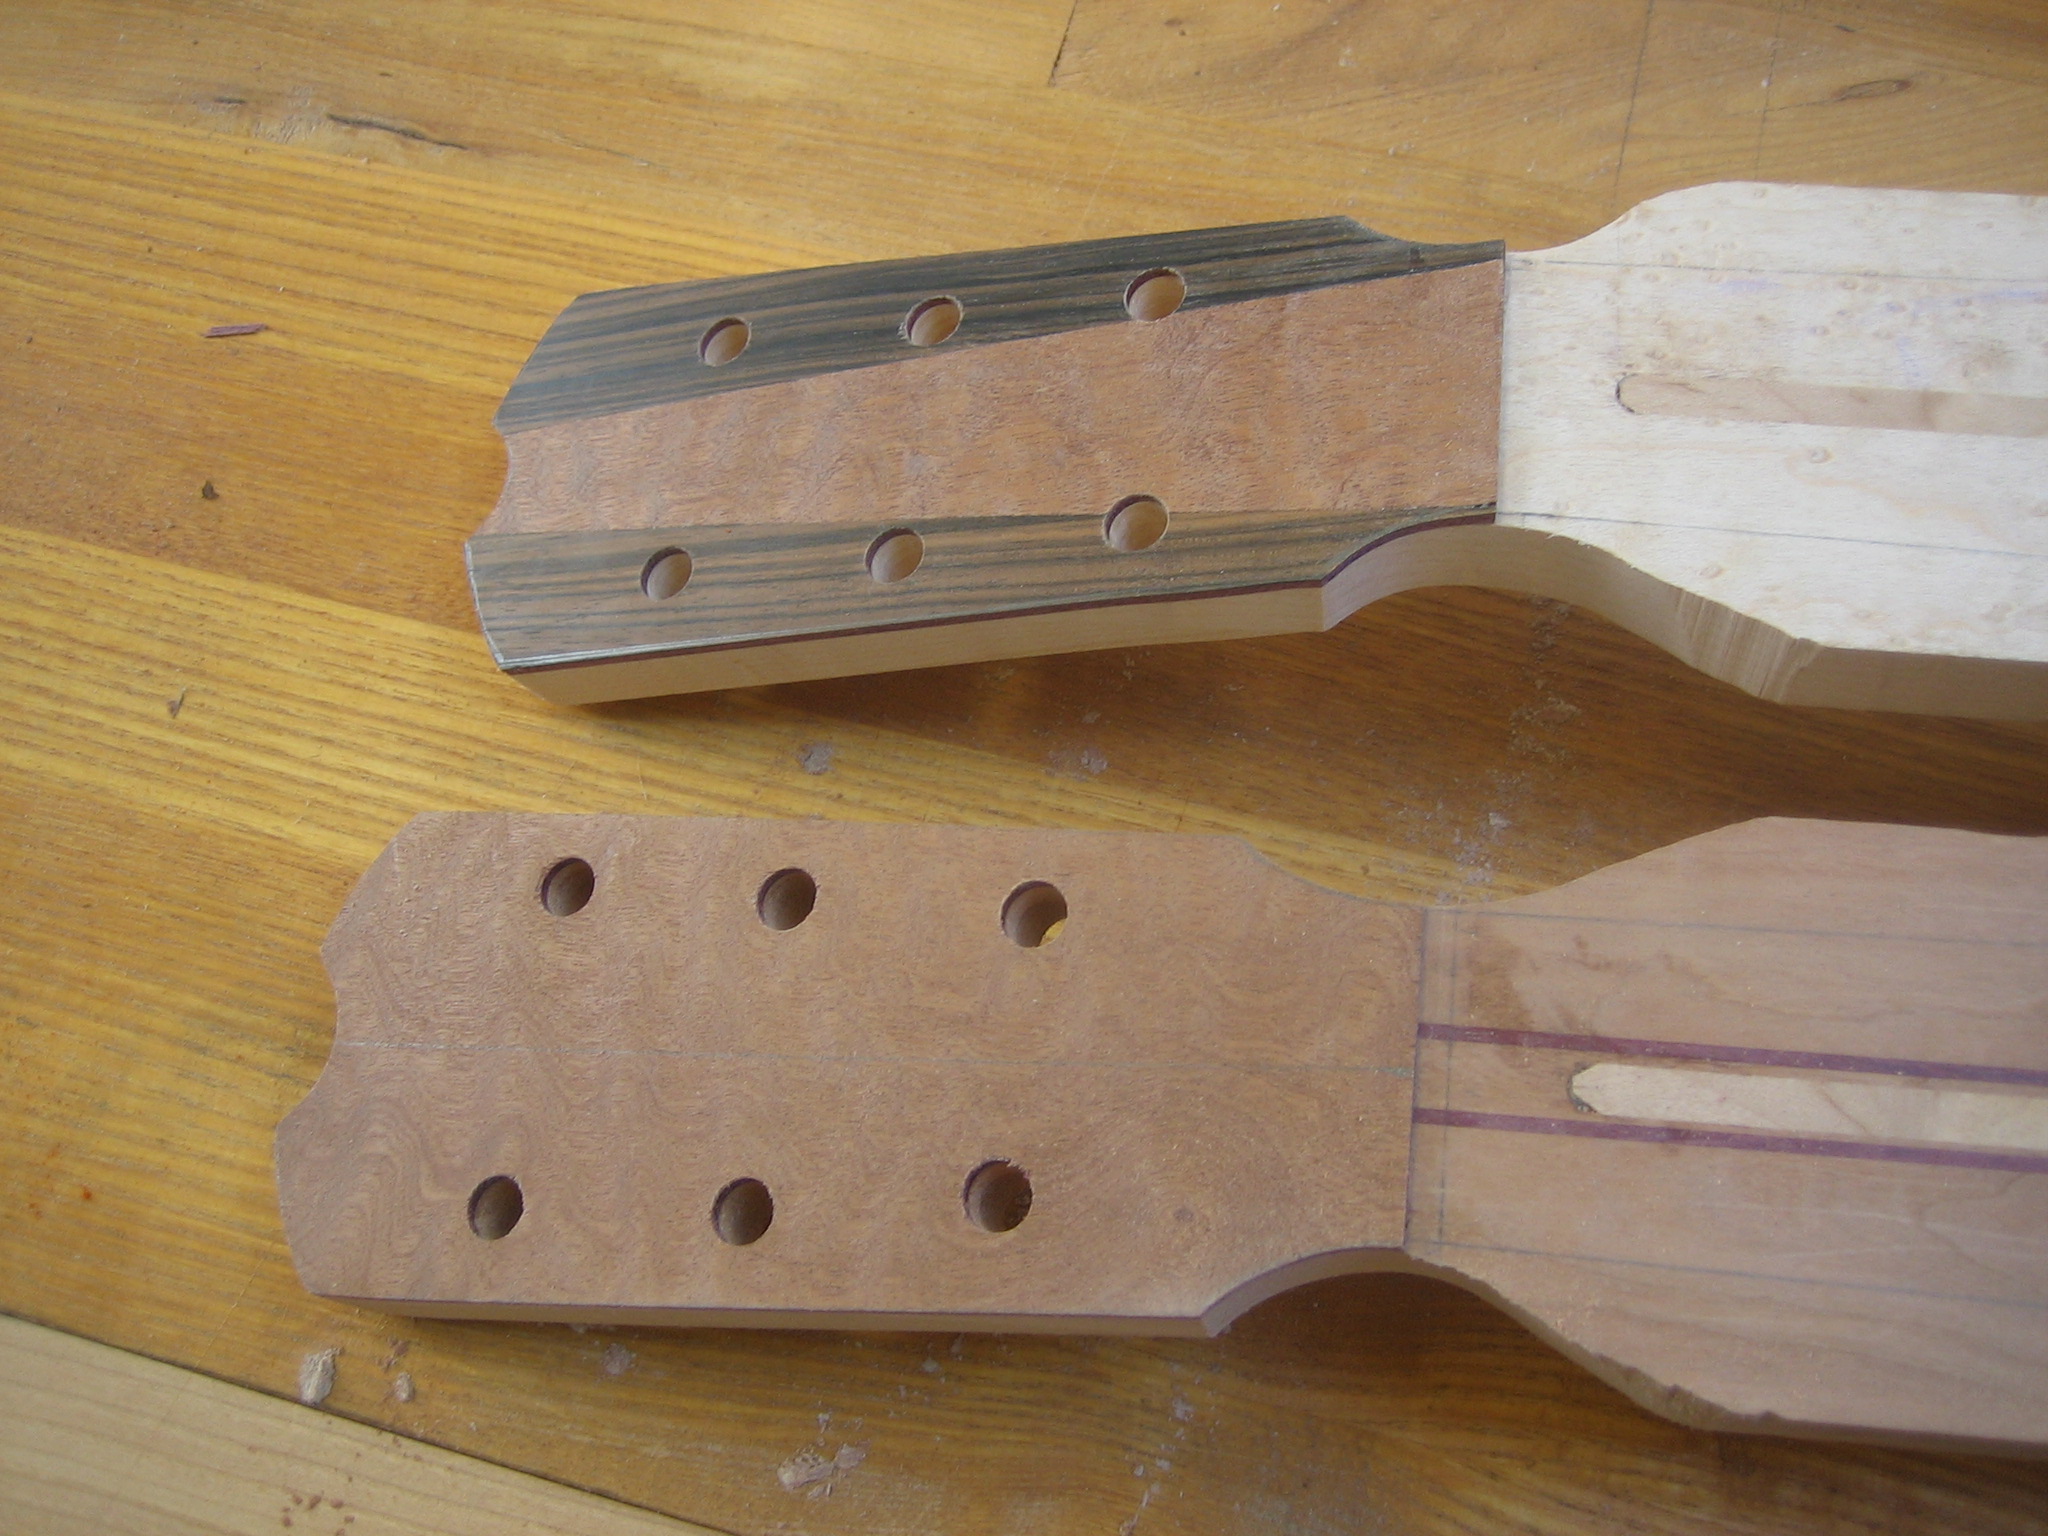
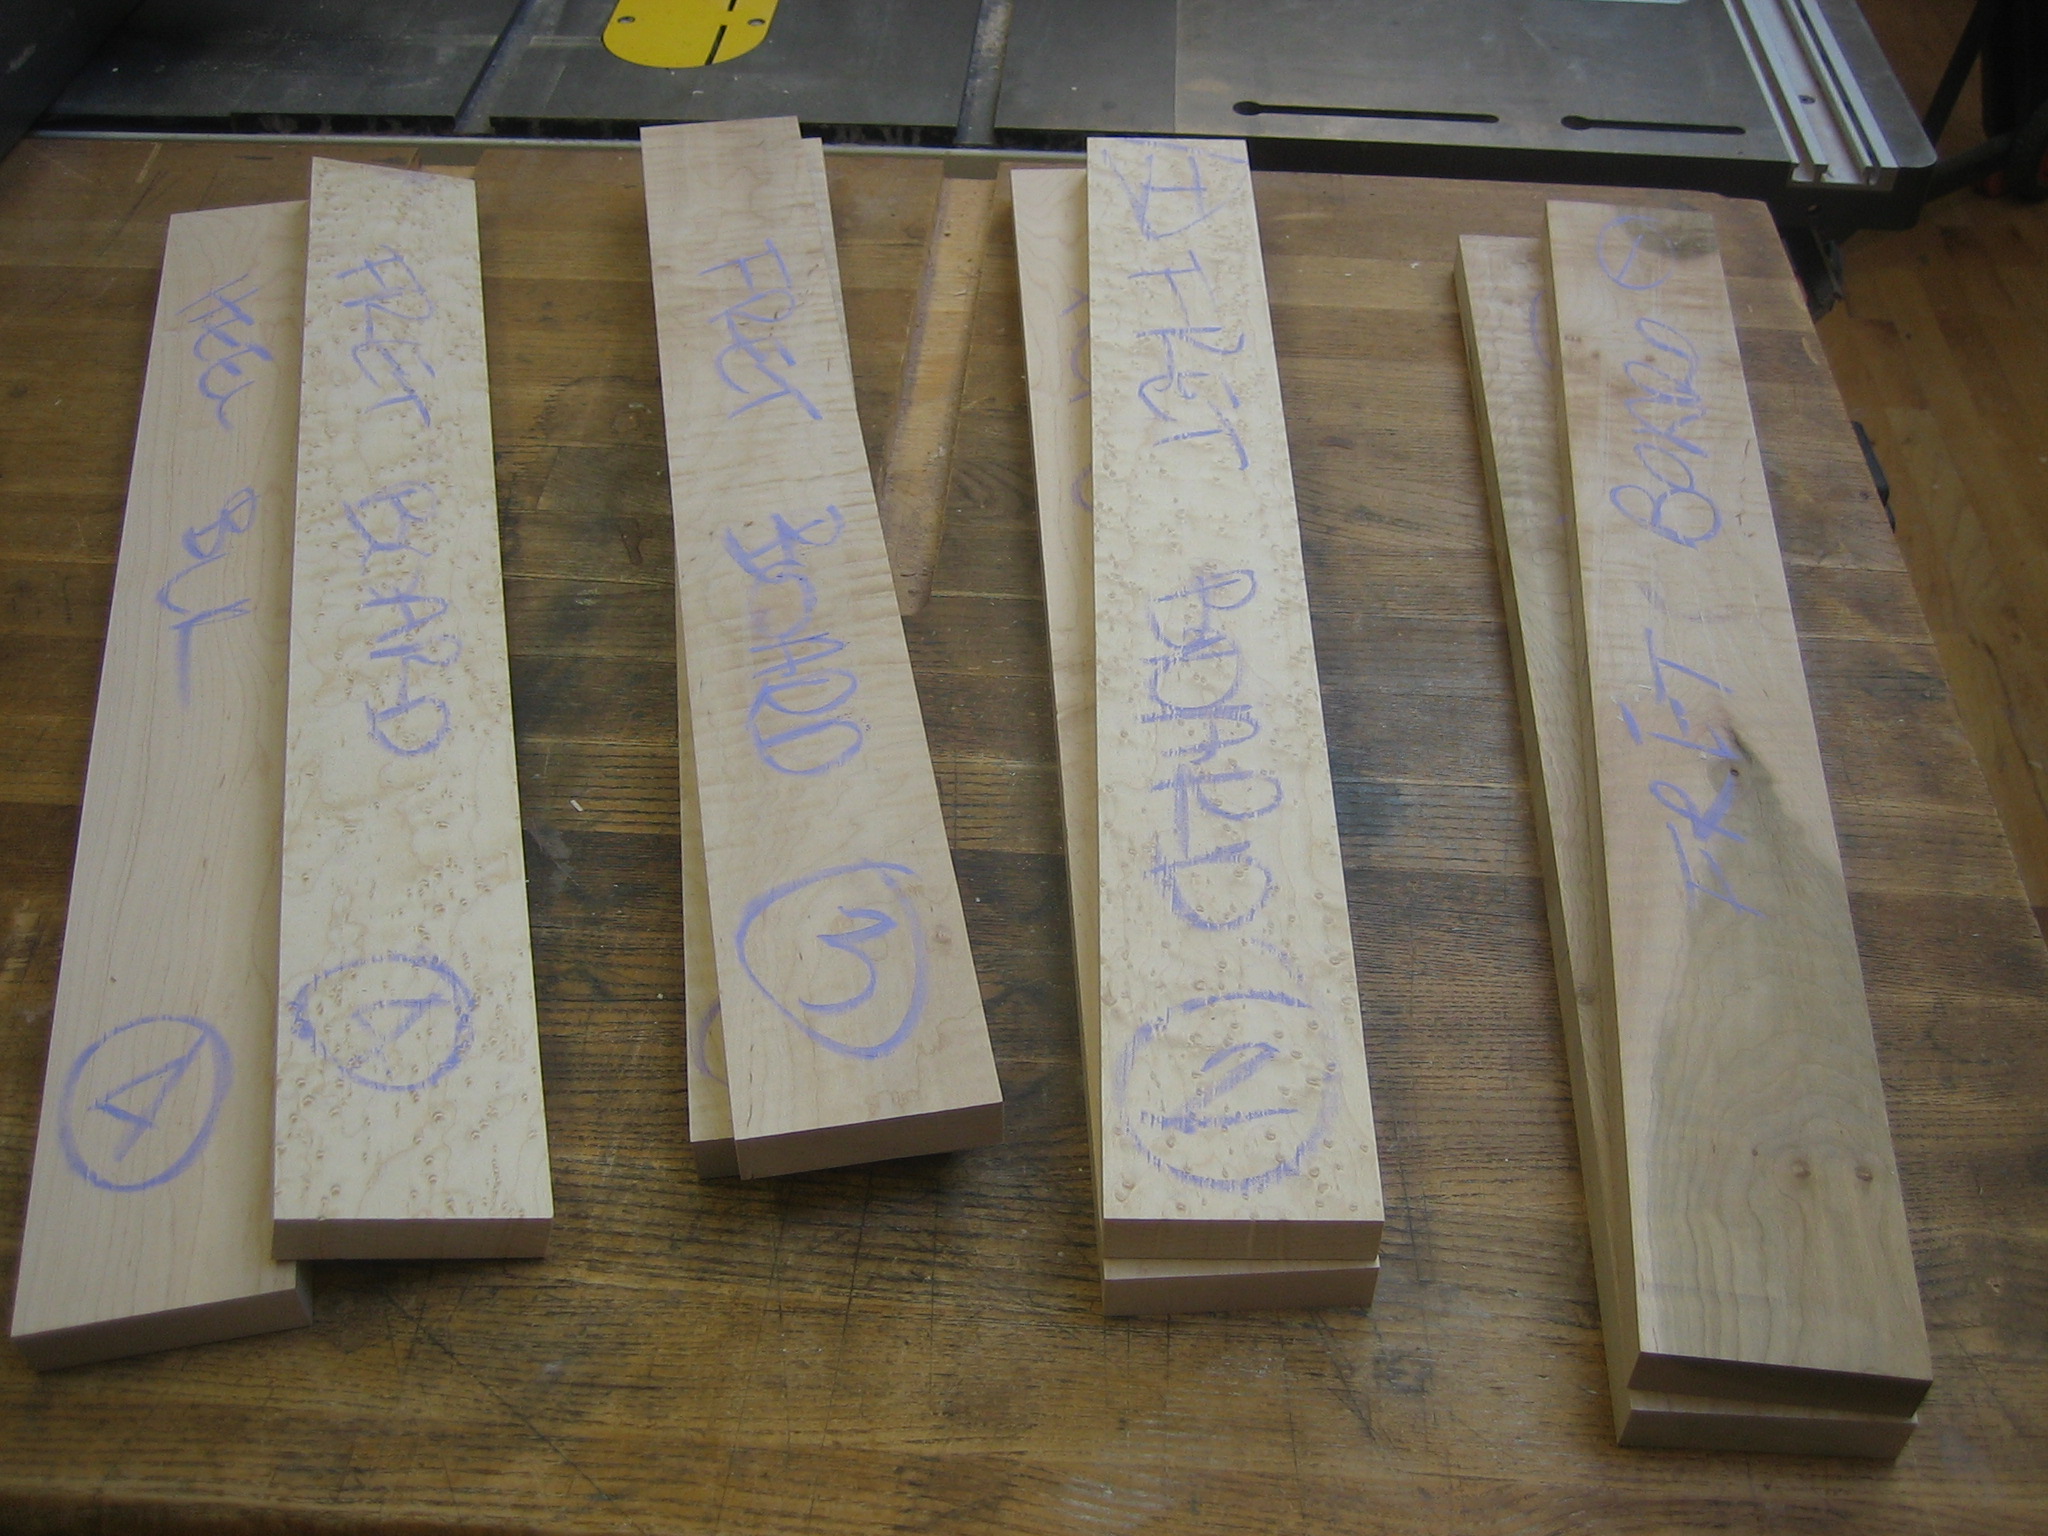
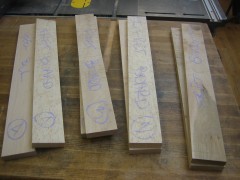
Cumpiano’s book begins with the neck. I figured I’d follow his lead and start there with my guitars. For a time I considered making multiple necks using different woods and build methods. The traditional scarf-joint method would naturally be first. However I also planned to build one by carving it from a laminated block of contrasting woods. A large curly maple board would make a great candidate for another carved neck. When it came time to actually build the necks it turned out that the lamination/carve method would waste far too much nice wood and by using the traditional method I would be able to build four necks with a relatively small amount of figured stock. So the decision was to resaw a large board of curly maple into a couple blanks and another board of birdseye maple as well. Thus I ended up with enough wood for four blanks using the scarf-joint method.

Neck blanks milled from curly, birdseye, and straight-grained maple.


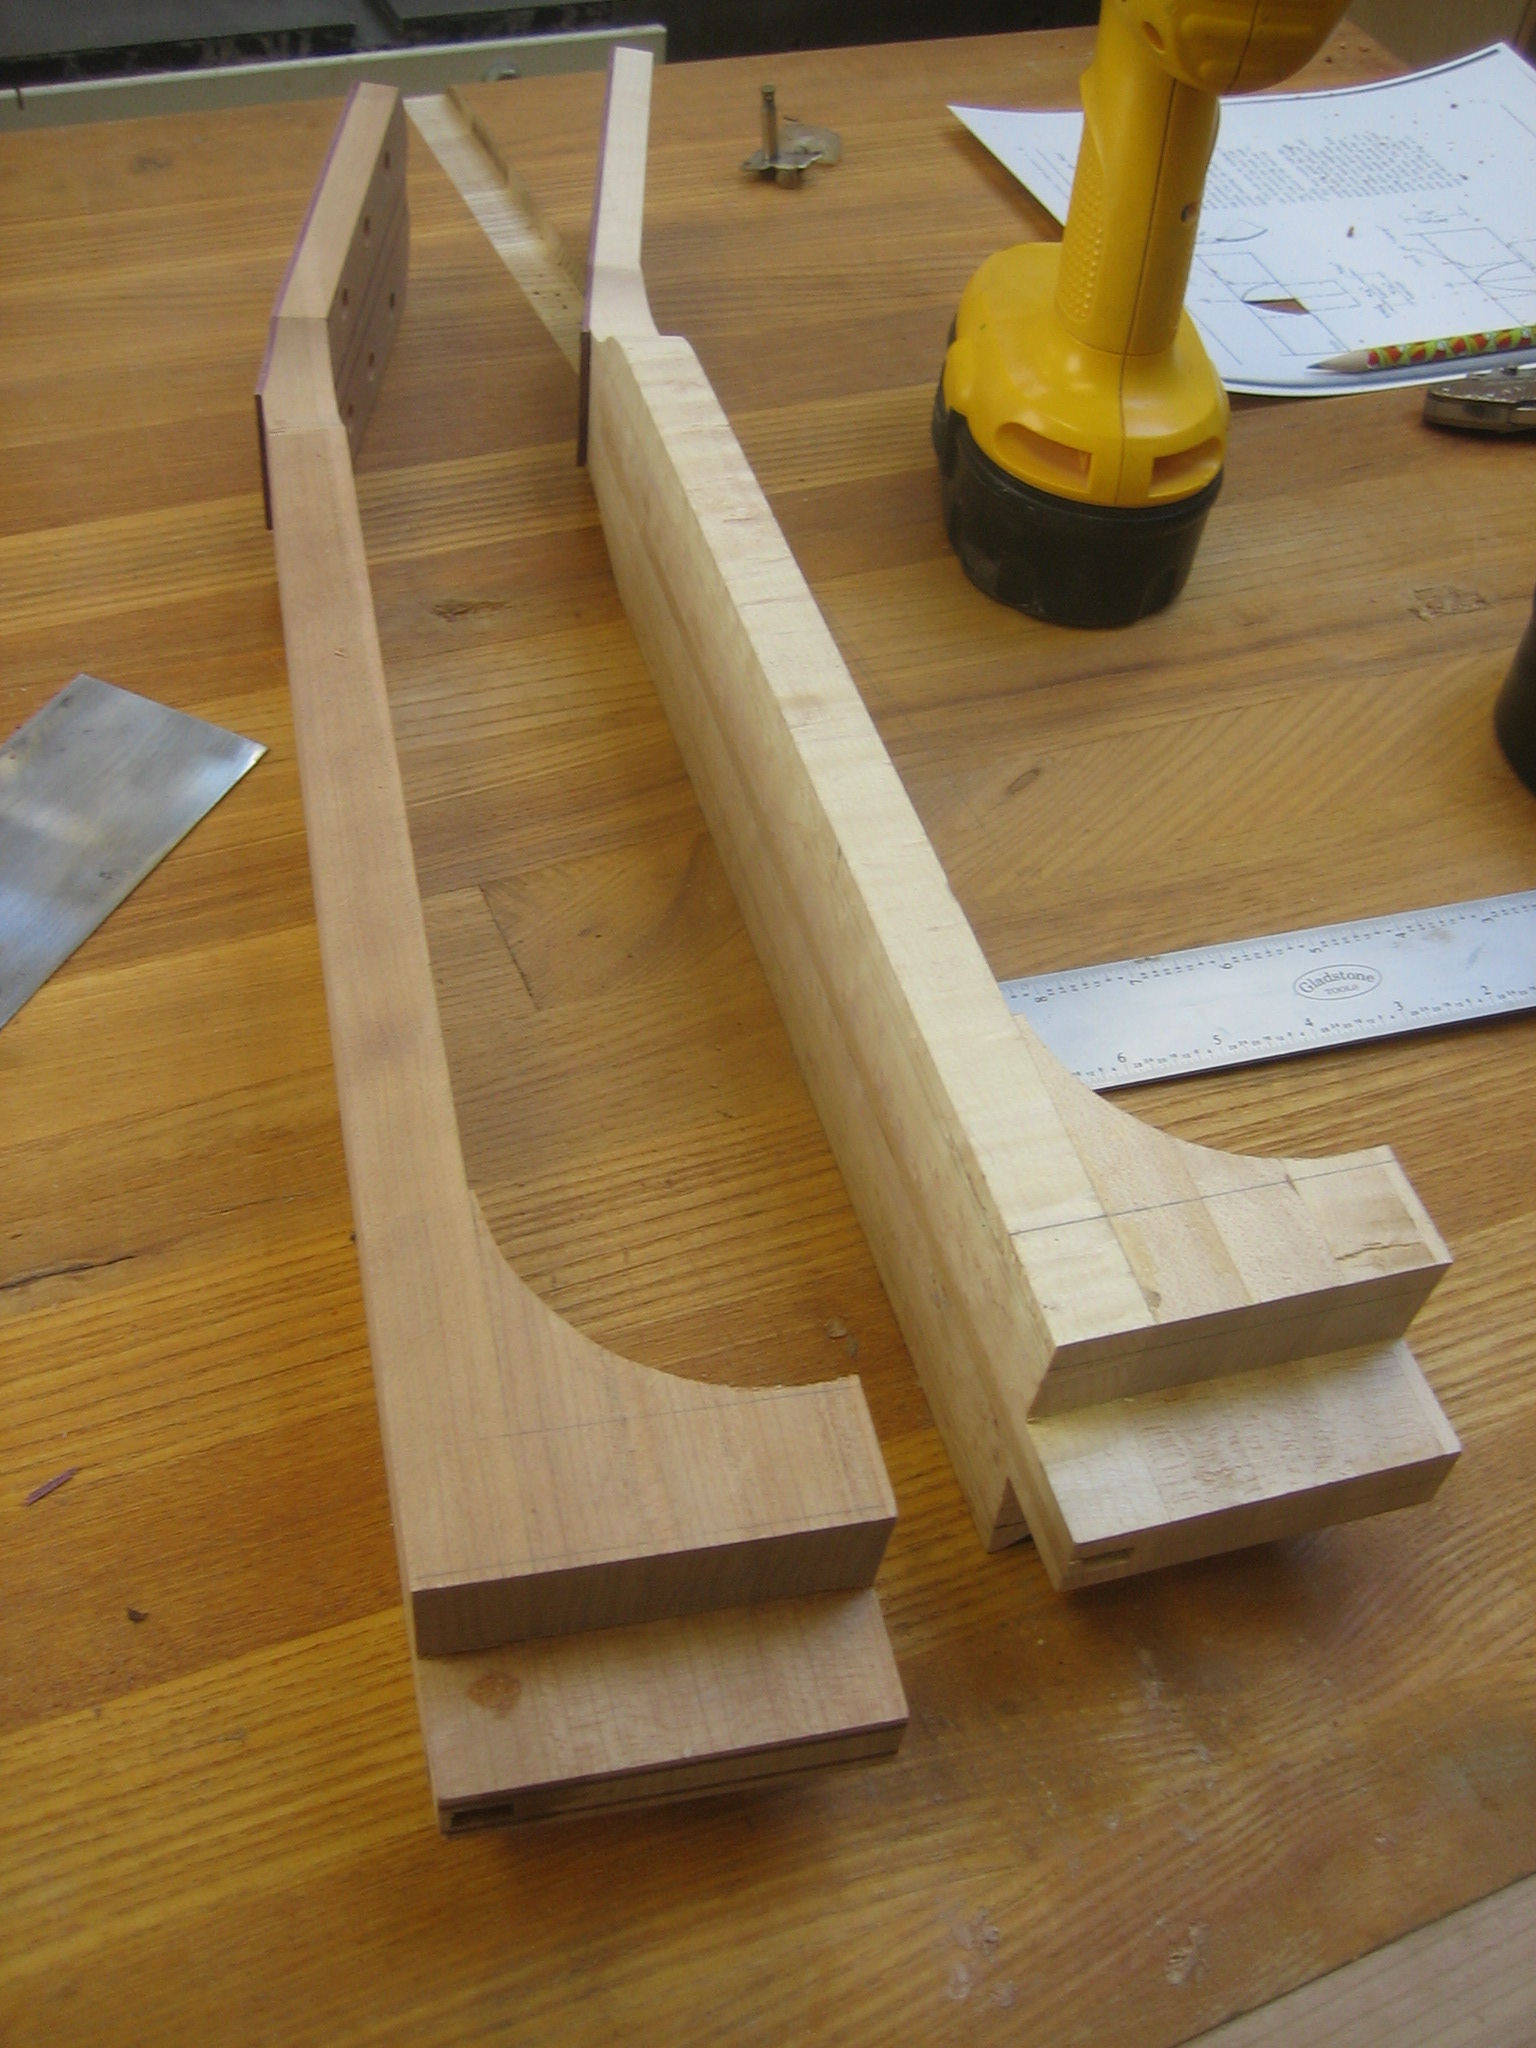
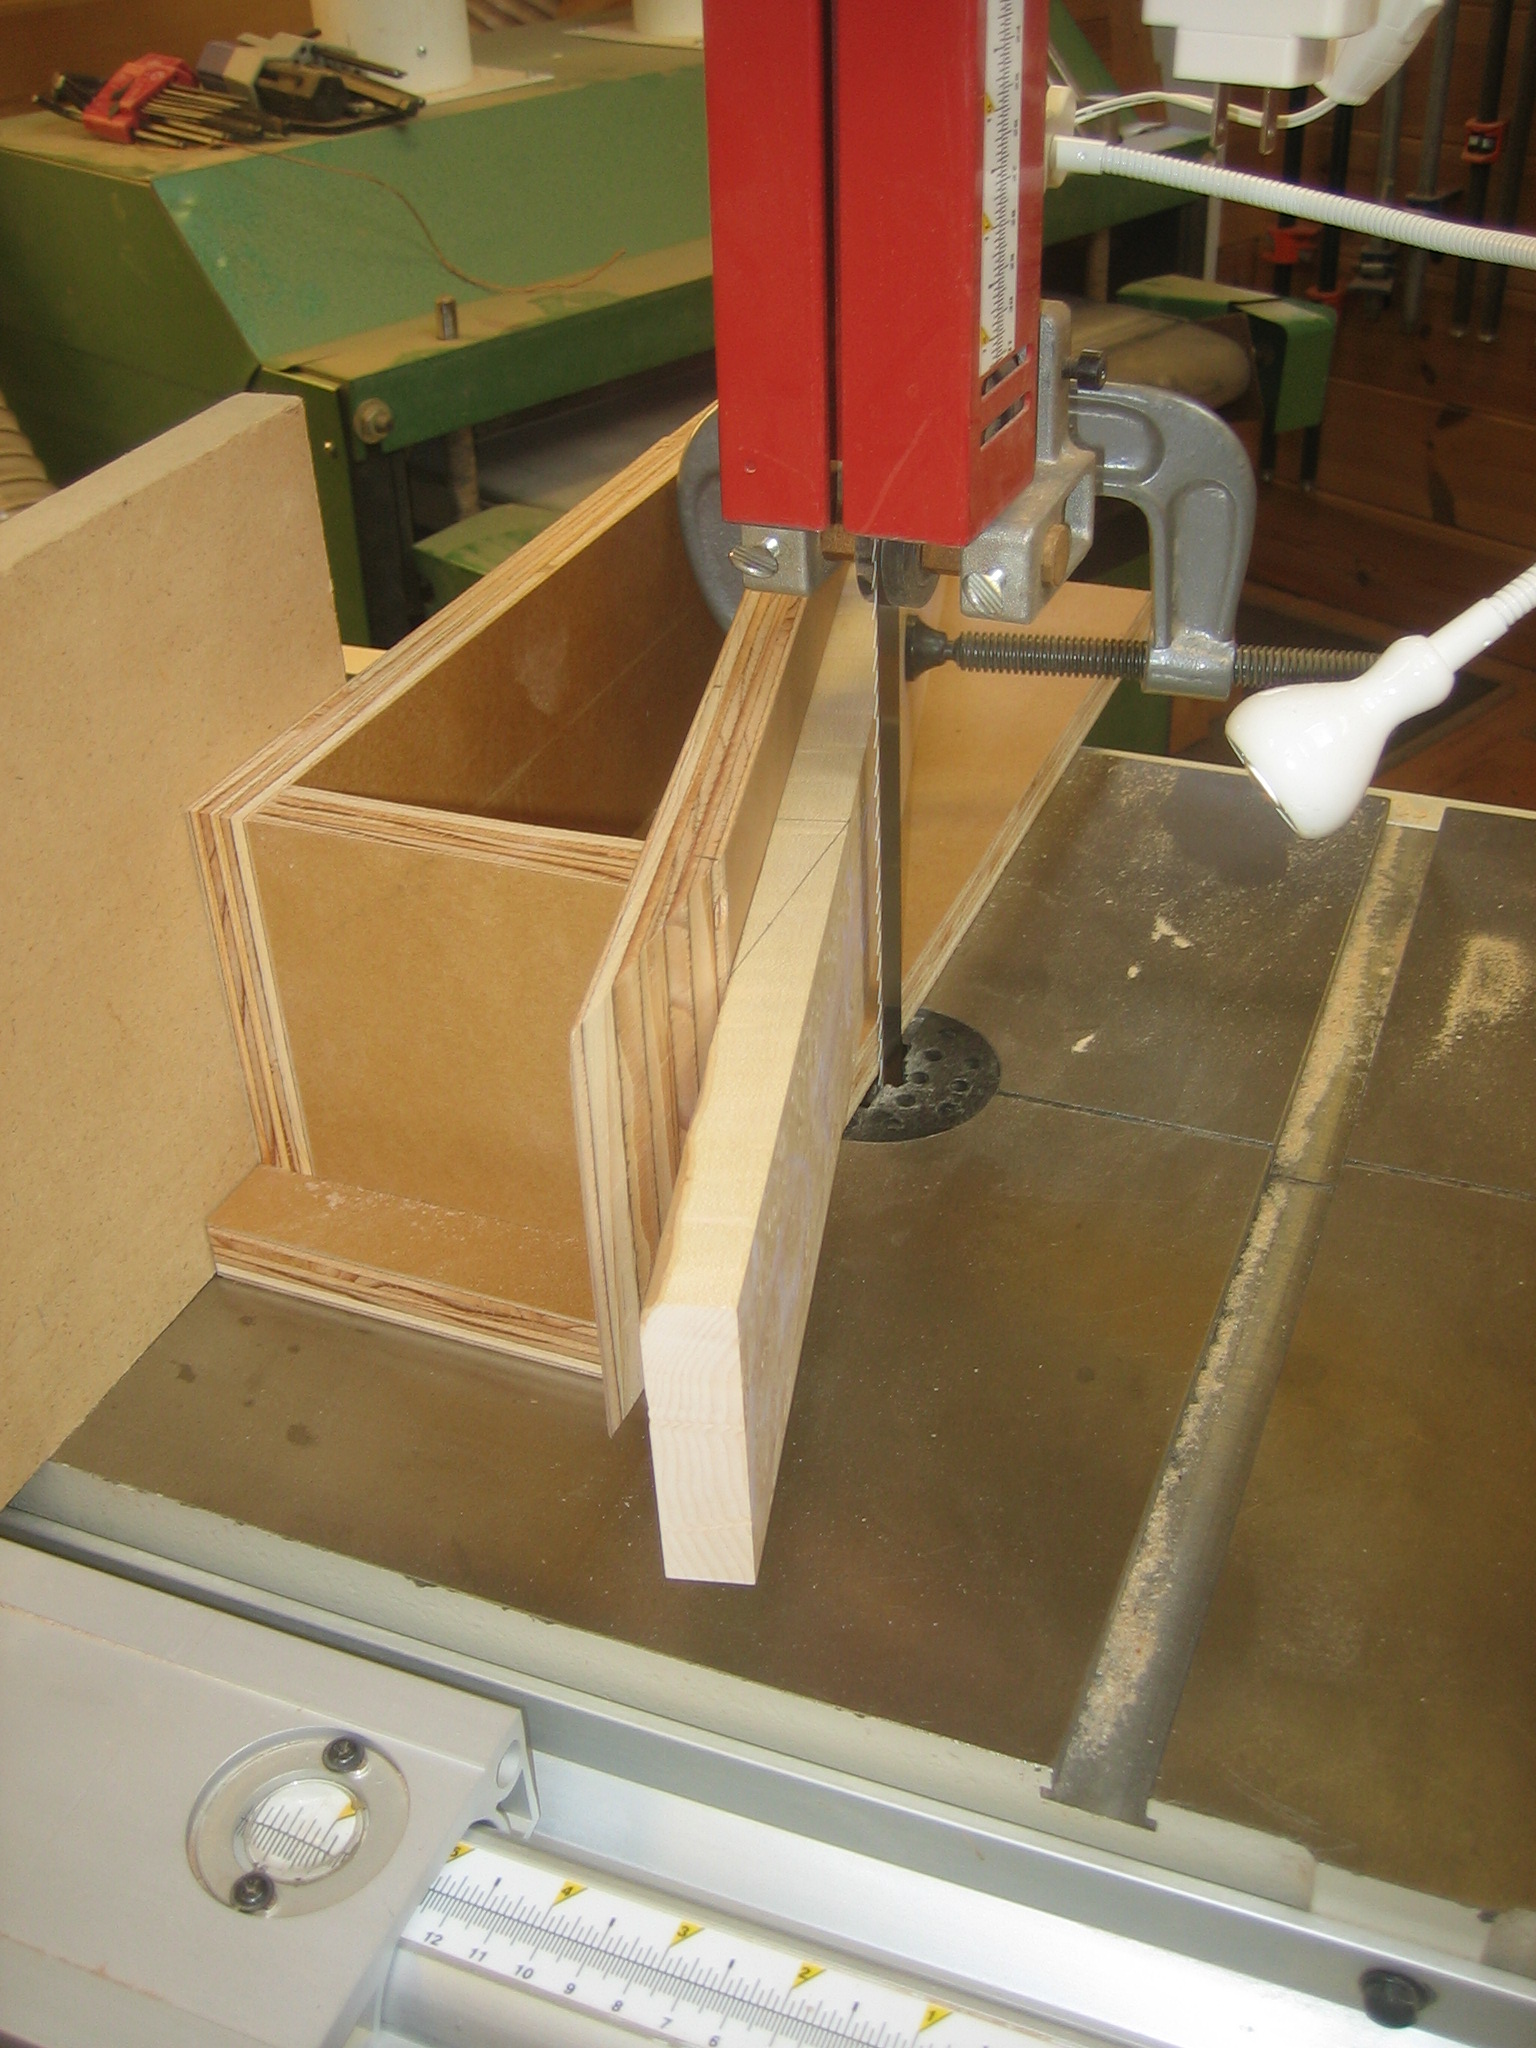
The remaining pictures highlight the process taken to date. I began by building a quick custom taper jig for the bandsaw for cutting the 15° angle in each blank.


Sawing the scarf joints on the bandsaw

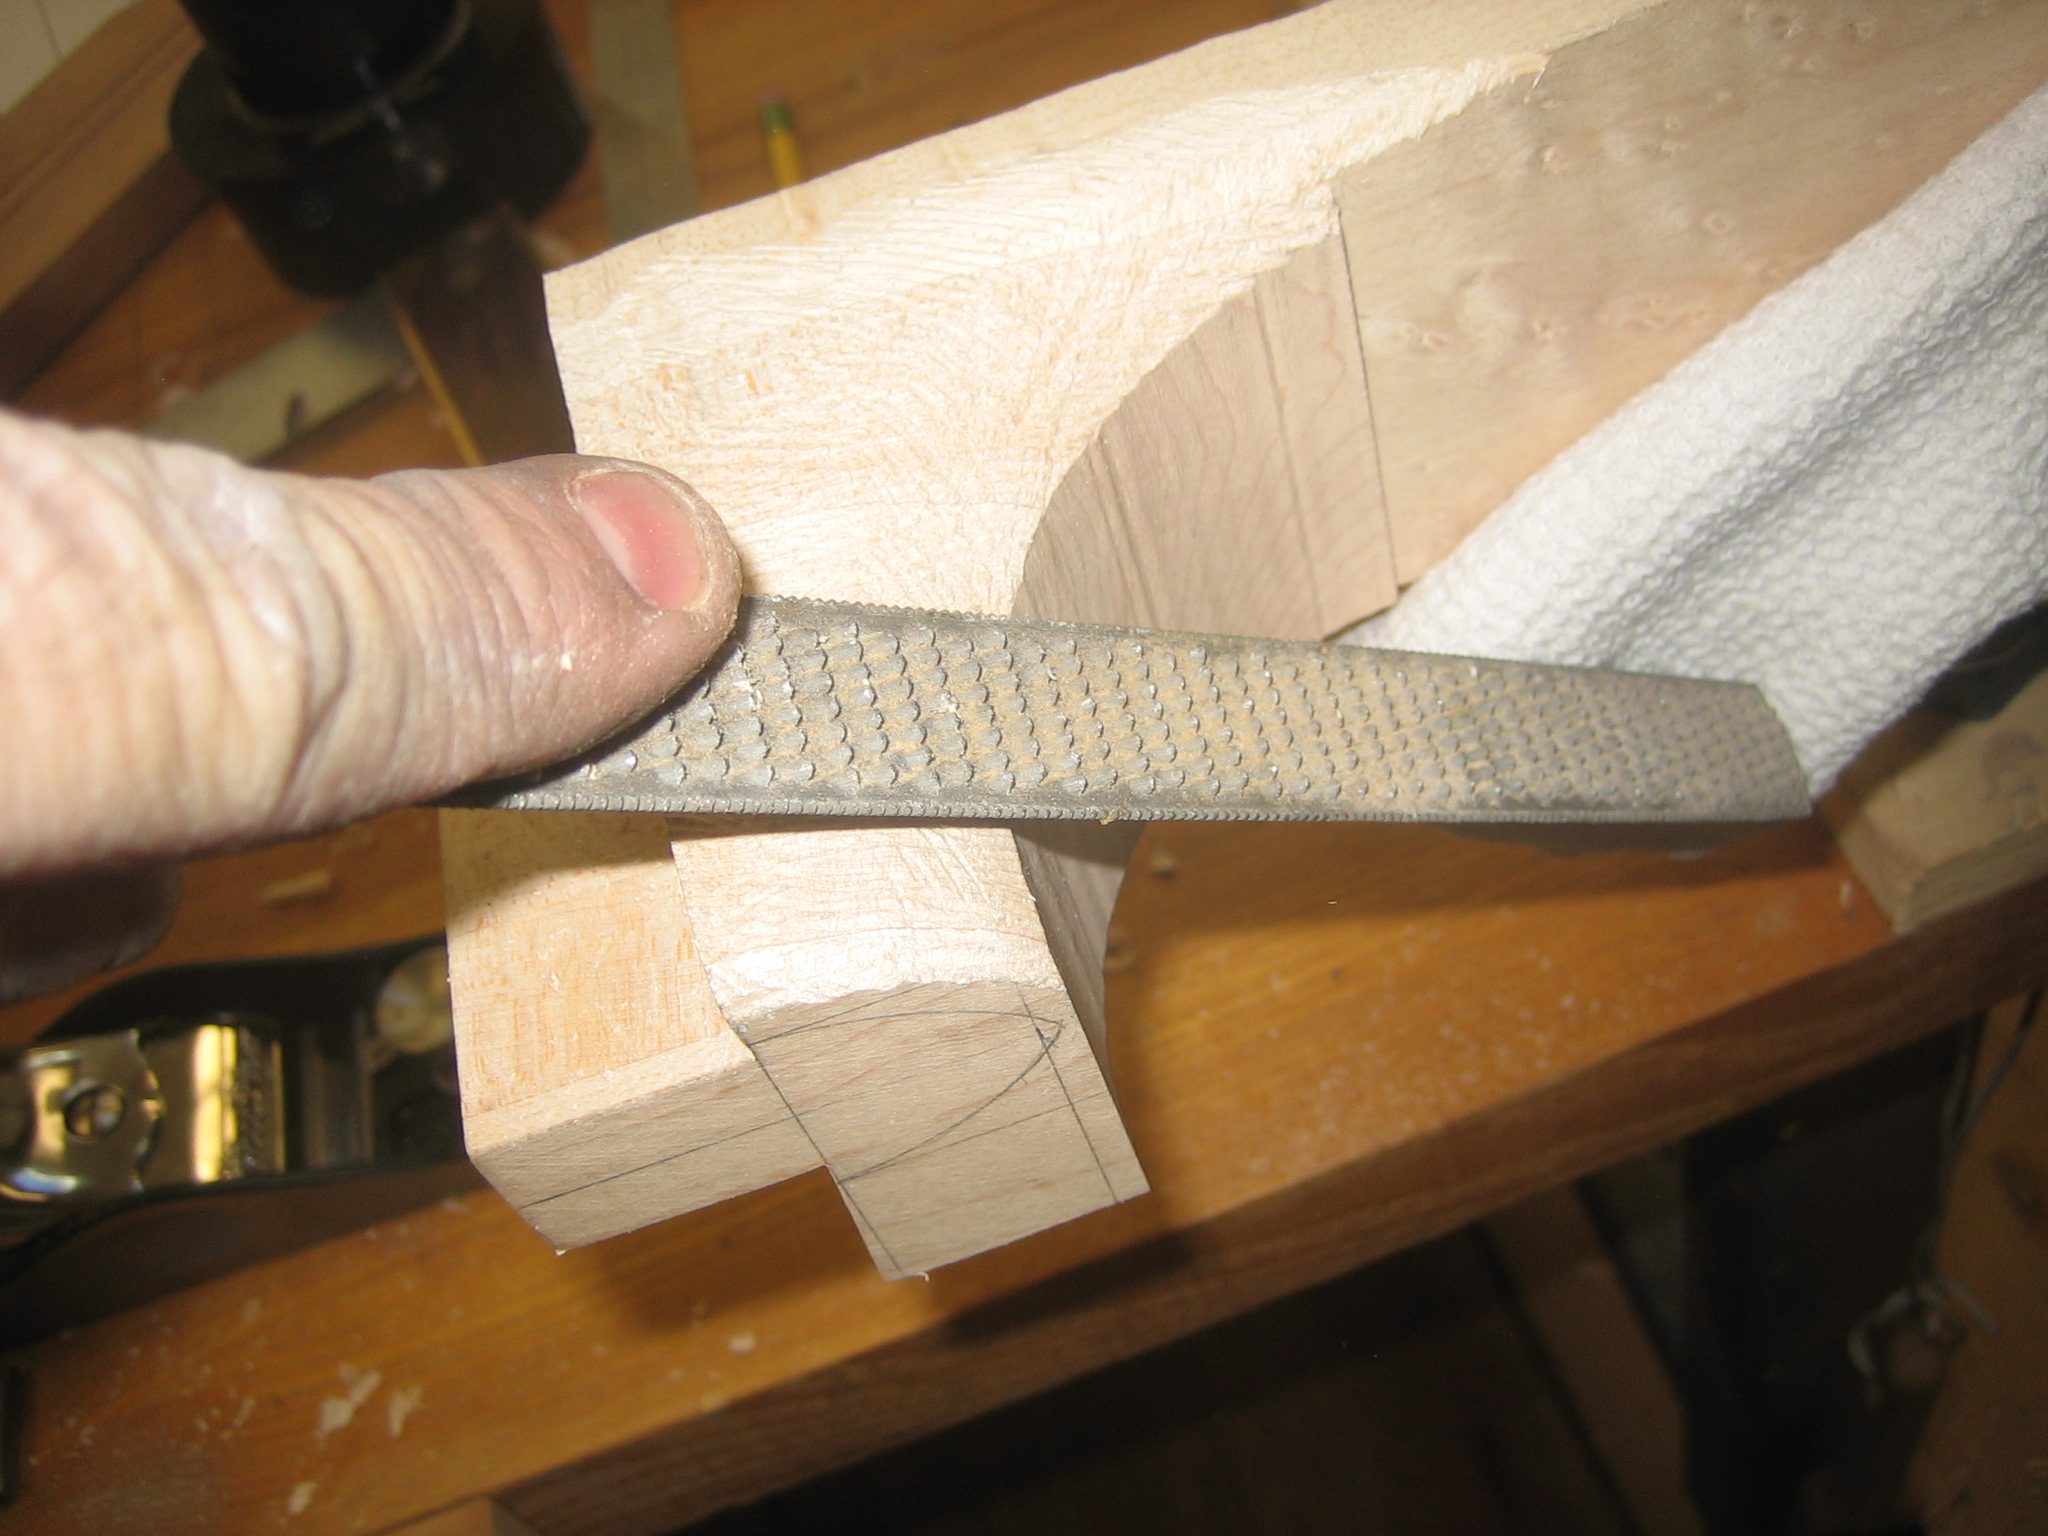
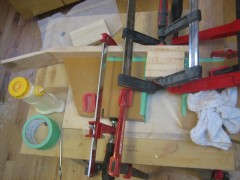
Then I sanded and scraped the resulting cut to clean it up and flatten it out (though apparently I didn’t take any photos of those steps), cut the sections for the heel block, glued it all together, and then sanded/scraped it flat, flush, and clean.

Scrapping the glued scarf joint.


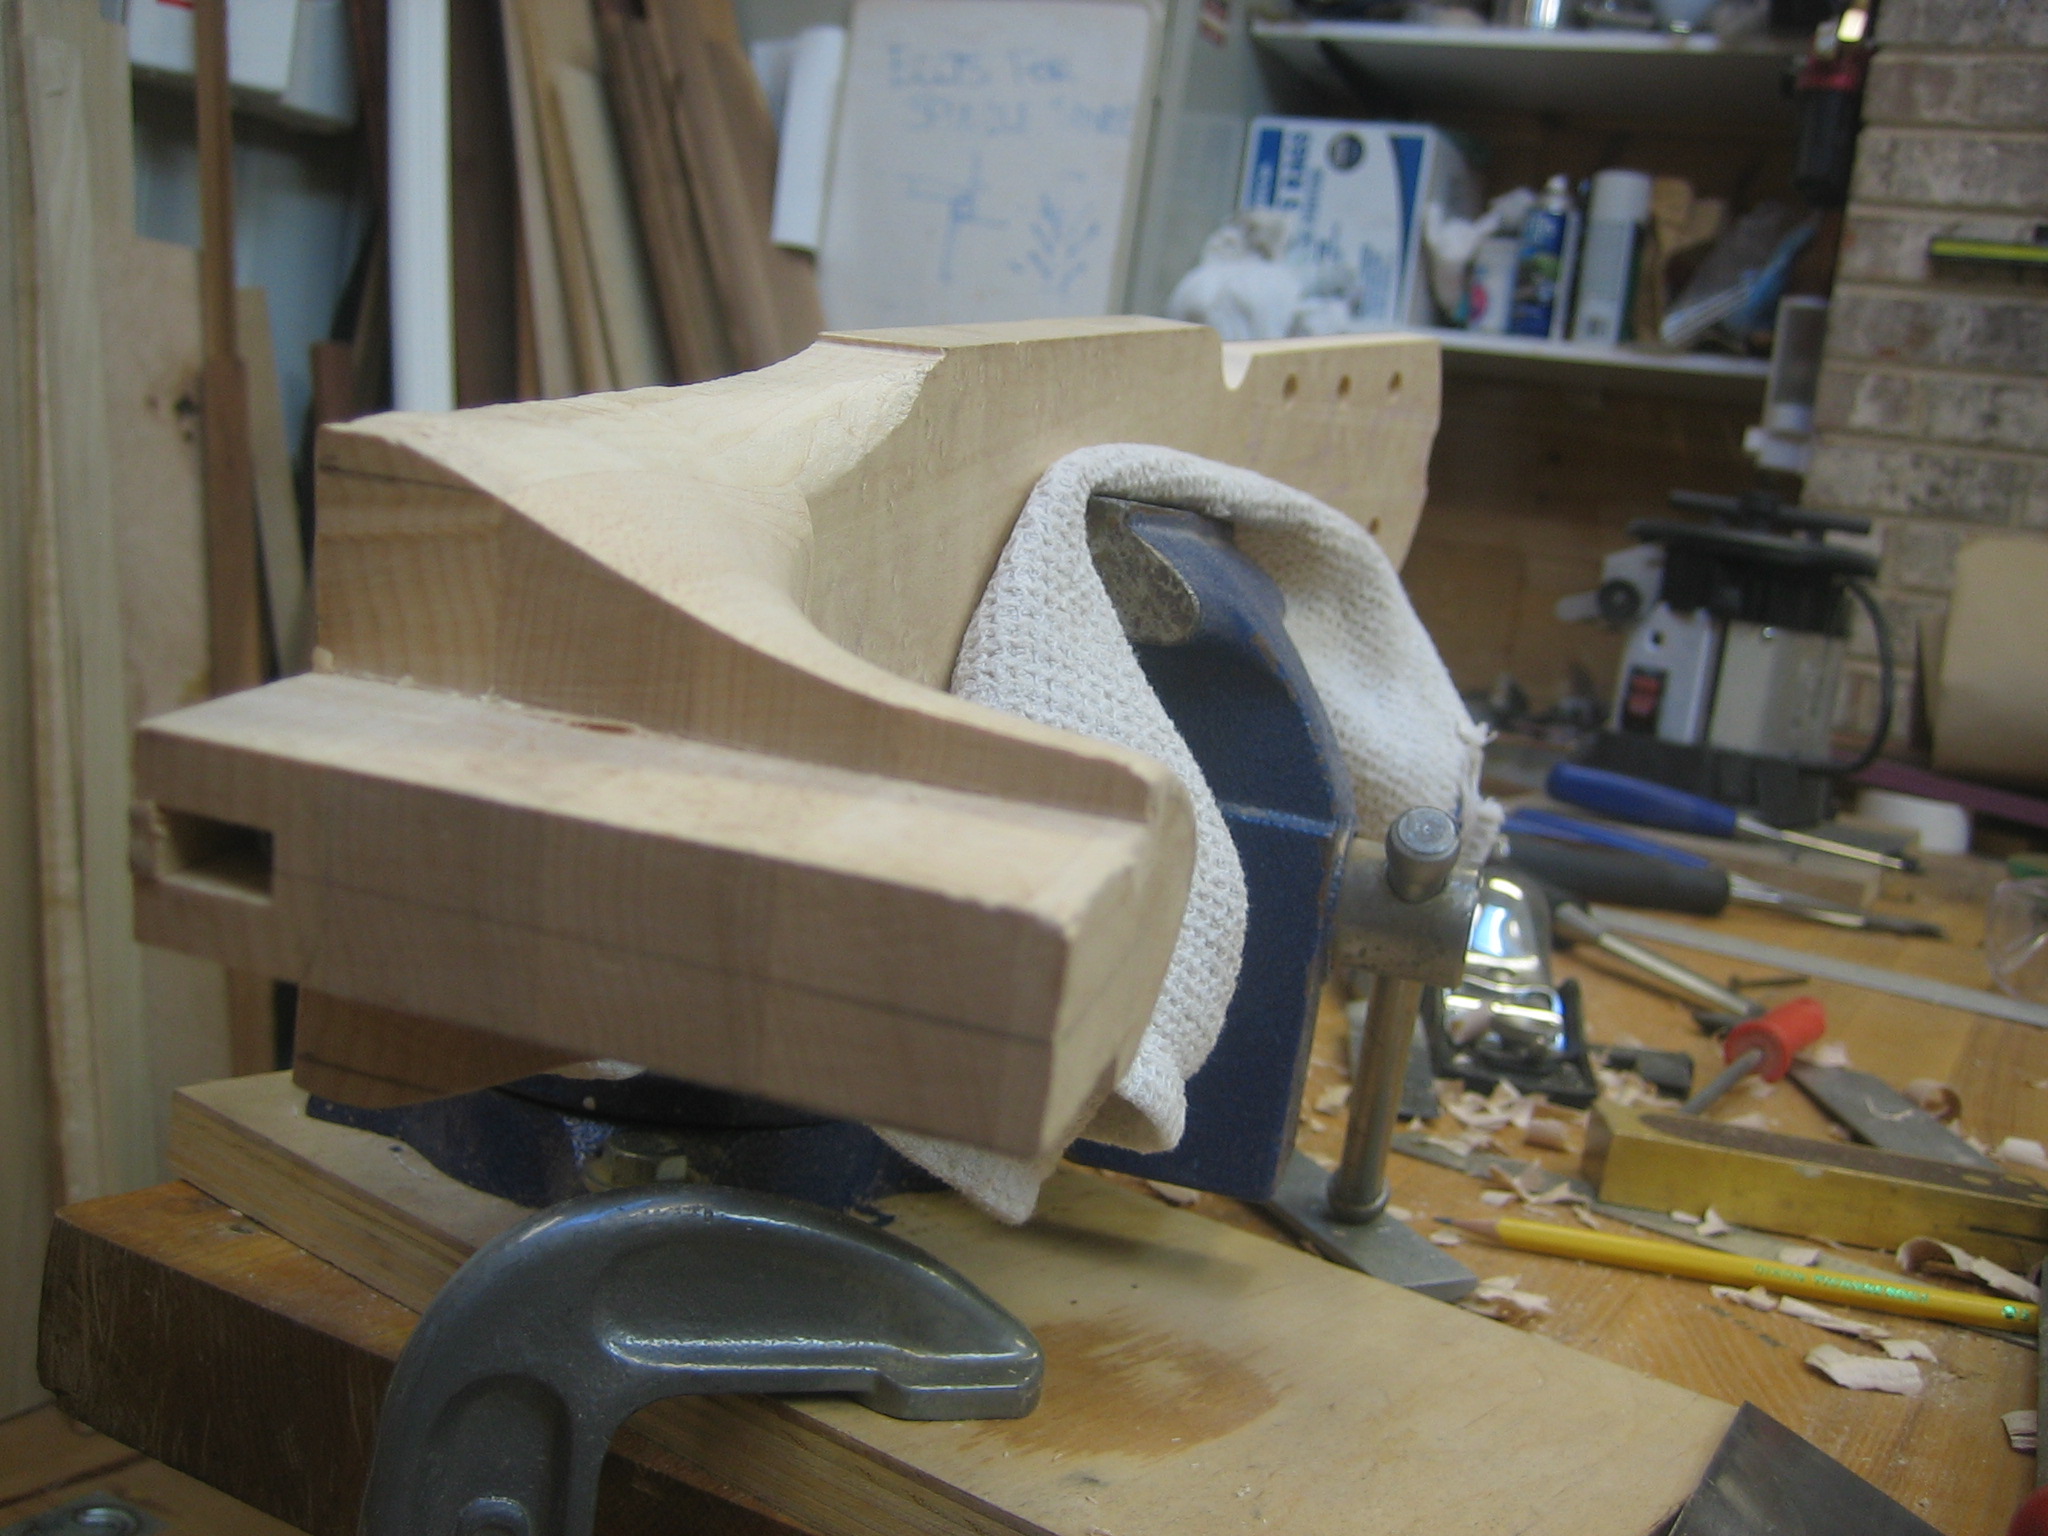
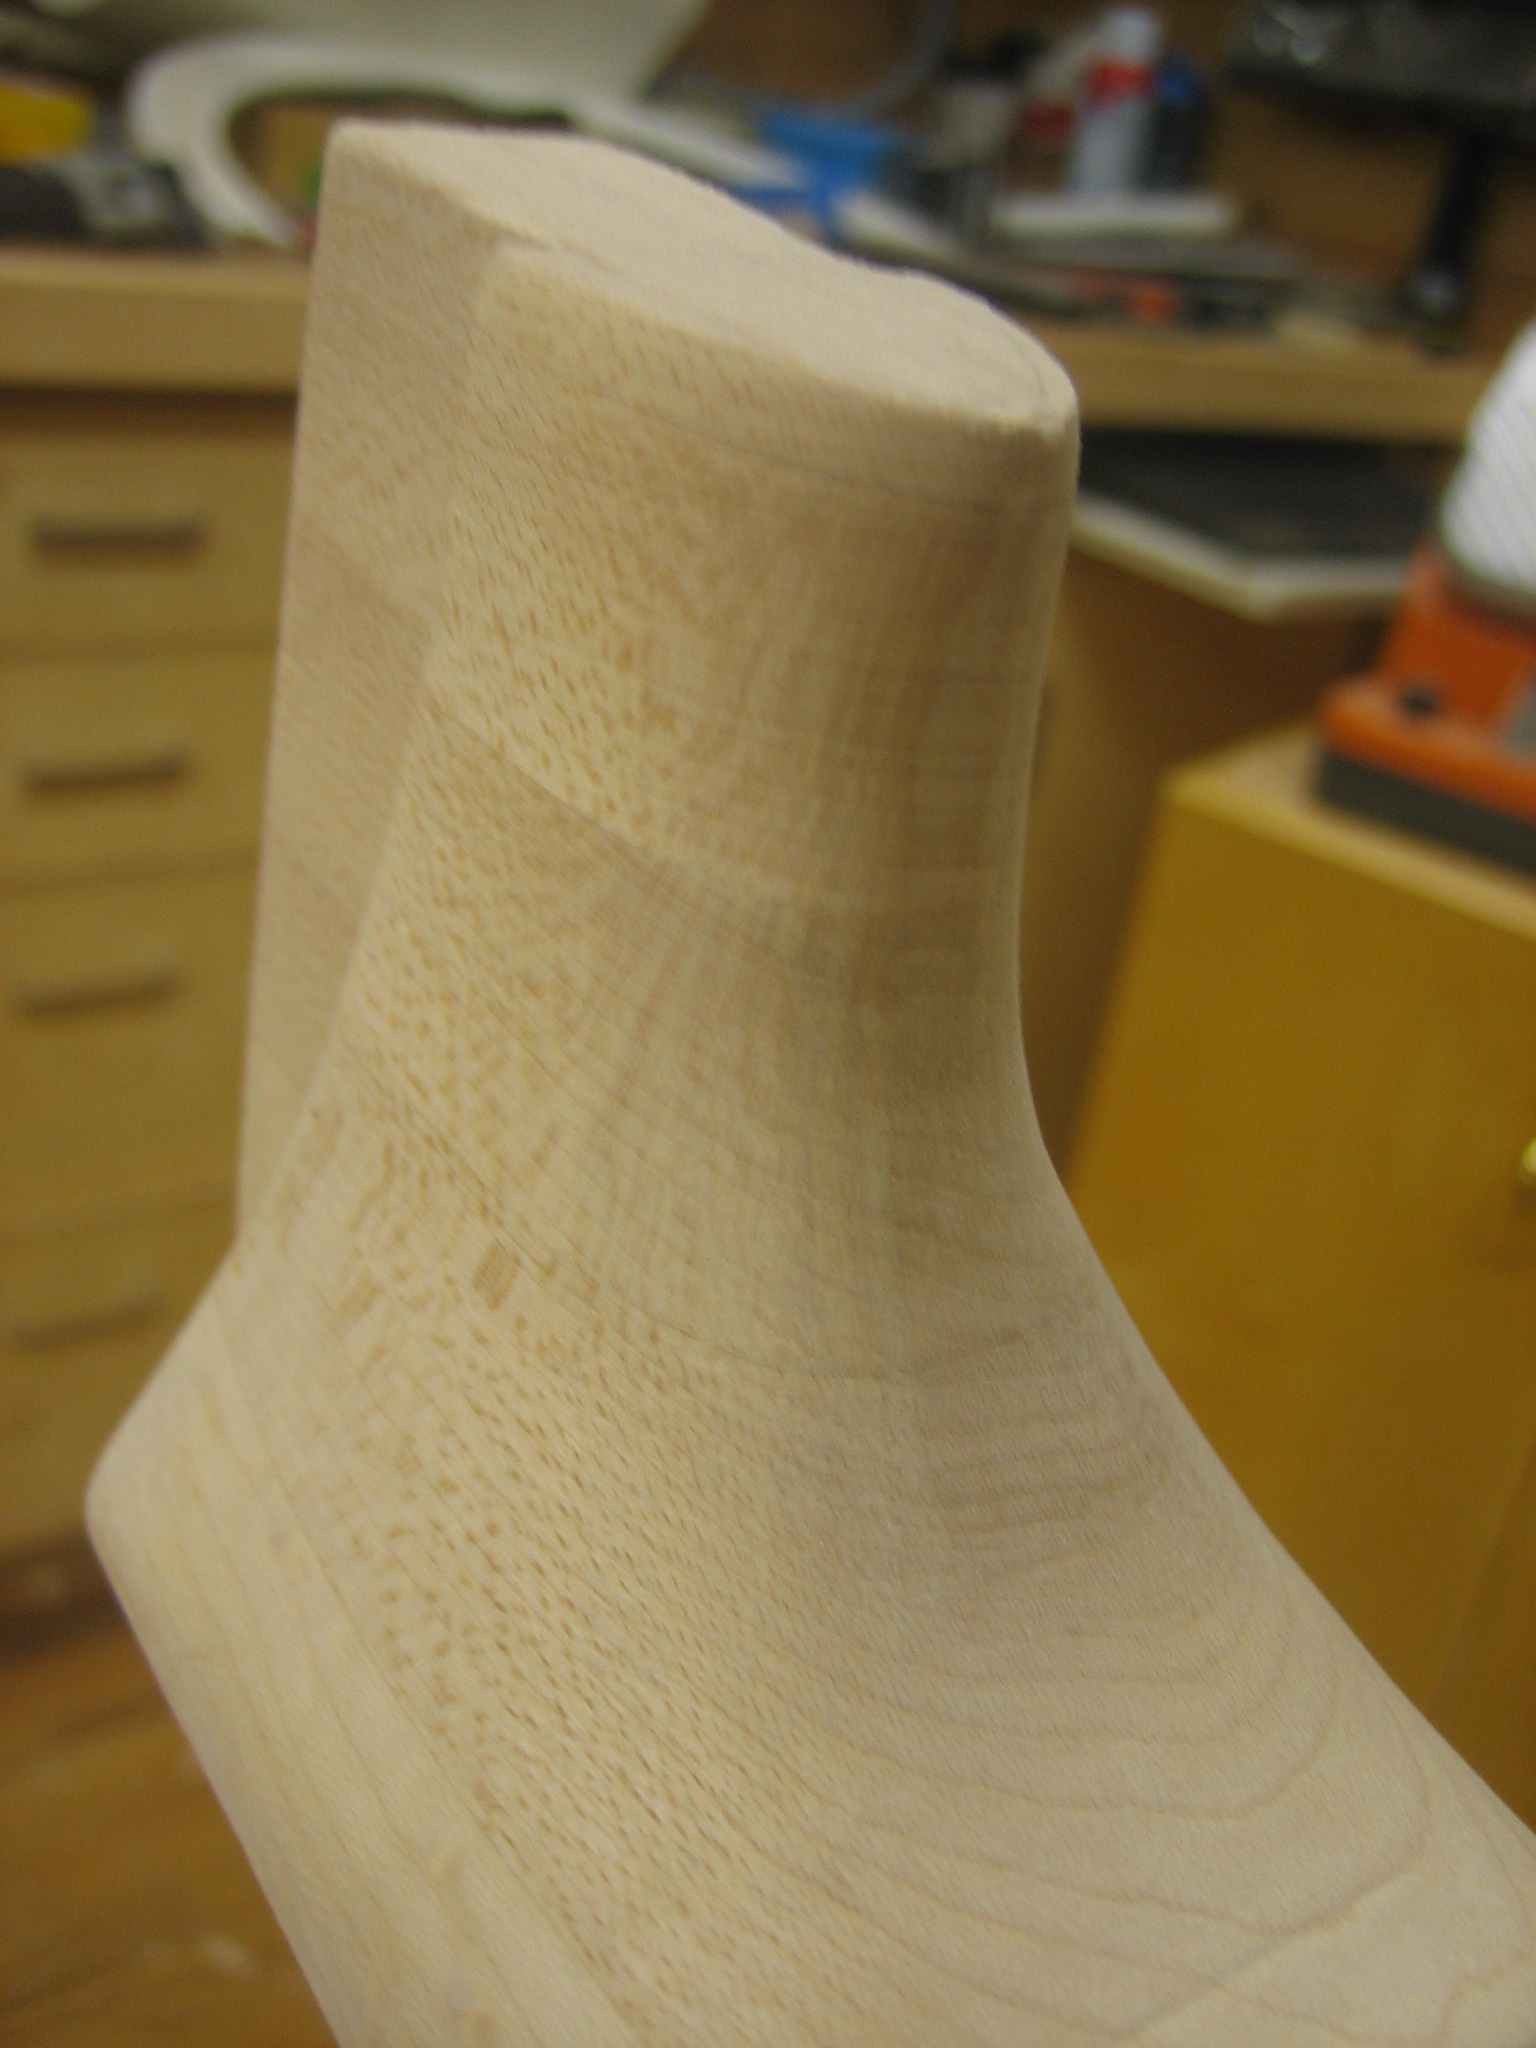
Glueing the heel block.

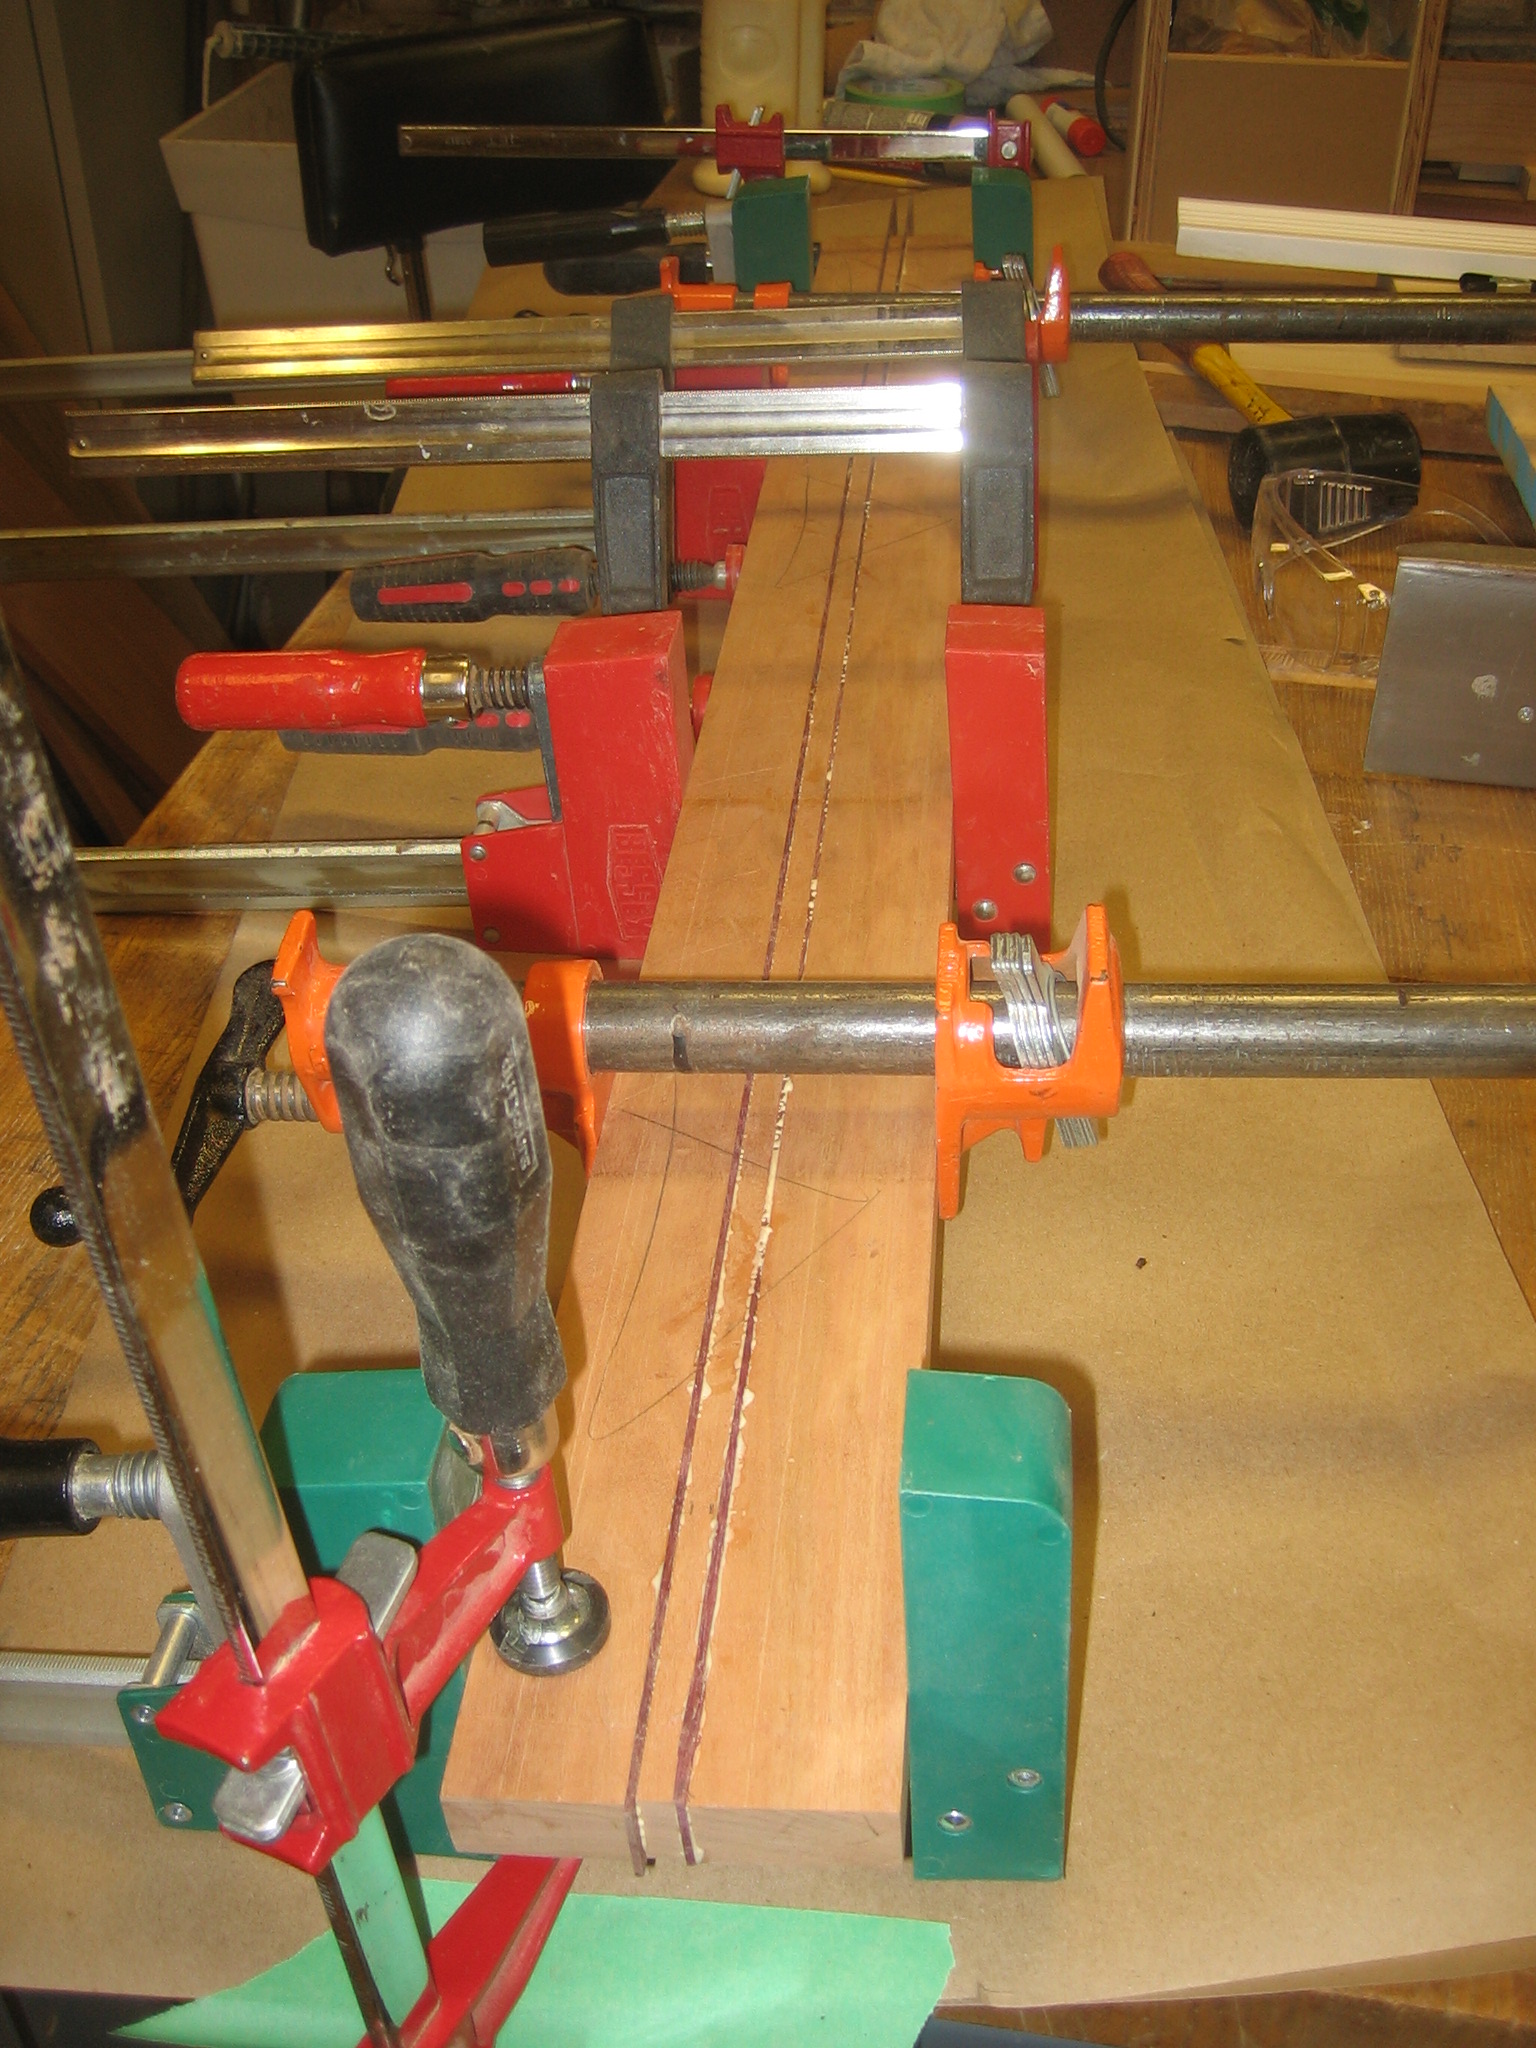
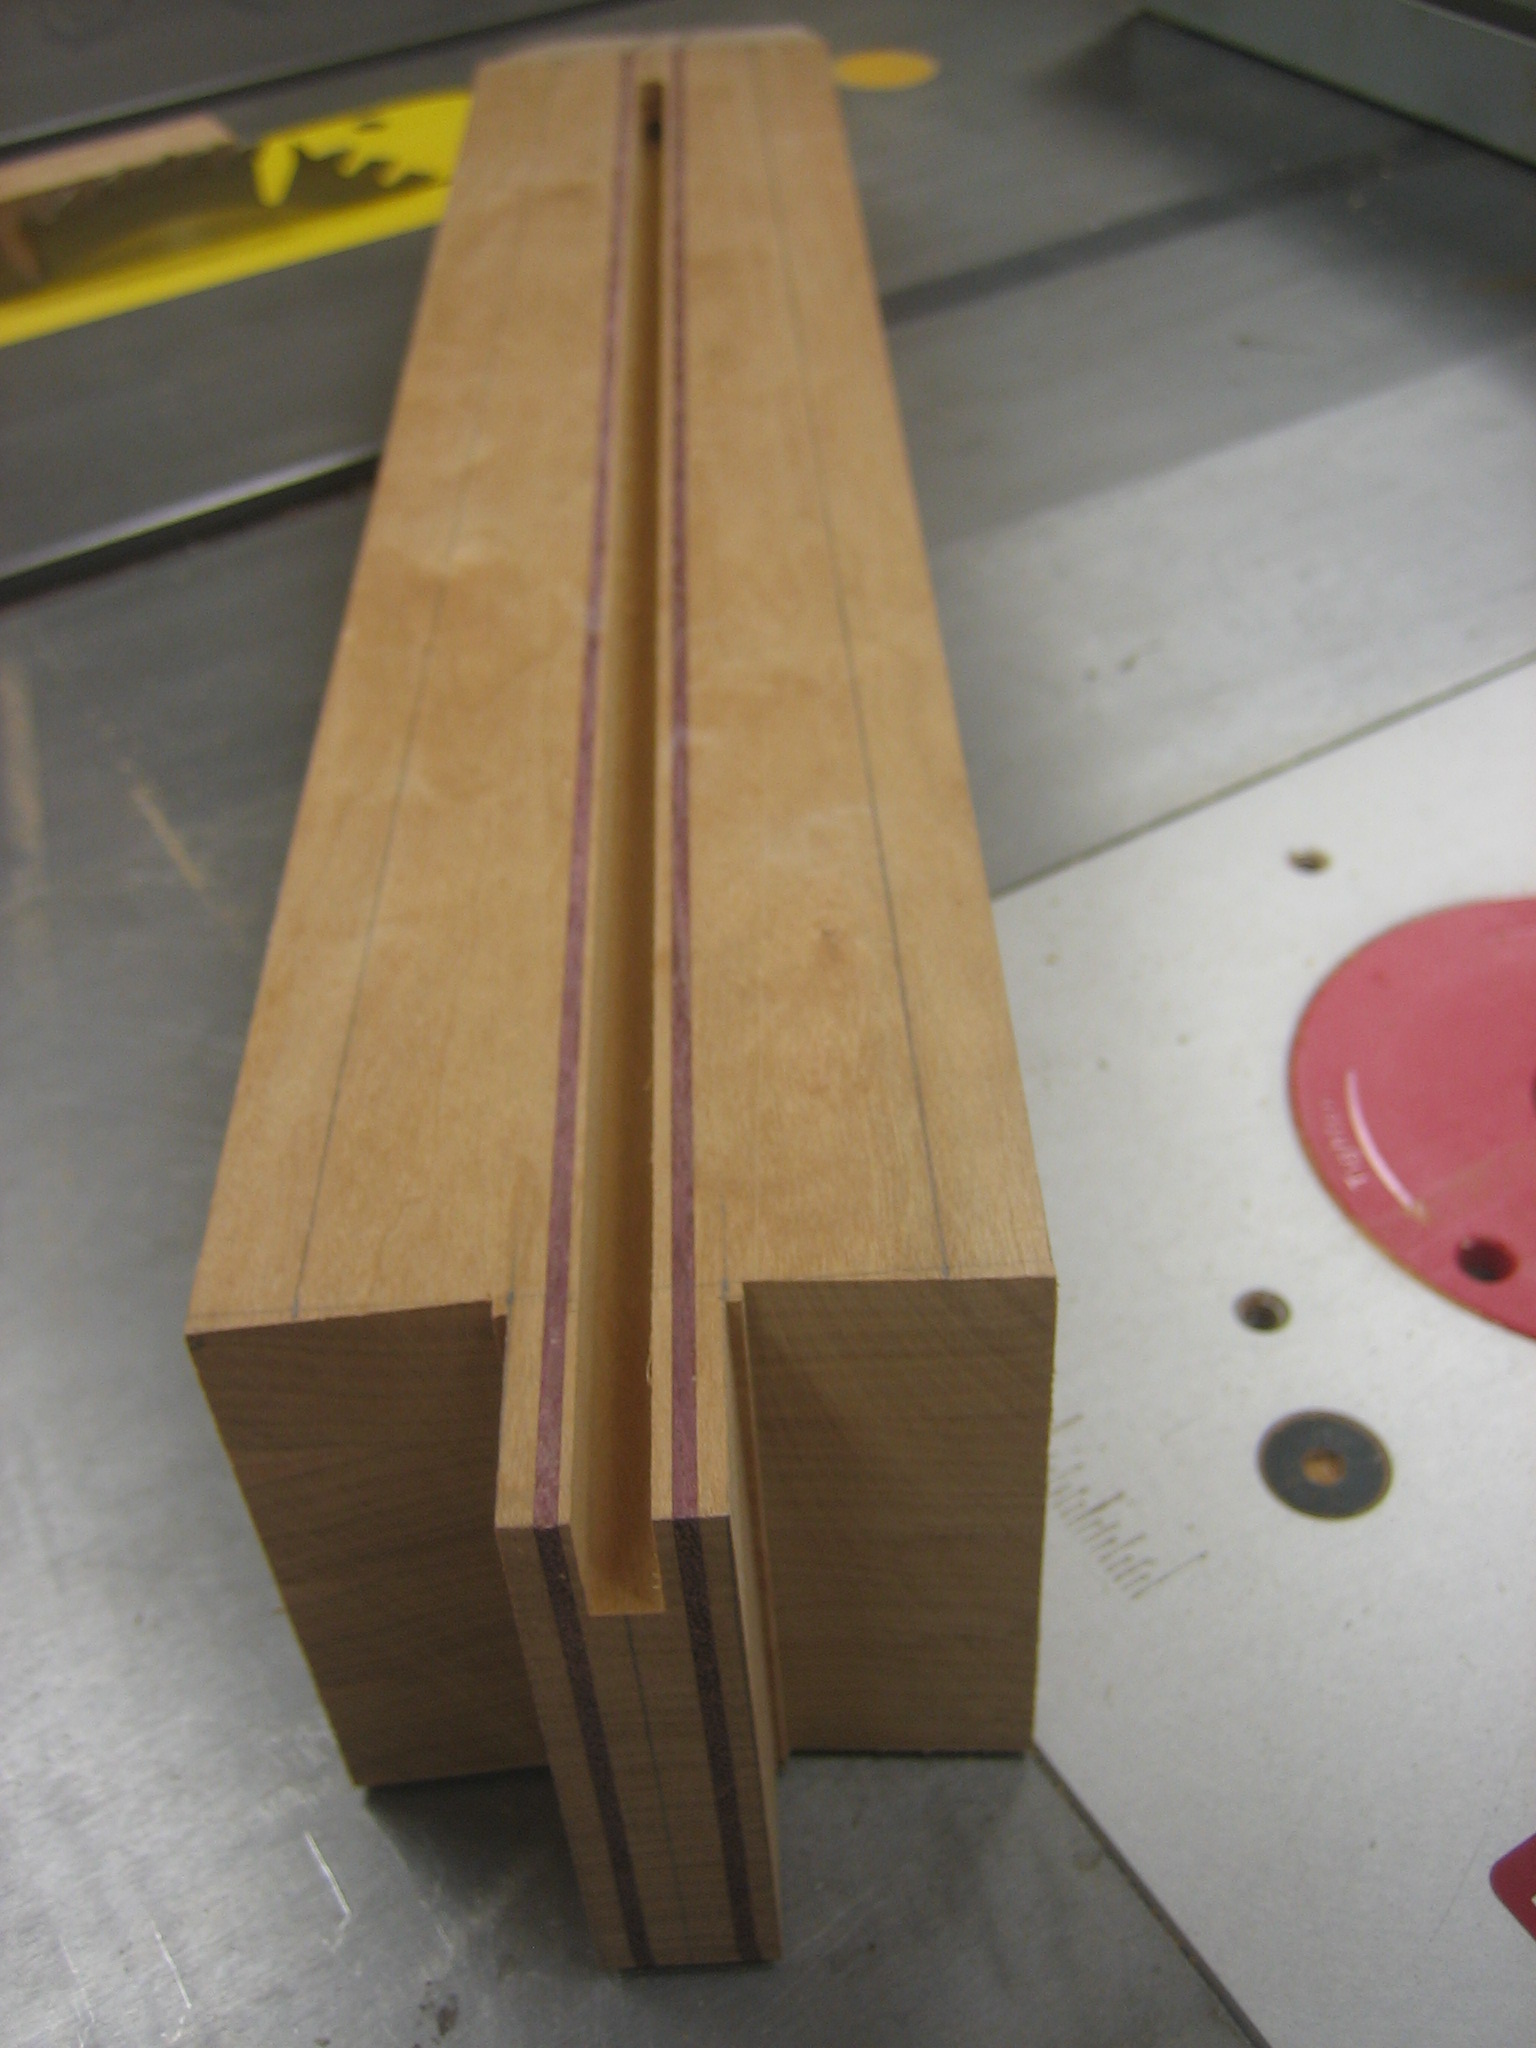
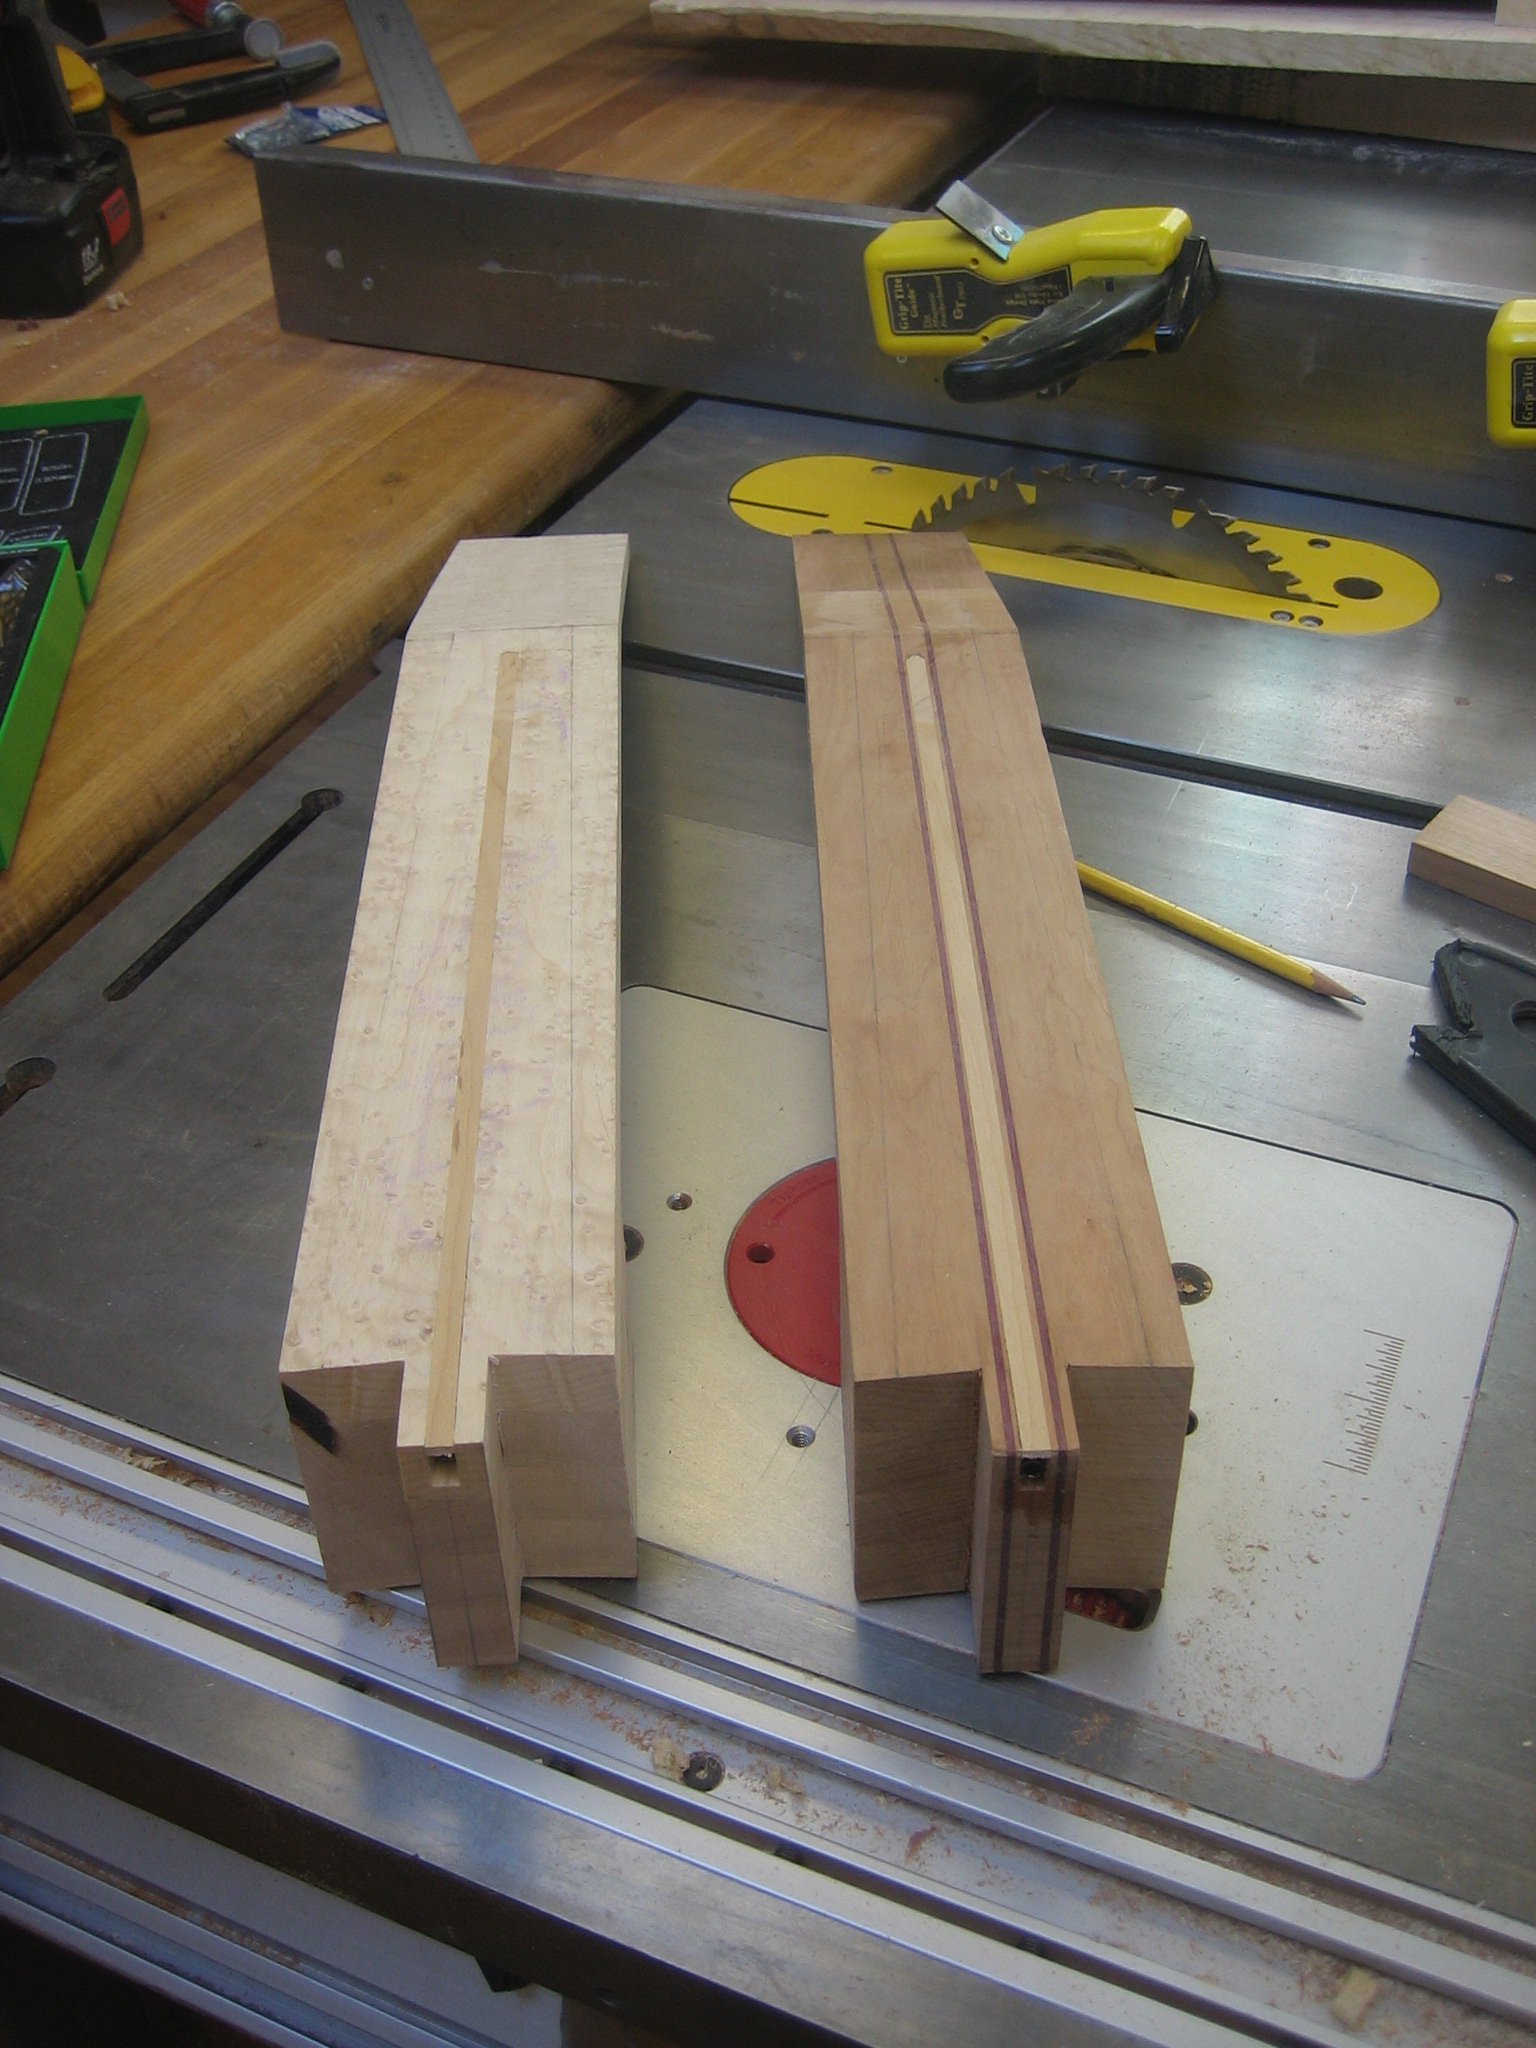
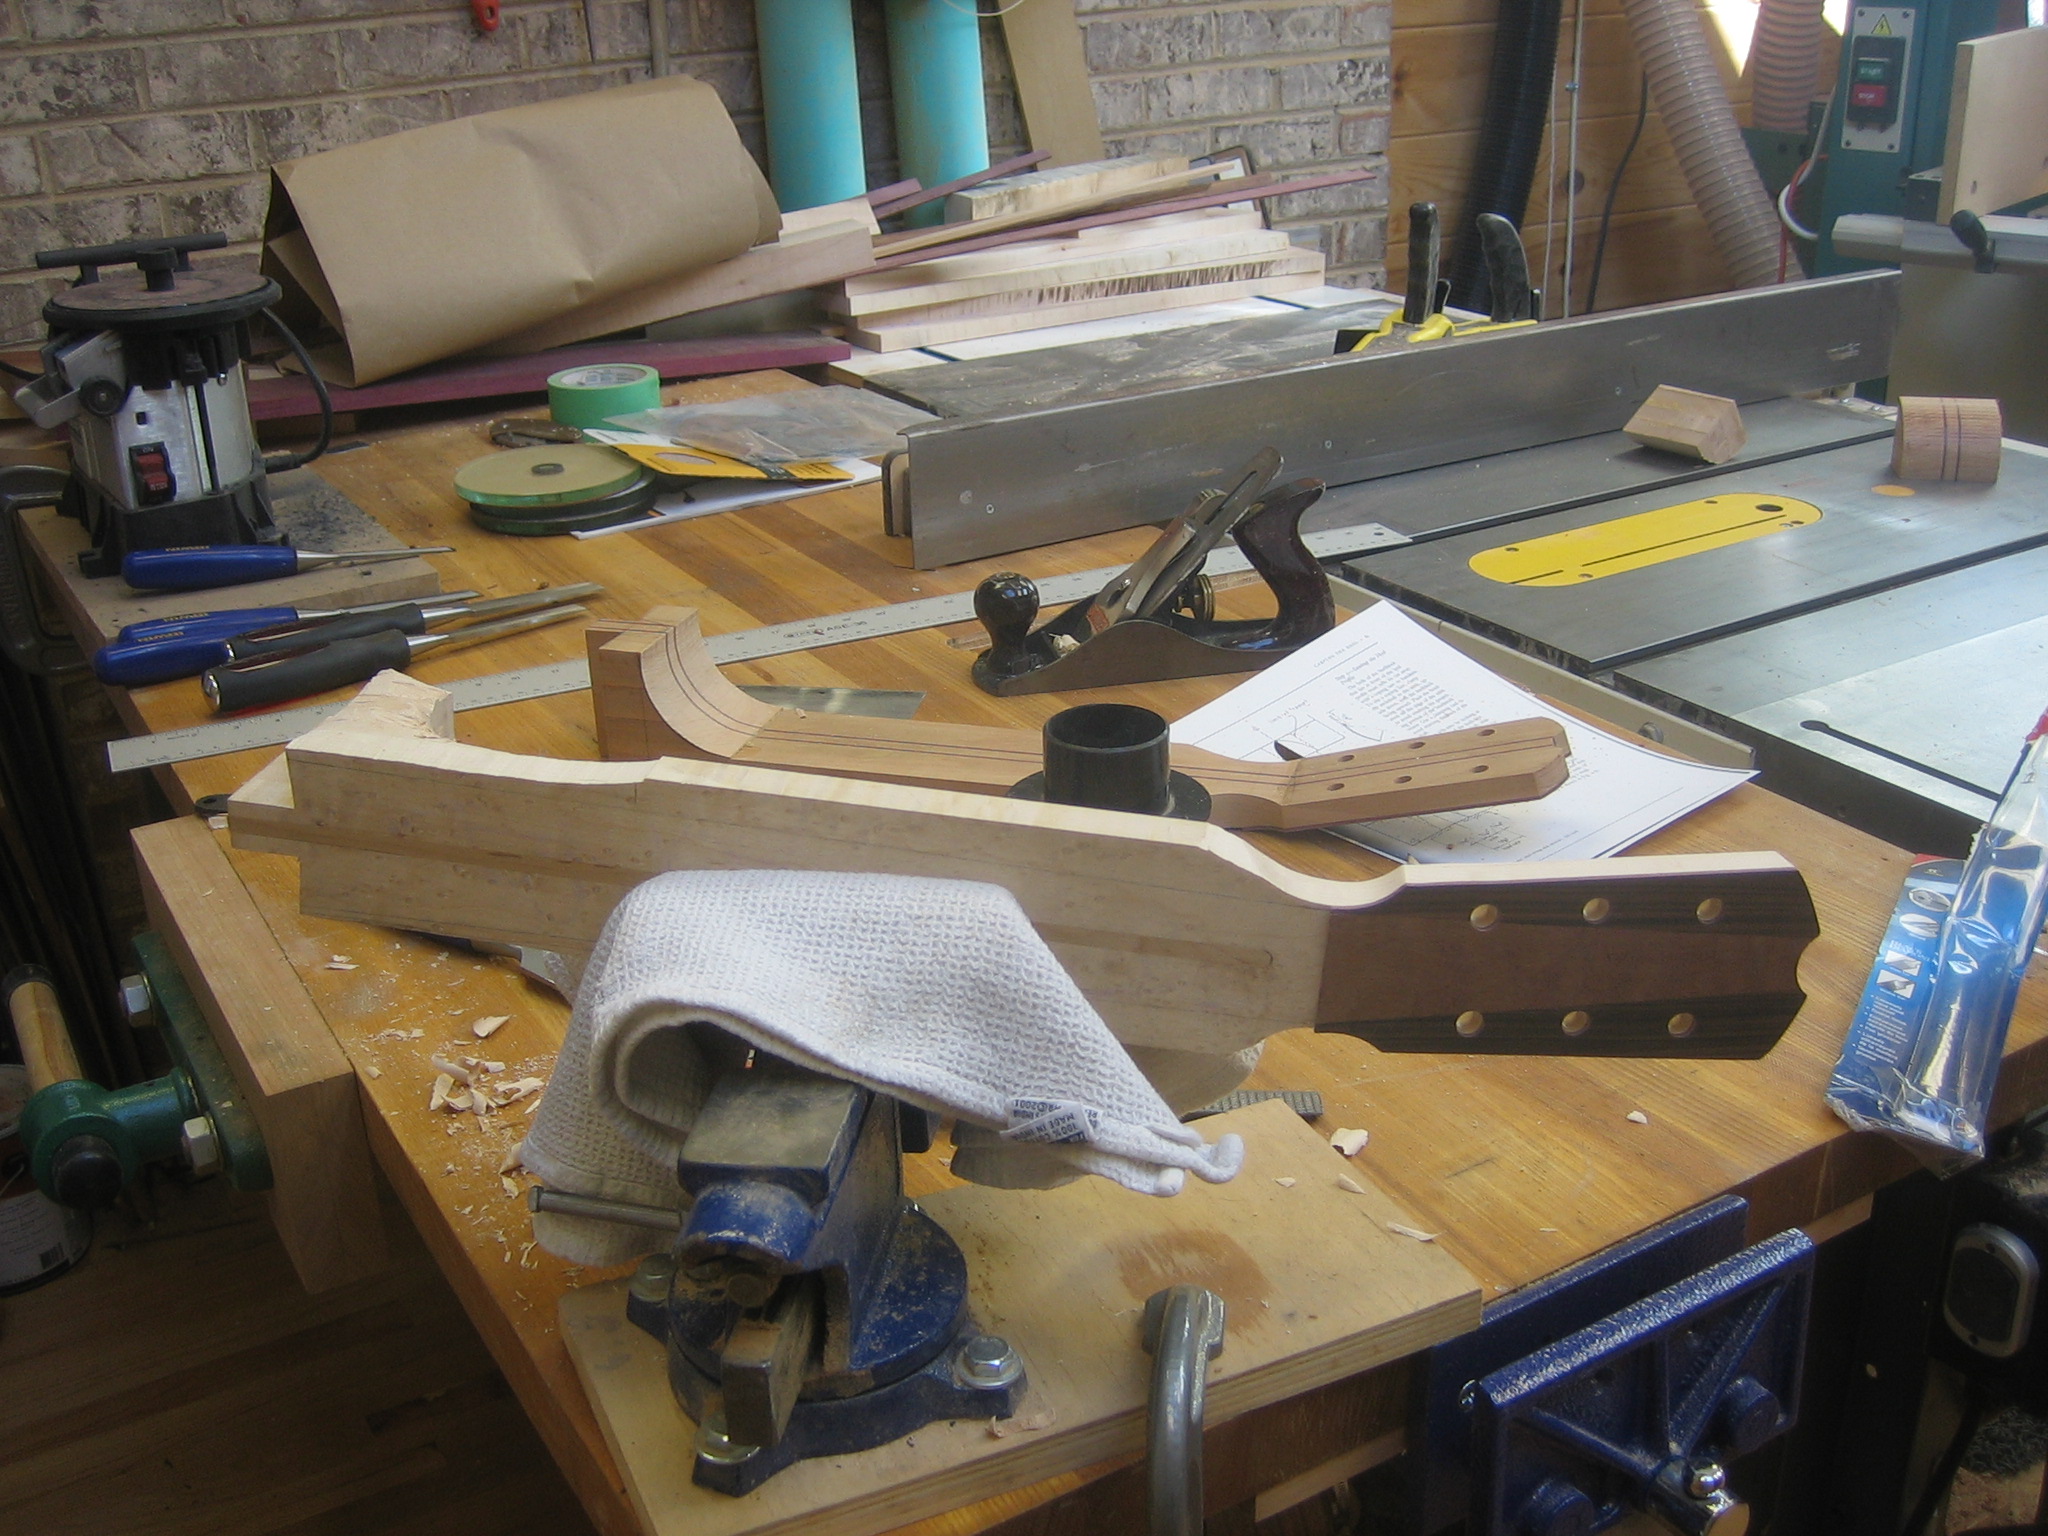
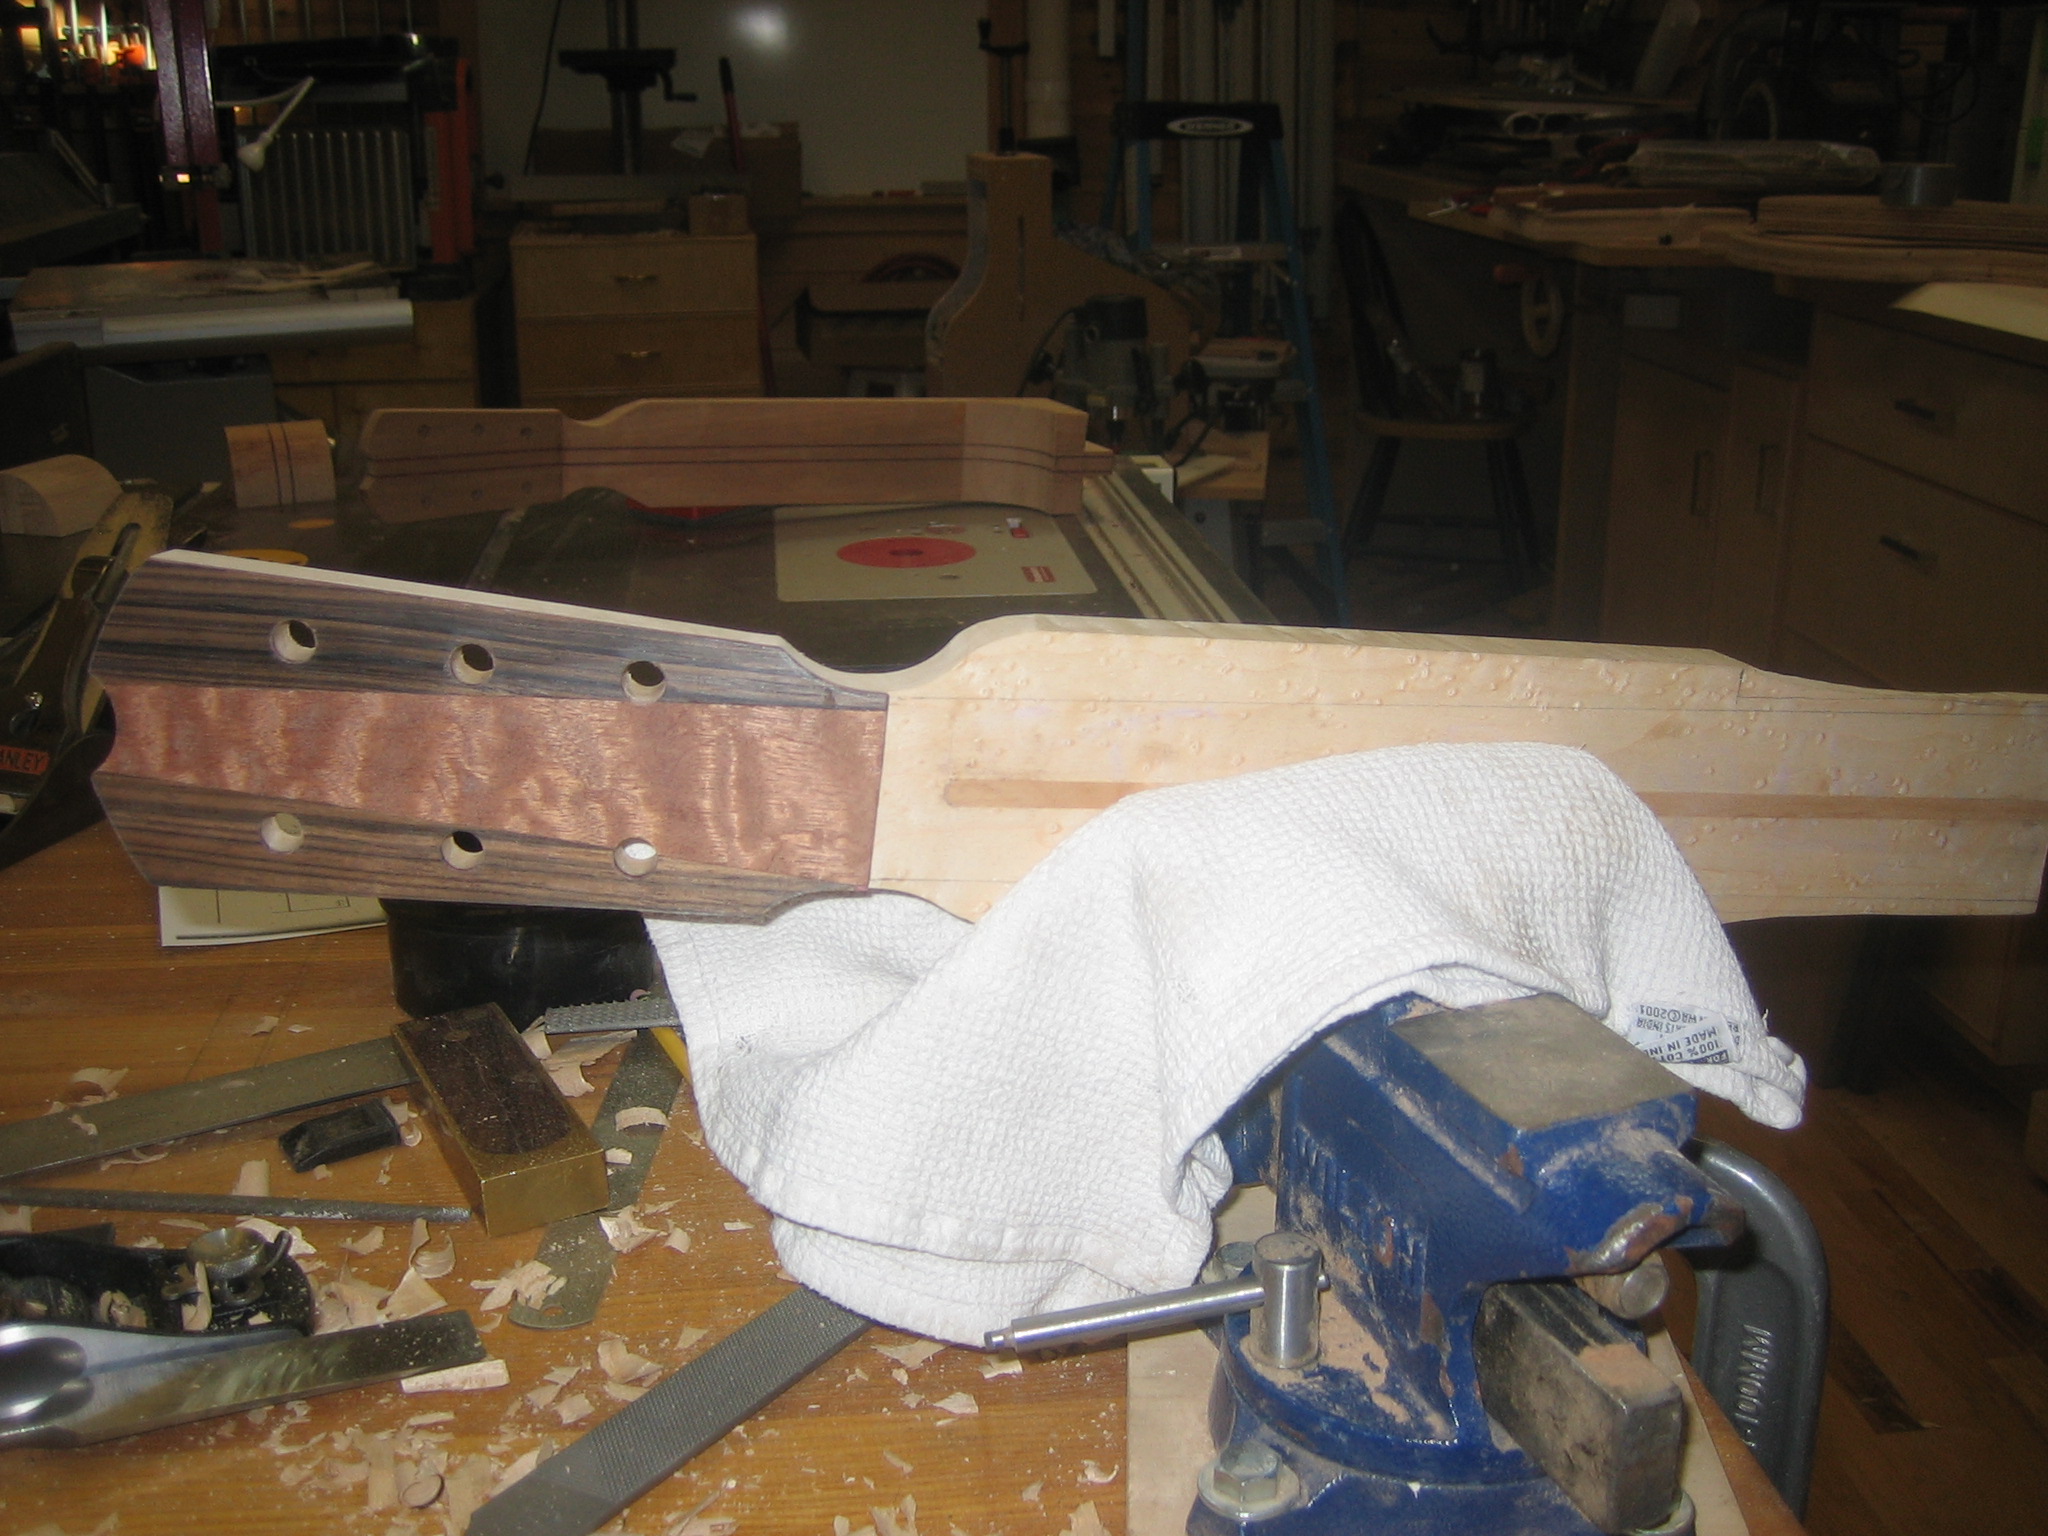
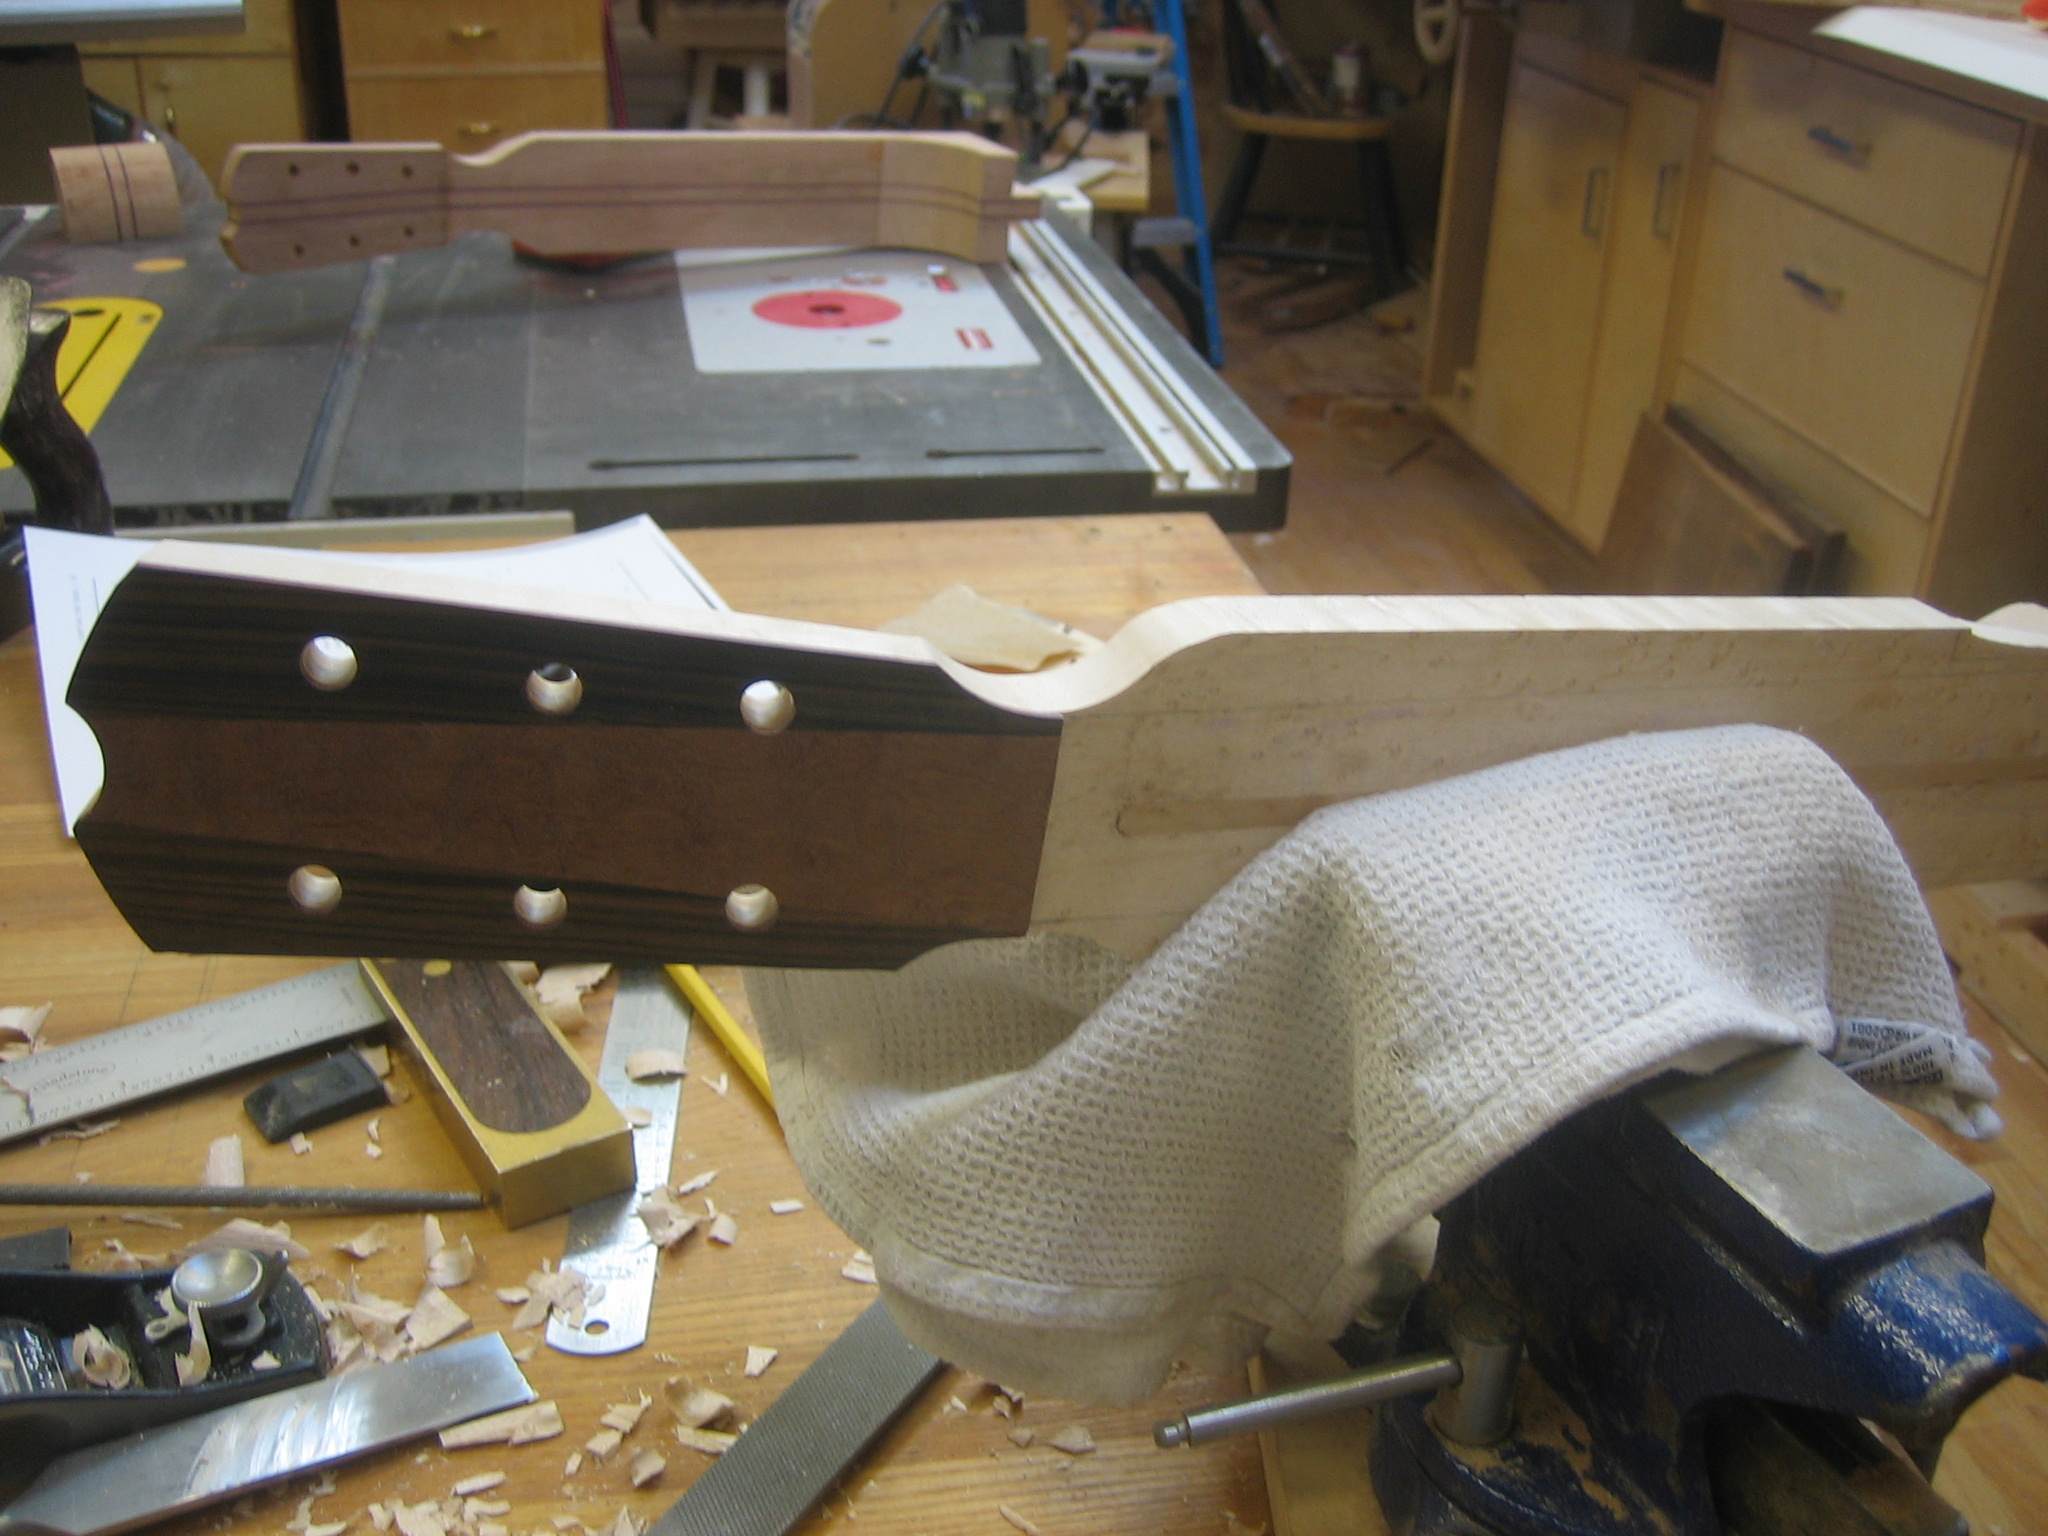
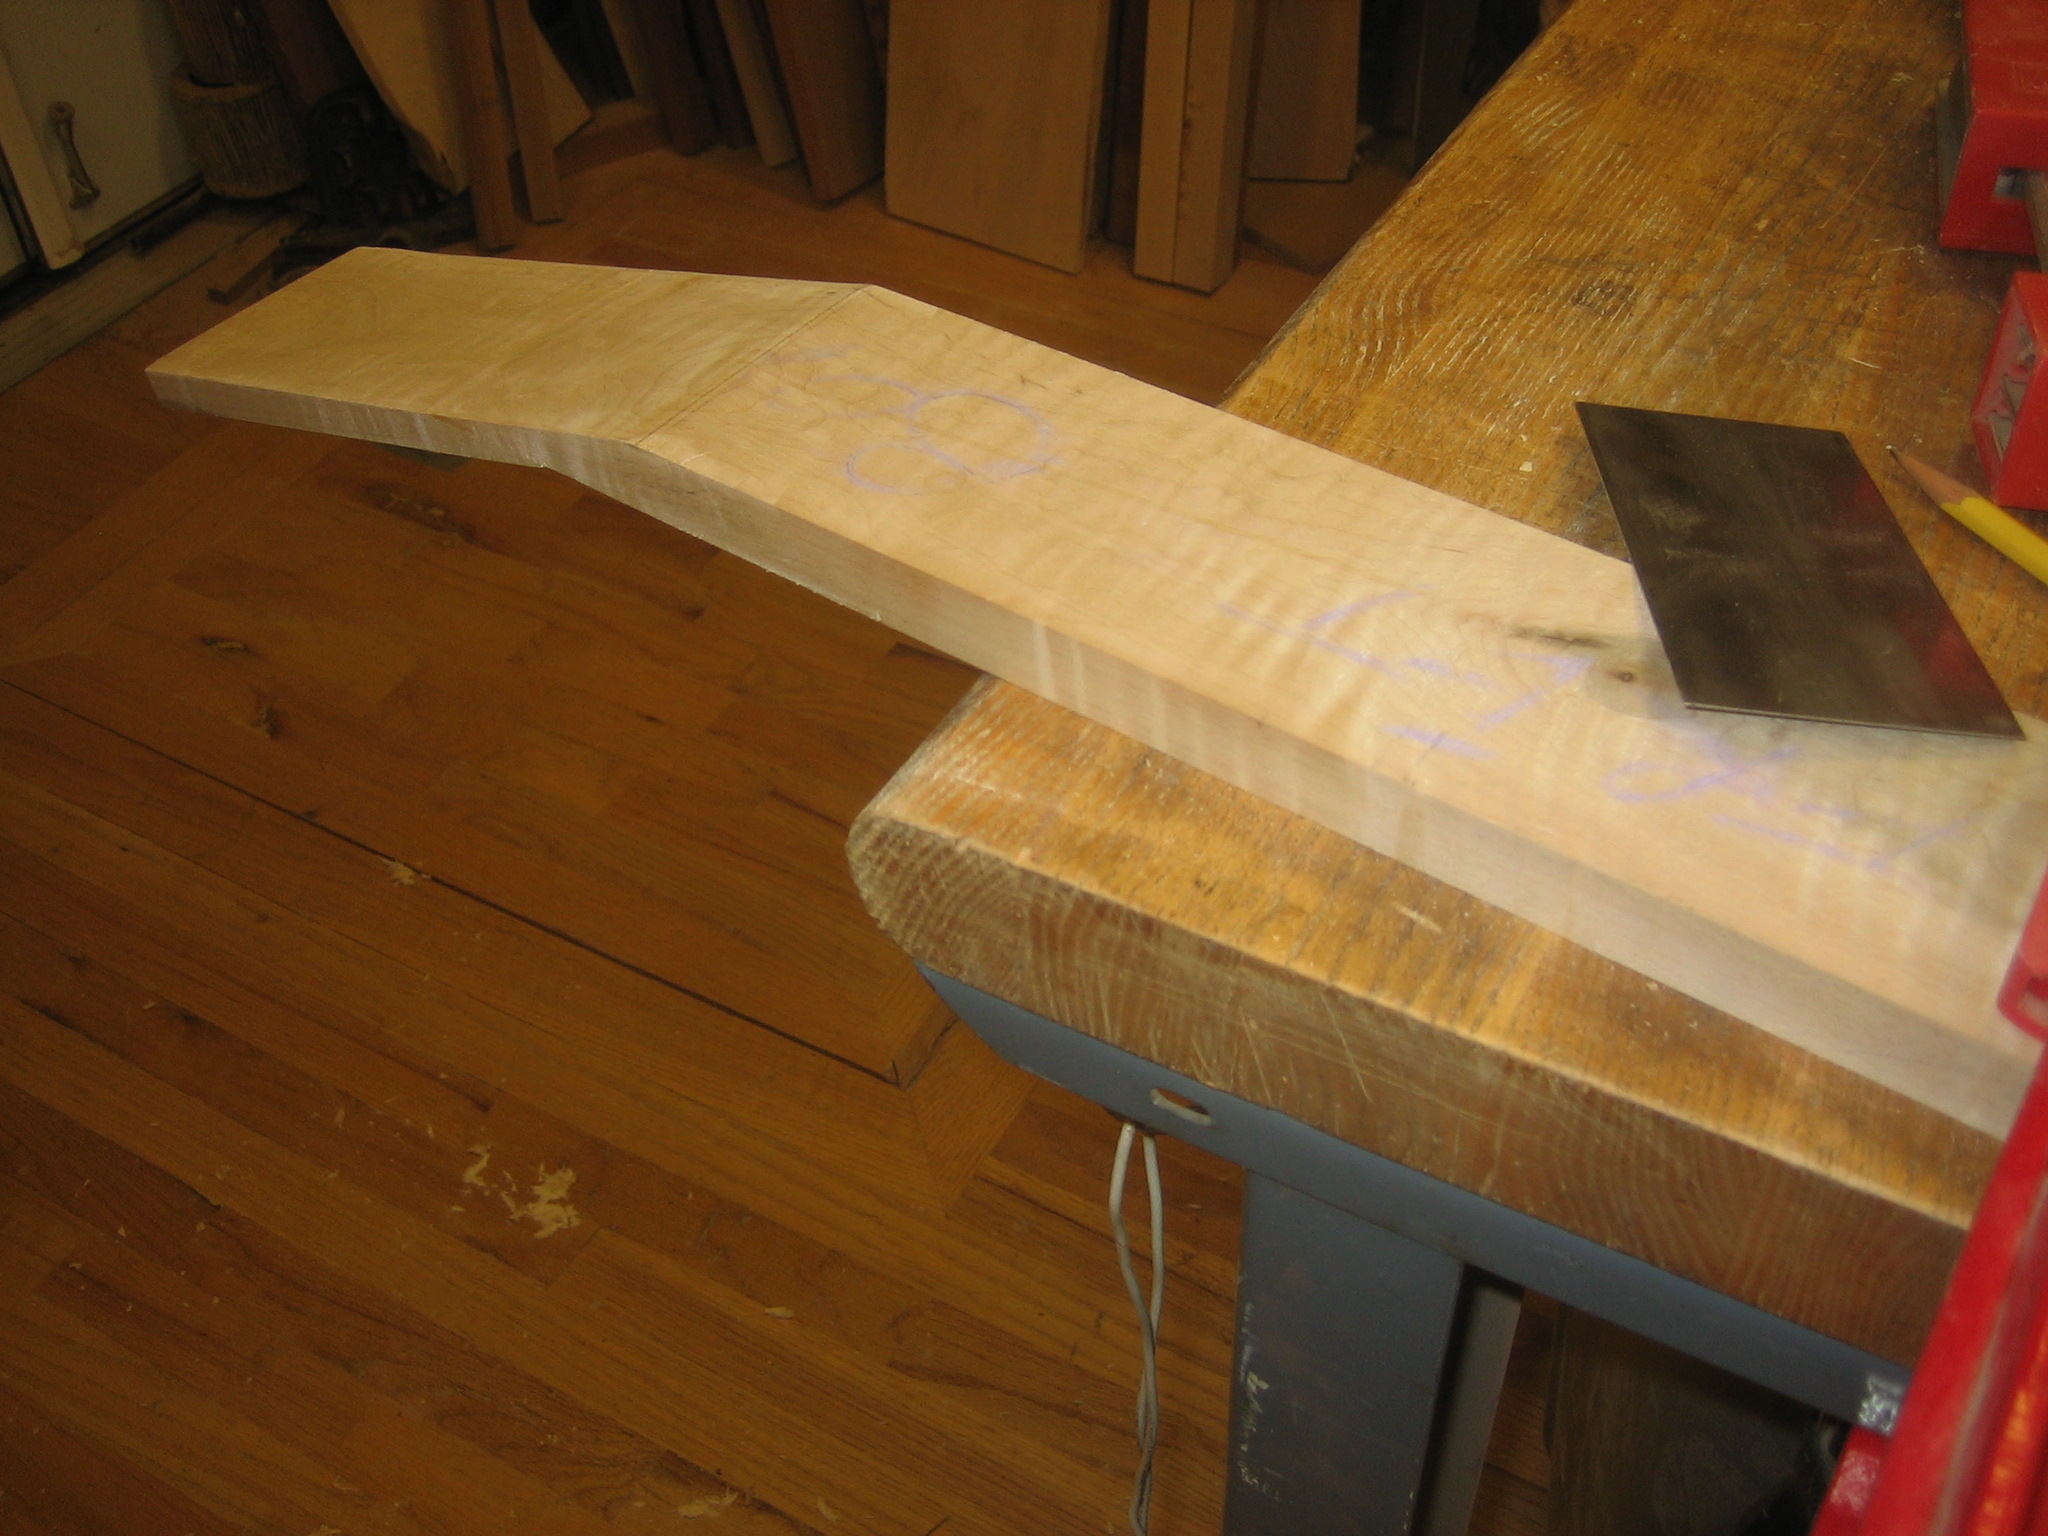
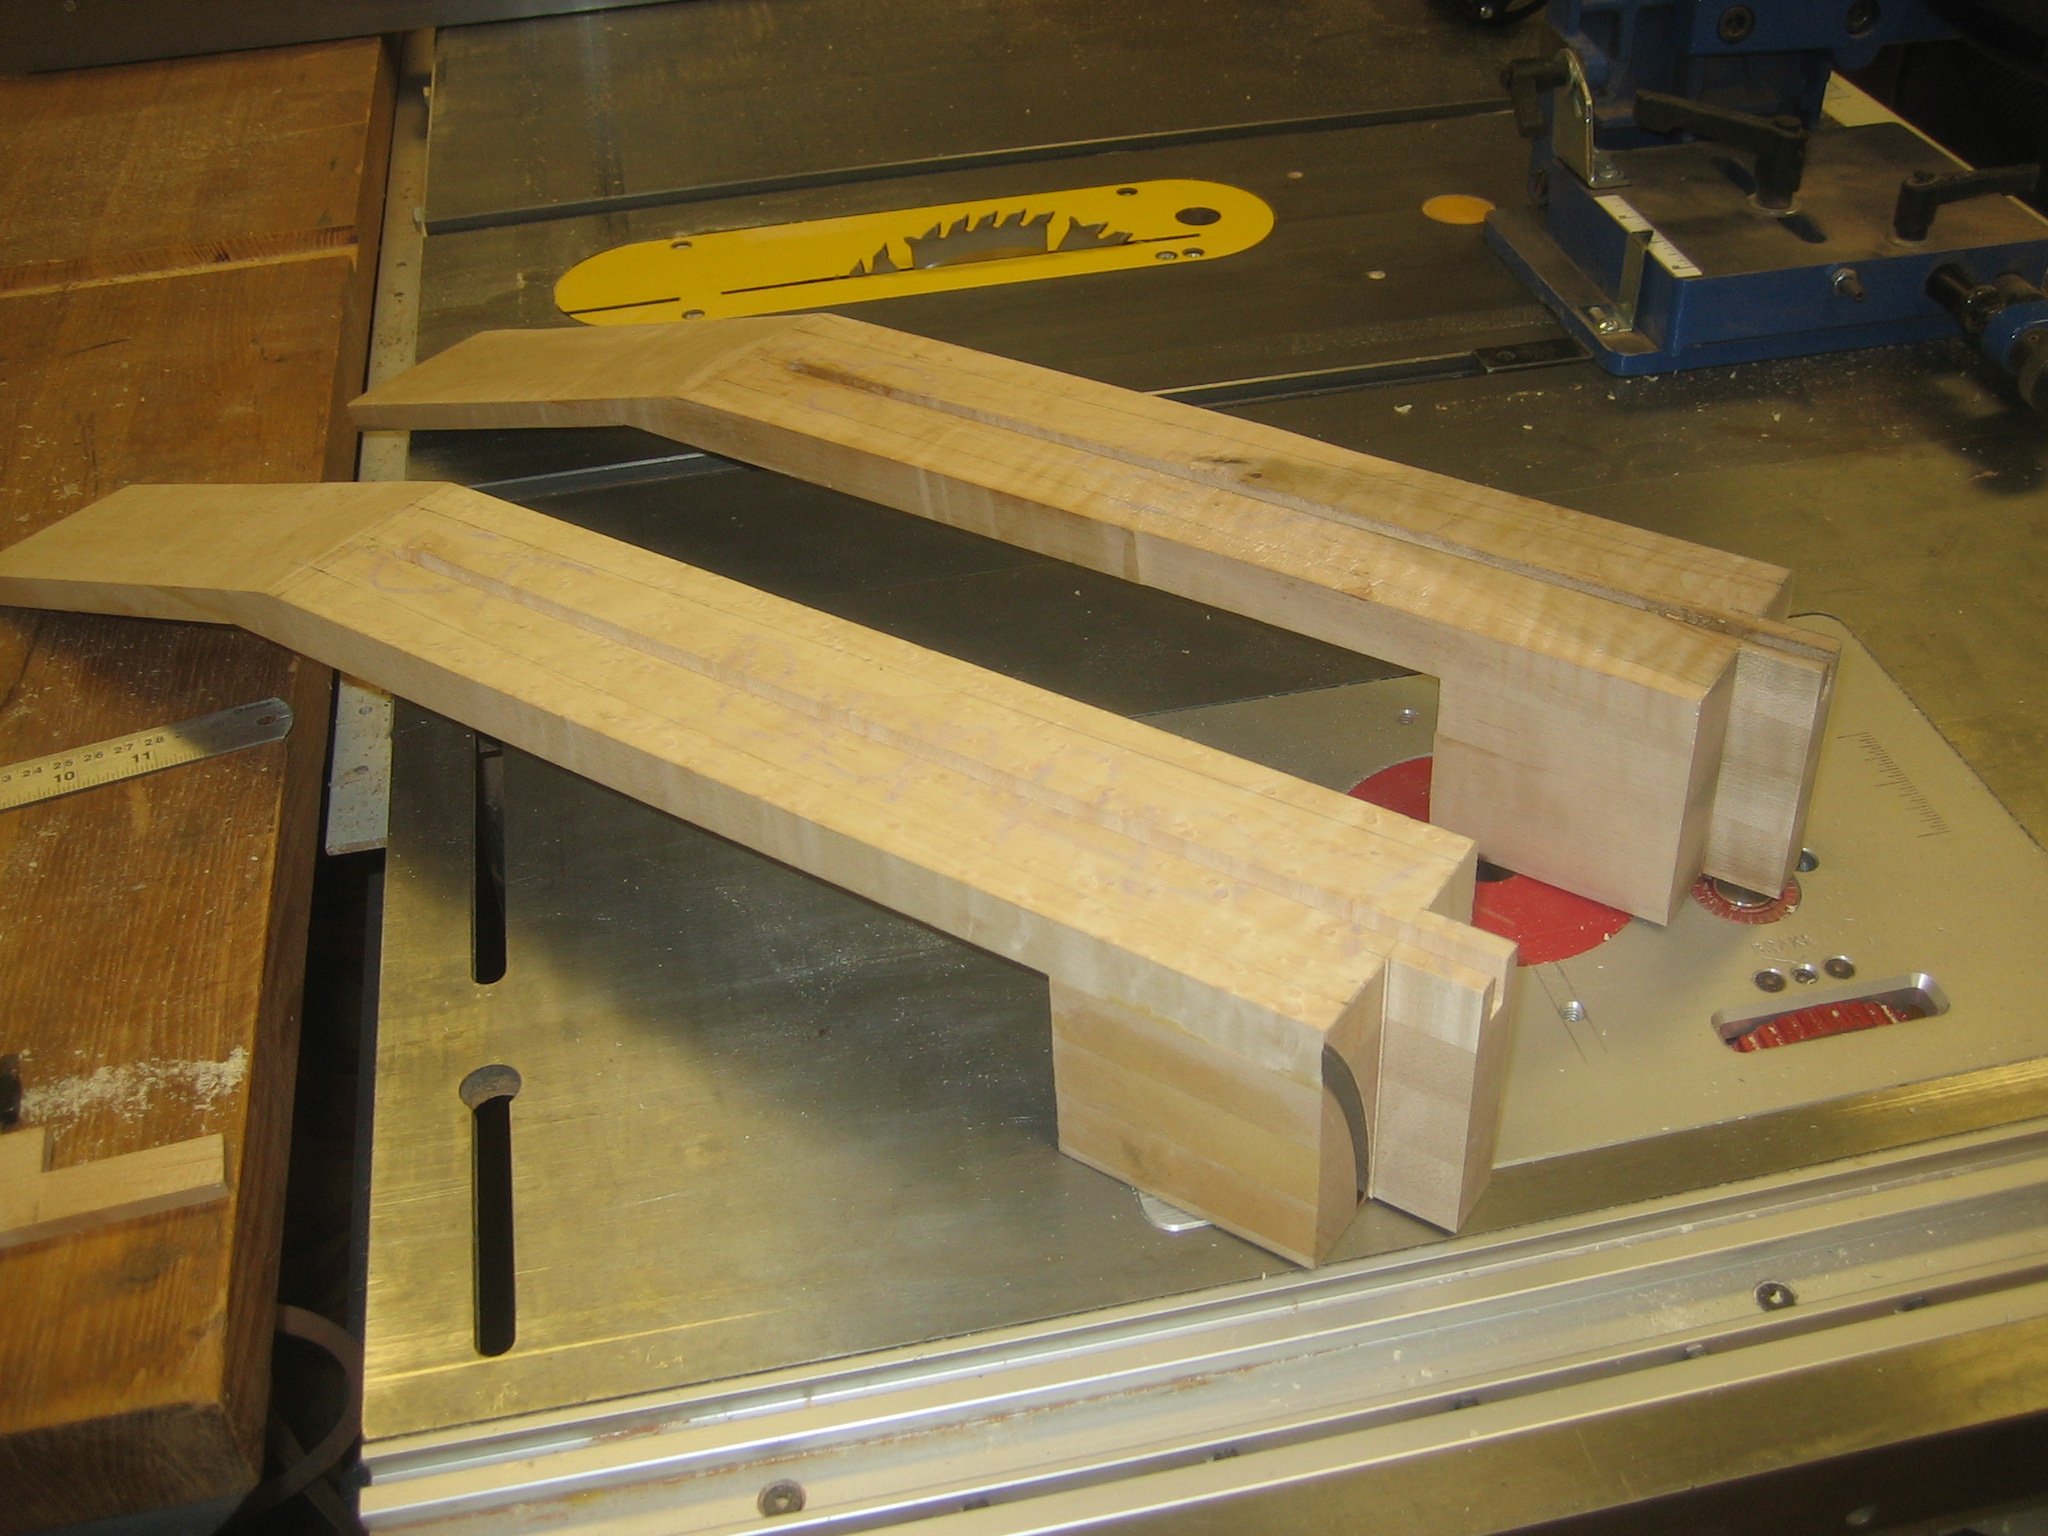
After routing a channel for the truss rods and notching the tenon at the heel end.

Next steps…

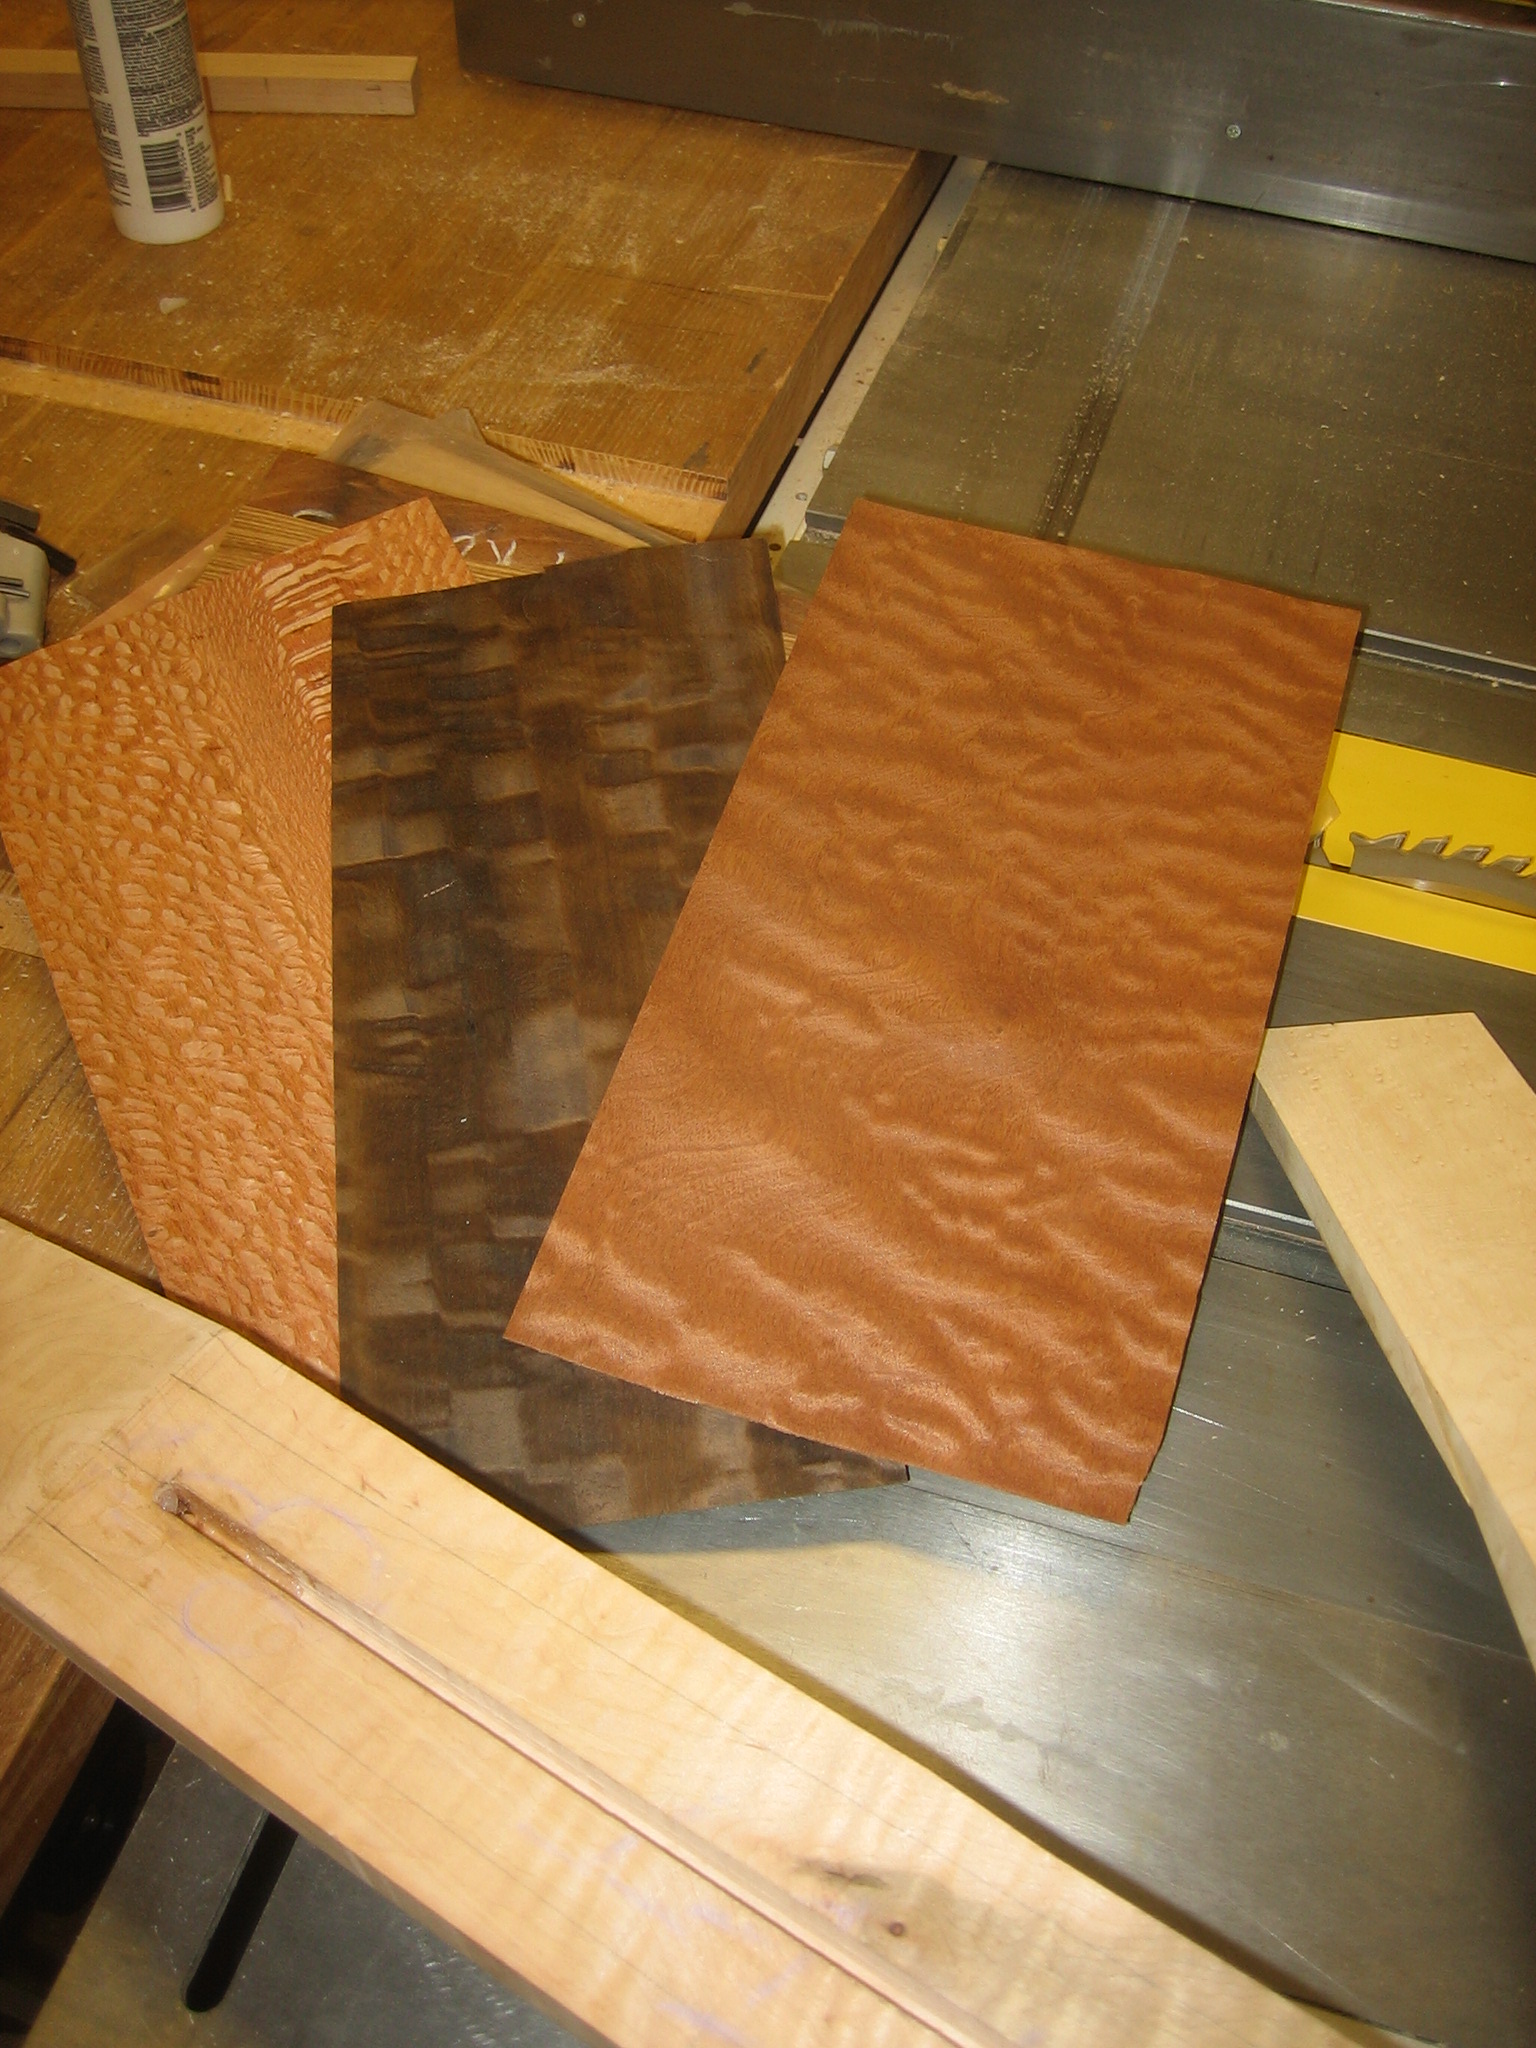
Because I had originally ordered only a single truss rod, I decided to stop at this point before burying the one I had in one of the necks. My next step will be to glue a shim over the installed truss rods, scrape it flush, and then probably glue the veneers to the headstock. On a visit to the last woodworking show I picked up a $30 sample pack of veneers. I figured they might be useful for the guitar build, and it looks like I was right. Now I’ve just got to make a final selection of the specific veneer sandwich to use for each neck. I’ll probably stop with these two at that point and begin the process all over again with the other two blanks…provided I don’t discover some major mistake in these two before then!

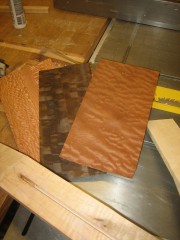
A sampling of the selection of veneers in consideration for the headstock


Facebook Comments
Categories: Guitar Building, Uncategorized | Tags: , , , , , , , | Leave a comment

The “Veronica” Puppet Theater

This entry is part 7 of 7 in the series Puppet Theater

Upon seeing the version I built for my kids this past Christmas, my brother-in-law suggested that his daughter, Veronica, might like one as well. I’d already fielded a few requests for these and figured I really needed to come up with a more practical design — something a bit more portable/shippable and lighter weight. The original was also a bit unstable on heavily padded carpet such as that in our basement. So the new design would need to feature longer feet on the side wings as well.

With all of this in mind, here’s the newest design, which I’ve dubbed the “Veronica” after my niece.

Veronica in the Puppet Theater

The frames are solid maple with 1/2″ maple plywood panels. The top panel features a shop-cut birdseye maple veneer that I coaxed my Grizzly drum sander into thicknessing down to 3/64″. The intarsia is the same pattern used on the original, though this time I used bloodwood and mahogany, which I found significantly easier to shape than the original in purpleheart and walnut.

Intarsia Comedy/Tragedy Masks (bloodwood and mahogany)

The whole piece breaks down into four components, the two “wings,” the lower front panel with stage, and the top proscenium arch with intarsia masks. Threaded inserts in the front panels accept six (3 per side) brass 1/4 – 20 bolts passed through the wings. The curtain (built by my wife’s best friend Lisa) attaches to the arch simply with a strip of velcro.

Veronica’s expression upon viewing the theater for the first time was priceless! Hopefully she’ll get many years enjoyment from her new theater.

Here’s the project page on Lumberjocks.com

And here’s the page for the original:
Click for details: Cherry Frame and Panel Puppet Theater with Intarsia Comedy/Tragedy Masks

Facebook Comments
Categories: Uncategorized | Tags: , , , | Leave a comment

Opening Night!

This entry is part 6 of 7 in the series Puppet Theater

Rehearsals are over, costumes and makeup finalized, and last minute script changes incorporated. On Christmas morning, the curtain went up on the new Jaromin Family Puppet Theater!

The completed puppet theater and puppet tree

The puppet tree loaded with new puppets

Take your seat, unwrap candies, and mute your phones, please.

The show begins

Nathan joins the show

9 month old Emma takes her turn center stage

Click for details: Cherry Frame and Panel Puppet Theater with Intarsia Comedy/Tragedy Masks

Facebook Comments
Categories: Uncategorized | Tags: , , | Leave a comment