Picking Up Where I Left Off…

This entry is part 5 of 6 in the series Building an Acoustic Guitar

In early 2012, I started my first acoustic guitar build and for several reasons wound up putting it aside. Over 4 years, a couple electric guitars and mountain dulcimers under my belt, I finally felt ready to return to this project.
Making the mould

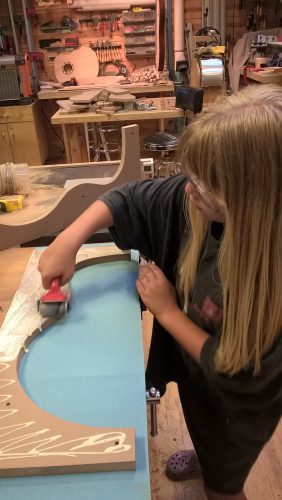
Annalise helps me glue up the mold

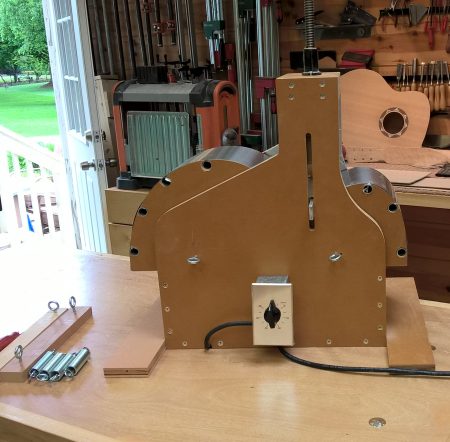
The completed bending machine
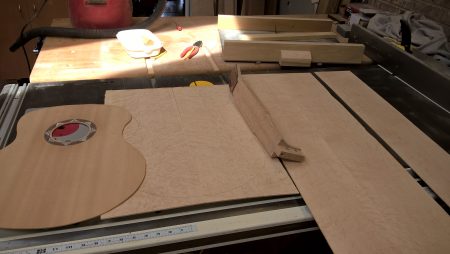
The soundboard and neck, and back and side blanks
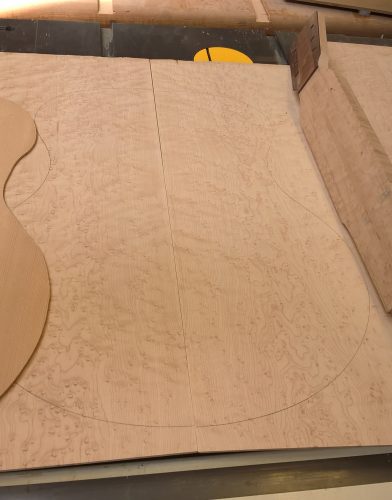
The soundboard and neck, and back and side blanks

WP_20160612_09_27_27_Pro

Back plates ready for joining

Making the back braces
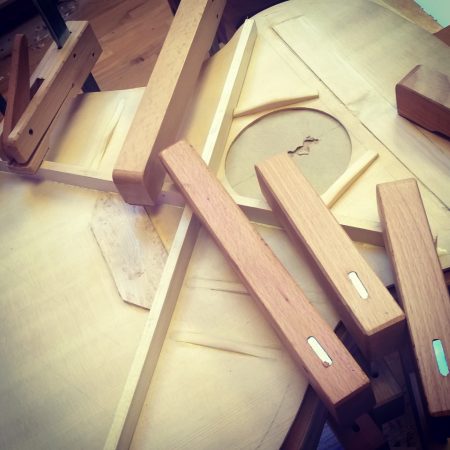
Making the back braces

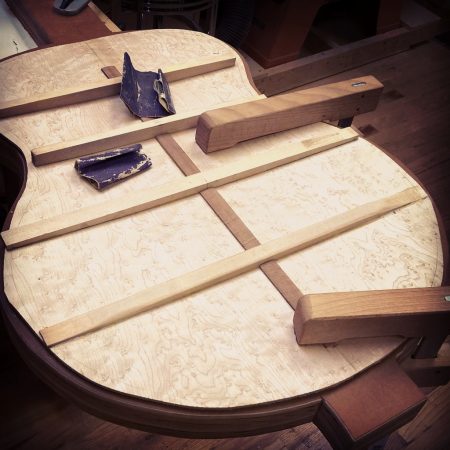
Gluing the soundboard bracing
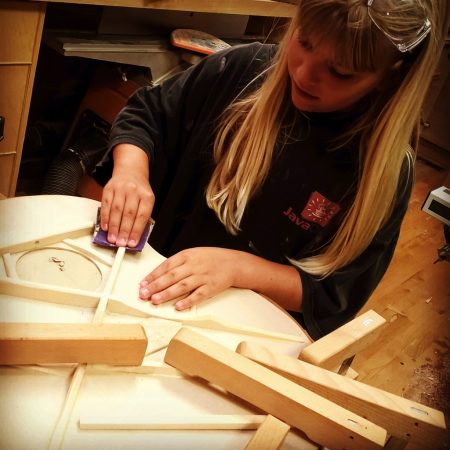
Gluing the soundboard bracing

Sanding the carved braces

Sanding the carved braces

Back to Prep Work…

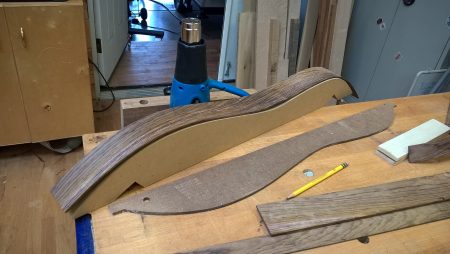
The first two tasks were to build a bending form and finish building the bending machine that’s been sitting under my bench gathering sawdust for several years. The machine was essentially complete – all that was needed was to assemble the form by drilling some holes and installing 1/2″ conduit. I also installed the springs for clamping down the ends.

Although I had already built a Cumpiano-style workboard, it’s clear that most luthiers these days use a mold to keep their sides in place during the assembly process. It certainly seemed to me like an easier and more precise way to assemble the guitar.

Additionally, with my somewhat limited and sporadic shop schedule, I knew the sides could be sitting around for several days, perhaps weeks, before being glued up. I wanted something to hold them securely in place to ensure the bends didn’t relax. And so my daughter and I built a mold of MDF.

Bending the Sides

Taking stock of where I left off, the neck I liked the most was made of birdseye Maple. I had also resawn a couple back blanks of birdseye. I just love the stuff and had a couple boards around that would work quite well as sides. So after an afternoon of resawing and thickness sanding the side blanks, it was time to test out the bending form.

Initially, I attempted placing a blank directly on the bending machine and allowing the heat from the three 200-watt bulbs to do the work. However, because my bending form is capped with aluminum sheeting, the heat is trapped by the surface of the form and doesn’t heat the straight slat floating several inches from its curved surface. This approach wouldn’t work unless I wanted to remove the aluminum, leaving the bright, hot bulbs exposed.

Shifting gears I briefly attempted bending the sides with a heat gun; a technique that worked very well with the dulcimer ribs. As I suspected, the extra width – more than 2x wider – of the guitar sides made this significantly more difficult to pull off.

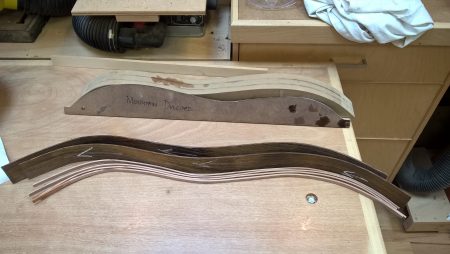
So I pulled out my new steam box and decided to steam the wood before bending it against the pre-warmed bending form. This worked quite well. The pieces bent readily after a 20-minute steaming session. Leaving them on the form with heat applied for an additional 15 or so minutes helped “lock in” the bend. There was very minimal spring back.

The Back Plates

While the sides “cooked” we turned attention to the back plates. They were first jointed and glued. With the back and sides of Maple and top of Sitka spruce, there would be a whole lotta light-colored wood in the body. This would need to be broken up with some contrasting binding which meant ripping up a pile of 1/4″ wide Cocobolo strips. One of these was inlaid down the center of the back.

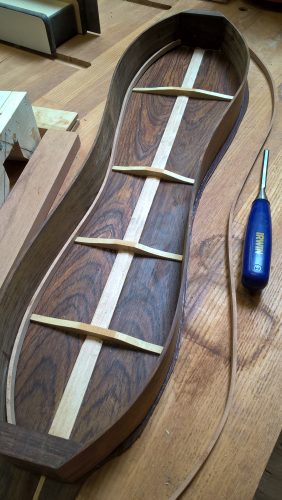
Mahogany seemed a nice contrast for the center patch. Sitka pieces were cut for the bracing. The 30″ radius curve was laid out on the computer and appropriate arcs printed out. I tried a new technique I learned recently from Mary May for transferring the drawings to the hardboard template: a hot iron was used to transfer the laser-printed curve directly onto the board. I would never have suspected this would work, but it does.  This curve was traced onto the Sitka bracing and they were sanded to shape.

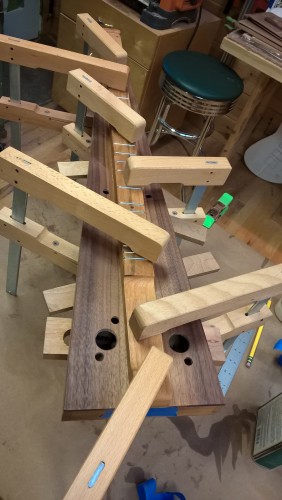
I glued these in place with the back clamped onto the Cumpiano work-board with cork shims around the edge to match the bow.

Soundboard Bracing

Before applying the bracing I noticed that the soundboard rosette wasn’t perfectly flat and flush to the surface. The soundboard itself also felt a bit stiffer than I’d like. I recall being apprehensive about running the delicate Spruce through the wide-belt sander four years ago. After running the birdseye Maple through probably dozens of times I was feeling far more confident. Several passes later and the rosette was flat and smooth and the soundboard stiff yet responsive.

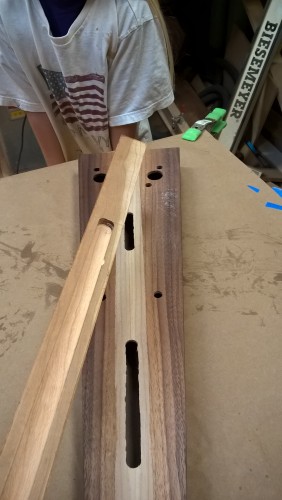
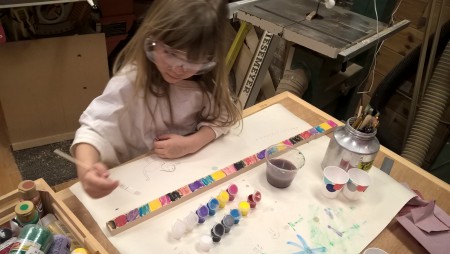
I’d purchased several blocks of Sitka Spruce “bracing wood” from LMI several years back. This was sliced up based on the specs from the Cumpiano book and curved in the same manner as the back bracing. Annalise helped me glue and clamp these into place and did much of the finish sanding after carving was done.

With the sides bent and the top and bottom plates completed, next up is assembling the body…


Facebook Comments
Categories: Guitar Building, Luthiery, Woodworking | Tags: , , , , , , | Leave a comment

Finishing “Coco Bear” the Appalacian Dulcimer

This entry is part 6 of 6 in the series Building a Mountain Dulcimer

My biggest concern in finishing the dulcimer was sealing the Cocobolo. I’d read that the oils in the wood along with it’s natural density made finishing difficult. Again turning to online forums, people typically recommended sealing the oils in first under a couple coats of shellac before applying your finish of choice.

2 coats of shellac to seal the oily Cocobolo

2 coats of shellac to seal the oily Cocobolo

Cocobolo shines under the lacquer.

Cocobolo shines under the lacquer.

Though I own (and love) an Earlex HVLP gun, for environmental/cleanup issues I use it for waterborne finishes only. The dulcimer is small enough that “rattle can” shellac seemed the obvious choice here. Several layers of lacquer was applied over the initial two shots of shellac. And then I waited.

Hanging to cure

Hanging to cure

Finishing the scroll

Finishing the scroll

For last year’s electric guitar build, I knew I’d need to use TimberMate to fill the deep, open grain of the Ash in order to get a smooth flat final finish. I’d assumed that this step wouldn’t be necessary with the Cocobolo. The grain seemed much tighter – especially after hand scraping the surface. A couple shots of lacquer proved this theory wrong. The grain lines and recesses were definitely visible and made for a less-than-glass-smooth surface.

I sanded a bit but in the end decided I wanted to move on (guitar!) and could live with the “grainy” finish – it still looked beautiful and perhaps some day I can use this as a test piece to improve my finish work.

While it was curing, I cut the nut and bridge from my “sample” block of white Corian and found some decent brass round-head nails to use for the string

pins.

And at last a chance to try it out:

Resting with its cousins.

Finished dulcimer resting with its cousins.

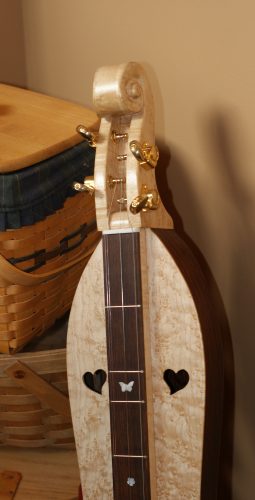
Inlaid mother-of-pearl

Inlaid mother-of-pearl

Peg box scroll detail

Peg box scroll detail

the completed dulcimer

the upper bout

The lower bout

The lower bout

Facebook Comments
Categories: Woodworking, Guitar Building, Luthiery | Tags: , , | Leave a comment

Glue Up and Carving the Scroll

This entry is part 5 of 6 in the series Building a Mountain Dulcimer
Back braced and glued to sides. Installing the cherry lining.

Back braced and glued to sides. Installing the cherry lining.

Joining the back and sides went smoothly. The concern I had here, and in general with gluing Cocobolo, is the oily nature of the wood. I’d read numerous articles and blog posts discussing difficulties with getting the glue to adhere. I followed the advice of several commenters in first sanding/planning the edges to be joined and then wiping the area with acetone. The wood’s oils left a brown residue on the wiping cloth. After that, Titebond III seemed to do the trick. So far I’ve not experienced any failed joints; they appear sound and solid.

In guitars, the bracing is typically Spruce. I’m not sure what they usually use for dulcimers, but as the Cocobolo isn’t in any way typical I figured I’d use what I had on hand – in this case scraps of Maple.

Carving the Scroll

Next up was carving the scroll. I briefly considered a more modern guitar-style head but really wanted a more traditional style instrument – and really wanted to learn how to carve.

To work out how to actually carve the scroll, I turned to the Internet where ultimately I discovered Mary May’s School of Traditional Woodcarving. Among her many video lessons were at tutorials on carving at least 3 different types of scroll. Although I’d watched the beginner lessons, I was too impatient to carve donuts and flowers first. Instead I dove right into the scroll.

Scroll blank glued from 3 pieces of birdseye Maple.

Scroll blank glued from 3 pieces of birdseye Maple.

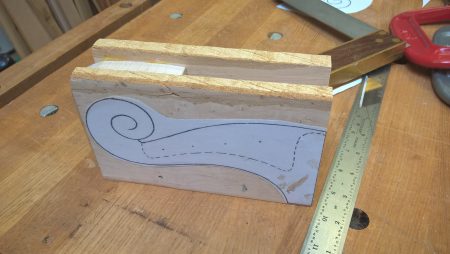
The Kimball book provided no actual peg head dimensions, but there were a few drawings of common heads. I chose one, scaled it to what looked like a proportional size, and printed it out.

I opted to go with a three-part glue up. By leaving a hollow in the middle of the assembly this allowed me to skip the step of chiseling out the peg box.

The carving went quite well, though I did have to use a bit of CA glue to reattach a chip from the center of the scroll that popped off. I also stopped a bit shy of what I had originally intended – the depth of the scroll is a bit subtler than I’d wanted. However, it was looking really good to me and so I decided to quite while I was ahead!

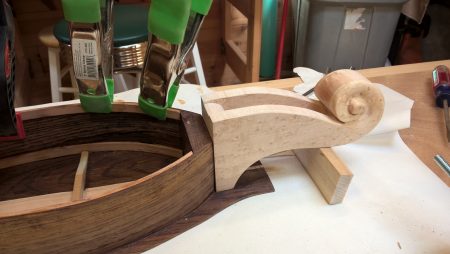
The carved peg head was attached to the body and reinforced with hardwood dowels before turning to the soundboard.

Scroll attached to head block

Scroll attached to head block

The Soundboard

Soundboard glued to sides

Soundboard glued to sides

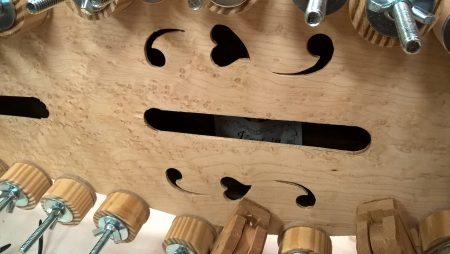
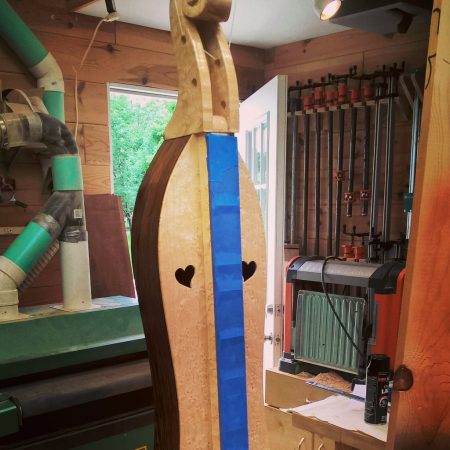
My assistant and I spent quite a bit of time searching the Internet for the right sound hole design. In the end, we decided to go with a riff on the traditional “f” sound hole design by marrying it with a canted heart design – a dulcimer staple.

The actual heart shape was pulled from Microsoft’s “Webdings” font collection. Though I could probably have drawn my own, I knew this fact would drive my Microsoft Windows-hating co-workers crazy.

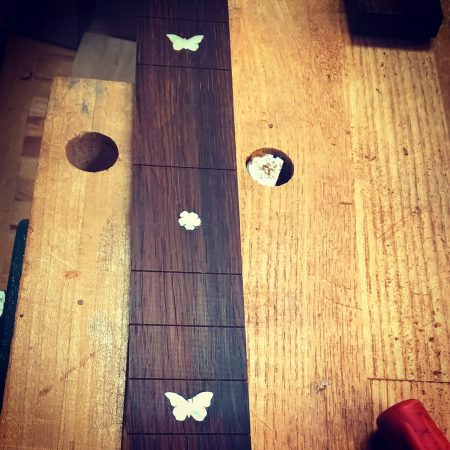
Mother-of-Pearl Butterfly and Flower Inlays

Butterflies and flowers inlay

Butterflies and flowers inlay

My very first large scale “fine woodworking” project was a crib and changing table/dresser for my then infant daughter Annalise. These featured my first attempt at inlay – butterflies. As she also happens to be my constant shop companion these days, helping me out with the dulcimer, it seemed fitting to incorporate butterflies into this project as well. After trying, and failing, to cut the shell on my scroll saw, I cut a slot in a piece of scrap plywood and proceeded to hand-cut the abalone. It turned out to be faster and easier than I originally assumed it would be.

Following some very helpful video advice from Blues Creek Guitars, the abalone was glued to the Cocobolo fretboard, scored with an Exacto blade, and routed with a small trim router. The fret slots were cut with my Stewart MacDonald template and table saw blade. I couldn’t have been more pleased with the results.

After gluing the birdseye Maple neck and inlayed and fretted finerboard to the body, it was ready for finishing.

Next up: Finishing and final assembly!

Ready for finishing

Ready for finishing

Facebook Comments
Categories: Luthiery, Woodworking, Guitar Building | Tags: , | Leave a comment

Starting the Kimball Dulcimer

This entry is part 4 of 6 in the series Building a Mountain Dulcimer

After finishing up the “Back to Basics” dulcimer, I took a few shop days to prepare for the next build. This time was spent building a couple keys jigs/fixtures that I was lacking.

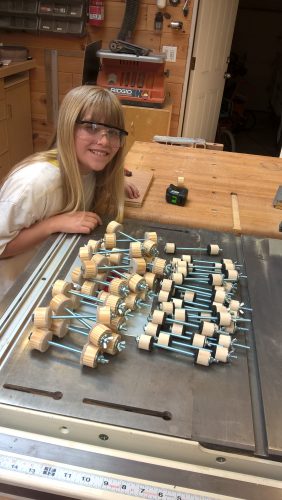
Something I knew I wanted for the next build (and future guitar builds) was some spool clamps. If you’re not familiar, spool clamps are essentially two round wooden disks or dowels  lined with cork with a bolt running through the middle. They’re traditionally used to clamp the thin top and bottom pieces to the sides for violins and other acoustic string instruments. The commercially available ones seemed a bit pricey to me – I figured I should just build some of my own.

Though I had cork, I wasn’t keen on hand-cutting it into disks and couldn’t locate any pre-cut ones. I figured round felt pads, like the ones for putting under chair and table legs should work just fine. Not only were they abundant, they were also relatively cheap.

The bolts were also a bit pricey on Amazon.com and in the big box stores. However several blogs pointed me to http://www.wholesalebolts.com/. They had what I needed at great prices with pretty reasonable shipping via USPS flat-rate box. I considered using a hole saw to cut plywood disks for the ends, but ultimately it seemed easier to just slice up a dowel and use a centering jig in the drill press to drill the bolt hole.

50 spool clamps complete

50 spool clamps complete

With my trusty assistant helping out in the shop, we managed to build 50 clamps – (25) 1″ and (25) 1-1/2″ diameter in just a few hours.

Wood – 1, Steam Box – 0

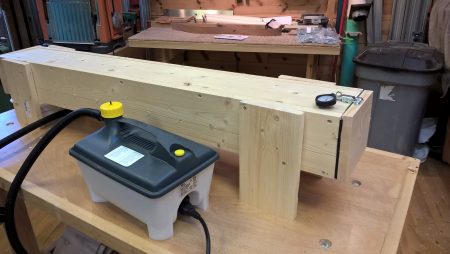
Next was to prep for bending the sides of the hourglass-shaped dulcimer. Although an earlier attempt at bending thin strips of wood with a heat gun went rather well, I still wanted to experiment with steam bending.

I went out and grabbed an Earlex steam generator – really just a wallpaper steamer with an extra brass fitting – and slapped together a spiffy new steam box out of pine boards.

I made myself a bending form out of MDF to match the hourglass dulcimer from the book and tested out the steam bending process on ash and cherry.

The results were pretty awful.

Initially I tried steaming the 1/8″ thick pieces for around 10 minutes. Almost as soon as it was removed from the box, I could feel the stiffness begin to return. I couldn’t seem to get it clamped to the bending form fast enough and wound up with a board with a very subtle bend in it – not even remotely close to the shape on the form. Subsequent attempts at 15 and finally 30 minutes weren’t any more successful. After 30 minutes in the steam box the board came out saturated and feeling like a sheet of soggy cardboard. However, even after drying out clamped to the form for several hours, the “spring back” was so significant it couldn’t be used for an instrument side.

Steam box

Steam box

Back to Work…

Not wanting to spend any more time on this, I set aside the steam process and began prepping the parts for the new dulcimer.

It was probably 10 years ago when a now defunct internet-based lumber supplier accidentally shipped me roughly 20bf of Cocobolo instead of the Cherry I’d ordered. Since that time it’s been stacked in my shop’s wood storage loft waiting for the right project. Though mountain dulcimers are more typically made from native North American hardwoods like Maple, Cherry, Walnut, etc., I decided this would be a great project for this beautiful Cocobolo.

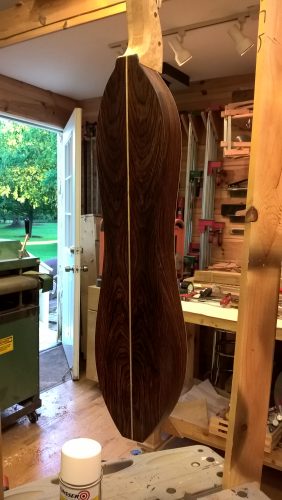
The back planed and scraped

The back planed and scraped

First side bent to shape

First side bent to shape

The sides and back would be built from this resawn and bookmatched Cocobolo. The top would come from a beautiful piece of birds-eye maple.

My woodslicer blade made quick work of re-sawing both boards, and after a few passes in the drum sander, the sides, back and top pieces were prepped. To add some interest and help tie the top and back together, a decorative maple strip was inserted between the back halves.

Sides and lining bent

Sides and lining bent

Bending the Hourglass

Following my failed attempts at steam bending I’d decided to pull the heat gun back out and bend the sides freehand.

I was pleasantly surprised and pleased by the results. While the gun was out I also bent some strips of Cherry to be used for the lining.

Finally, the bent sides were attached to the head and tail blocks – also of Cocobolo – using a custom-cut clamping block suggested in the book.

Next up: Gluing and bracing the bottom.


Gluing up the head and tail blocks

Gluing up the head and tail blocks

Facebook Comments
Categories: Guitar Building, Uncategorized, Woodworking, Jigs & Tools | Tags: , , , | Leave a comment

String it up!

This entry is part 3 of 6 in the series Building a Mountain Dulcimer

This past weekend as planned my helper and I spent a couple more hours finishing up our new “Back to Basics” dulcimer. Annalise was excited about finishing this up – as was I – so shortly after breakfast we retreated to the shop to get back to work.

The Tuners and Tail

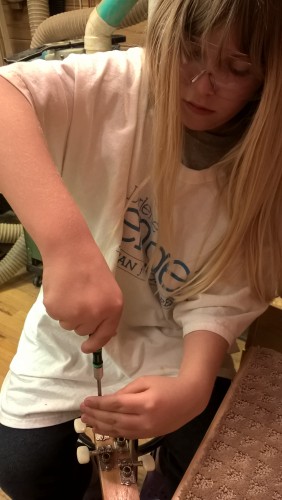
The tuners were first. The head was essentially ready, waiting only for the small pilot holes needed to affix the tuners. Annalise quickly installed all four tuners.

The plans suggest using 4 small pins that the strings loop over. I didn’t care for this look, so instead I crafted a small acoustic-guitar style tail that we glued to the bottom. I was slightly concerned about the stresses from the strings shearing this block off – especially because it was glued on after applying the finish. Therefore we carefully sanded a bit of the finish before gluing and then, for a bit of extra insurance, and because we thought they’d look nice, we added a couple brass screws to the tail.

WP_20160413_19_55_23_Pro

Attaching the tuners

WP_20160416_10_31_26_Pro

Brass screws to reinforce and dress up the tail


Nut and Bridge

I crafted a nut and bridge out of a couple Corian sample blocks purchased last year. The band saw sliced neatly through the sample blocks. And with a bit of sanding on the oscillating belt sander, and some adjustments to the nut slot with a chisel, the pieces were installed and ready for notching.

WP_20160417_07_00_52_Pro

Time to try it out!

Lessons Learned

We followed the original book design that calls for a guitar style headstock – with the string posts oriented vertically. Unfortunately the angle of the headstock is too shallow to pull the strings down into the nut slot with sufficient force to keep them there. I installed a couple Fender-style string trees – which mostly work – though there is still a tendency for a string to jump its slot if strummed too aggressively.

This isn’t tragic and I may put some more time into this in the future to improve the situation. However it’s still a very playable instrument that we’ve been having a lot of fun with.

Now that this is complete, we’re moving forward with a more traditional style with curved sides and a carved scroll headstock.

Next up: starting work on the Kimball book “hourglass” dulcimer…

Facebook Comments
Categories: Guitar Building | Tags: , , , , | Leave a comment

Back to Basics

This entry is part 2 of 6 in the series Building a Mountain Dulcimer

In the first post of this series, the kids and I built “canjos” following our visit to the Great Smoky Mountains. Besides being a fun “shop time” activity with the kids, this was a prelude to – and preparation for – building our own mountain dulcimer.

I admit I was tempted to purchase a finished dulcimer from Wood-n-Strings dulcimers. They also sold kits including all of the pre-cut pieces and pre-bent sides. However, I also knew I’d rather build one myself and, frankly, I don’t see the point of woodworking kits in general. IMHO kits remove most of the artistry and craftsmanship from the process. If everything’s already perfectly machine-cut, the headstock scroll carved, I’d be little more than the last step on the assembly line. Too much “paint-by-numbers” means very little risk of utter failure – which also means no true pride of real accomplishment, at least for me personally.

Back to Basics

Back to Basics

The 2-page spread on how to build a mountain dulcimer

The 2-page spread on how to build a mountain dulcimer

Reading Up

Of course, I had no clue how to actually build a proper mountain dulcimer.

Having read several books on acoustic guitar building, I understood the basic construction techniques and concepts such as scale length – or vibrating string length (VSL) as I see it called on the dulcimer forums. But I wanted to find a plan showing how the tuning head and body are typically attached, internal structure of the body, etc.

Thankfully I found the book – “Constructing the Mountain Dulcimer” by Dean Kimball.

This is a very old book (you can tell by the printed BASIC code for calculating fret placement designed to run on a Commodore 64). Many Internet sites sell used or hardcover copies, but Luthier Merchantile International sells ’em new in paperback for only $15.

I also read a blog post describing another old book – the 1981 Reader’s Digest “Back to Basics” that includes plans for a mountain dulcimer. This book is out of print but there are dozens of used copies available online. I grabbed a copy from Amazon and sure enough, there on page 390 is a plan for building your own mountain dulcimer.

Though a traditional hour-glass shaped dulcimer is pictured on the cover, the plans inside the book are for a relatively simple triangular shaped dulcimer. This suited me just fine – I decided I’d build two.

Cutting the fret slots with a template and custom blade

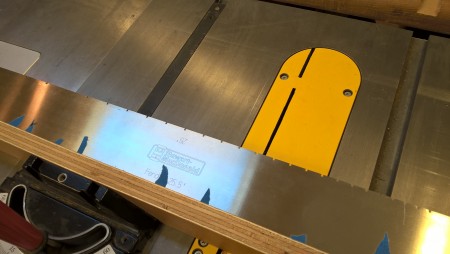
Cutting the fret slots with a template and custom blade. The blue tape is blocking off the “skipped” frets not in the dulcimer’s diatonic scale.

Gluing up the body

Gluing up the body

Reader’s Digest Dulcimer

The first one is the simple Reader’s Digest “Back to Basics” dulcimer. The purpose of this build is to gain additional experience fretting an instrument – something I’d yet to tackle on my two prior electrics or my as-yet-unfinished acoustic 6-string.

Following the (hopefully successful) basic build, I’d tackle a more traditional body style per the Kimball book. Through the second I’d gain experience bending wood. Both of these will hopefully lead up to finally finishing my acoustic guitar build.

Fret Not

Fretboards scare me. Not playing them, but building them. The precision required is a bit intimidating to say the least. Measurements are often specified in hundredths of an inch. And if you’re off just a bit, your gorgeous handmade masterpiece will forever play out of tune. Yikes.

To help ensure success and take some of the anxiety out of the process I decided I’d purchase a template.

Stewmac.com sells a very nice metal fret template and table saw blade that I’d picked up a few months back. After getting a somewhat imprecise and inconsistent result using the guide to mark frets with a pencil and hand saw them for the canjos, I figured I’d use the template as intended for the dulcimer – paired with the table saw and a simple jig.

The book specifies a 28″ VSL. Because this will be played primarily by the kids, and because I really wanted to try out my 25.5″ scale template, I adjusted this to Fender-style 25.5″.


Gluing on the top

Gluing on the top

Wipe-on Tung oil finish

Wipe-on Tung oil finish

Daddy’s Little Girl

My very “crafty” 10-year-old daughter was eager to help out with this project. So I put her to work doing nearly everything that didn’t require the use of power tools. She performed most of the gluing up, fret installation and beveling, and final finish work. We started on Saturday morning, and by Sunday afternoon the first coats of finish were drying.

Next weekend after a few more coats of finish and a few days’ curing time, we should be ready to buff it out, install the bridge, tail, nut, tuners and string it up!

Next up: how does it sound?

Applying finish to the body

Applying finish to the body

Beveling the frets

Beveling the frets

Wiping on the Tung oil finish

Wiping on the Tung oil finish

Fret board hollowed out on the underside

Fret board hollowed out on the underside

Gluing the fret board

Gluing the fret board

Facebook Comments
Categories: Woodworking, Guitar Building | Tags: , , , , , , | Leave a comment

Canjos and Dulcimers and Bears – Oh My!

This entry is part 1 of 6 in the series Building a Mountain Dulcimer

This most recent Spring Break week, we decided to take our “new” popup camper out for our maiden voyage on a week-long trip to the Great Smoky Mountains of Tennessee.

WP_20160328_18_04_45_Pro

Setting up camp

A tiny sample of the dozens of carved bear art pieces found in stores dotting the highways in the region

A tiny sample of the dozens of carved bear art pieces found in stores dotting the highways in the region

The original motivator, besides finding a relatively warm place to camp in March, was to ride one of the alpine coasters running in the Pigeon Forge/Gatlinburg area.

V__29DE

Sean gets an impromptu lesson on playing the mountain dulcimer at Wood-n-Strings

The coaster was great fun, as was the amazing Tuckaleechee caverns tour. For me however, the highlight of the trip was visiting the Wood-n-Strings Dulcimer Shop in Townsend, TN.

A day earlier we’d wandered into the Sunshine Mountain dulcimer shop in downtown Gatlinburg. There, during an interesting conversation with the luthier, we were introduced to the “Canjo.” This is basically a toy instrument – a single-stringed stick with an aluminum soda can for a resonator at one end.

Fretted like a dulcimer, you can play simple melodies on it, as demonstrated by the maker. I decided to pick one up to use as a template for building our own. The kids loved it and it immediately became the hit of the campsite. The kids decided they wanted to build their own canjos after we got home.

Building the Canjos

WP_20160330_18_42_47_Pro

Nate rockin’ out on the “canjo”

Canjos are trivially easy to make. They consist of a single stick of wood roughly 1-1/4″ wide by 3/4″ thick with the length determined by the chosen scale length. They are fretted similar to a guitar, however canjos, like dulcimers, use a diatonic scale (think white keys on the piano in key of “C”) instead of a guitar’s chromatic arrangement.

Because I already have a guitar fret template with 25″ and 25.5″ scales, I chose to use a 25″ scale length.  I actually had plenty of scraps around of varying species that fit the bill. The kids each chose their own stick which I cut to length. After marking for the frets, I had each of them hand saw the fret slots and then glue/pound them in.

Annalise cuts fret slots

Annalise cuts fret slots on a shop-made simple miter box

Emma wanted to paint the back of her canjo stick

Emma wanted to paint the back of her canjo stick

The purchased canjo uses a phillips head screw for the nut. I figured I might as well make a more traditional guitar style nut for these. Upon hearing last year that Corian makes decent nut material, I’d purchased a couple sample blocks online (failing to procure any from local stores). The blocks cut quite nicely and sanded easily. I’m sure the dust will do you no good, so be sure to have decent collection if you’re working with the stuff!

Emma enjoyed installing the fret wire!

Emma enjoyed installing the fret wire!

Nate files down the frets

Nate files down the frets

Nate loves the "Monter canjo"

Nate loves the “Monter canjo”

Ready for her solo!

Ready for her solo!

Ready for the big concert

Ready for the big concert

Though we had plenty of soda cans in the house, my 7-year-old son insisted on using a “Monster” energy drink can for his. Rather than staple the cans in place like the original, my daughter suggested using hot glue. This was quick and easy and seems rather solid.

A couple layers of Tung oil and we were ready to string ’em up and enjoy the music!

Next up: our first mountain dulcimer!

Facebook Comments
Categories: Uncategorized, Woodworking | Tags: , , , , , , | Leave a comment

Beat Boxes: Building Cajones with the Kids, part 2

Painting and Finishing

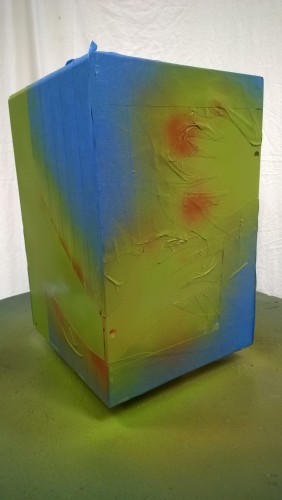
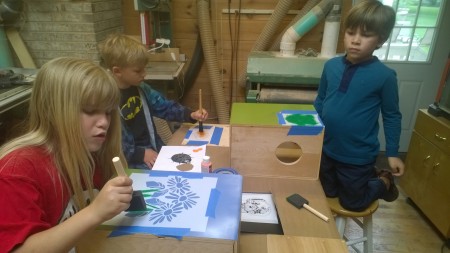
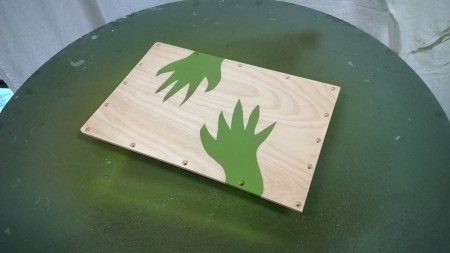
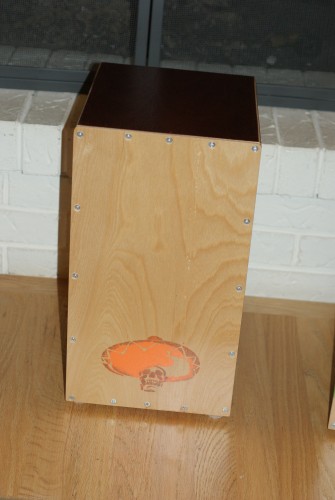
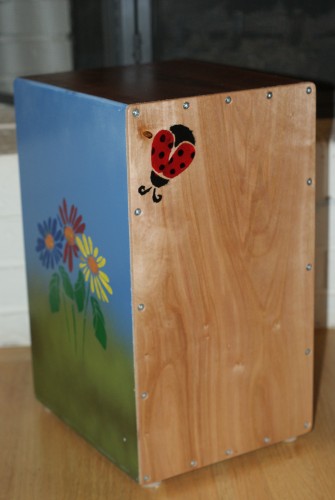
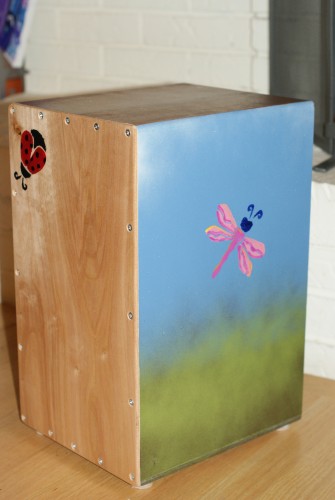
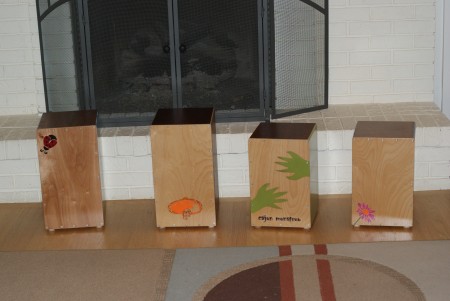
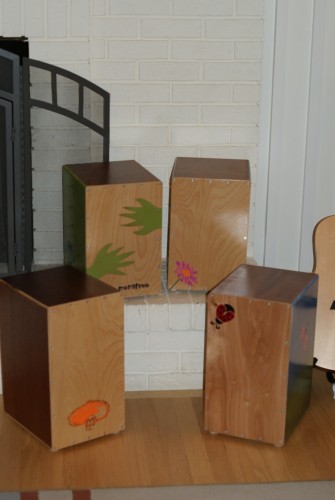
This weekend we painted and finished our cajones. Sean’s was constructed from furniture-grade mahogany veneer plywood, so this one would be finished with a natural finish. The girls wanted flowers, butterflies, and ladybugs. Nathan had his heart set on a monster. Since I’m entirely unable to draw any of these things well, we ran to the store and found some stencils that the kids could paint on their respective boxes. These worked much better than I’d expected – the kids were able to do it themselves with beautiful results!

WP_20150530_002

grass and sky background for the beetle box

WP_20150530_004

Painting on monster hands


WP_20150531_003

Stenciling on some flowers and a couple skulls

WP_20150531_006

Stenciled flowers on Emma’s flutterbox

WP_20150531_008

Making a bead rattle/snare

WP_20150530_008

Nate posing with his monster box

WP_20150530_009

An initial coat of polycrylic applied

WP_20150531_013

Sealing in the waterslide decal

WP_20150531_005

He likes the skull


The finished products

These are definitely family-room worthy pieces that we should be able to enjoy seeing and hearing for years to come. Great work, kids!

Emma's cajon

Emma’s cajon

Emma painted flowers on the side

Emma painted flowers on the side

The "flutterbox"

The “flutterbox”


Nate's cajon

Nate’s cajon – el “cajon monstruo”

Nate's monster box

Another view of Nate’s monster box

el cajon monstruo

Nate wanted a skull and bones on the side

Sean's cajon

Sean’s cajon

skull and sombrero

Mahogany sides and top with a skull and sombrero stencil

Annalise's cajon

Annalise’s cajon

the beetlebox

the beetlebox

Annalise chose a dragonfly stencil for the side

Annalise chose a dragonfly stencil for the side

Another shot of the four

Another shot of the four

the group

the group

Facebook Comments
Categories: Uncategorized | Tags: , , , , | 2 Comments

Beat Boxes: Building Cajones with the Kids, part 1

One of my (sadly now former) co-workers is an amazing drummer. As in professional-studio-musician-in-another-life amazing. I would spend quite a bit of time chatting with him about music and his experience as a working musician.

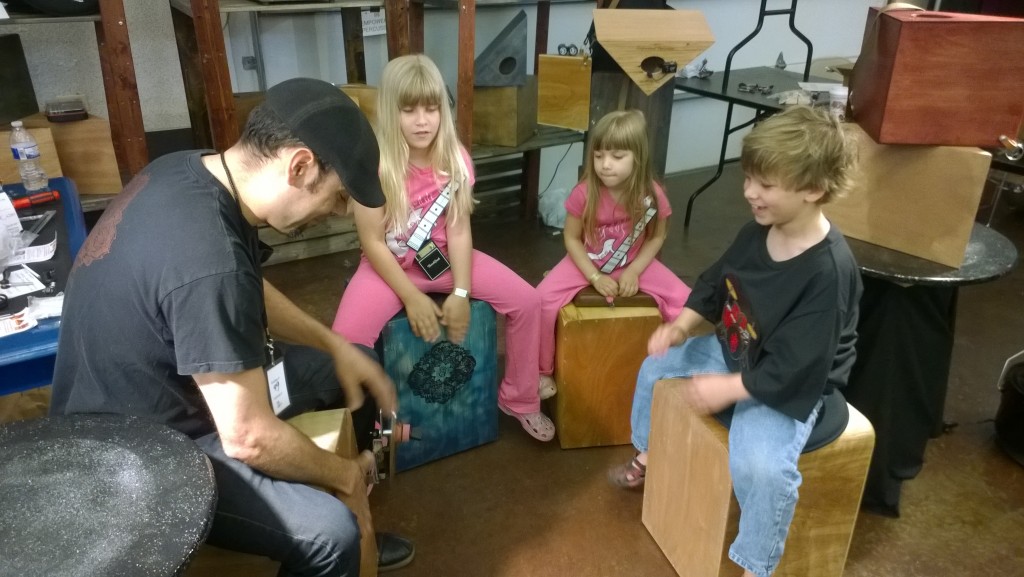
Shortly before his departure he mentioned to me at the Chicago Drum Show was coming to town in my neck of the woods. It seemed like a great way to spend an afternoon with the kids, so I figured I’d pack ’em up and check it out. One of the first booths we happened upon was that of Aaron of Empowered Percussion. After a brief chat he gave the kids an impromptu lesson on the cajón.

At this point I’d never heard of a cajón, but they sounded cool, the kids really enjoyed banging on them, and they were made of wood. Seemed like something we should be able to put together in the workshop!

So, first, what’s a “cajón”?

Cajón
A cajón (Spanish pronunciation: [ka?xon] (Ka-hon), “box”, “crate” or “drawer”) is nominally a six sided, box-shaped percussion instrument originally from Peru, played by slapping the front or rear faces (generally thin plywood) with the hands, fingers, or sometimes various implements…Cajón – Wikipedia, the free encyclopedia


In woodworking terms this equates roughly to a simple wooden box, frequently made of plywood from what I see online, with a thin (~1/8″) ‘tapas’ (cover or lid) on the front. Seemed like a fun, easy woodworking project that I could do with the kids on a cold (or and/or rainy) weekend, which unfortunately we’d had far too many of this spring.

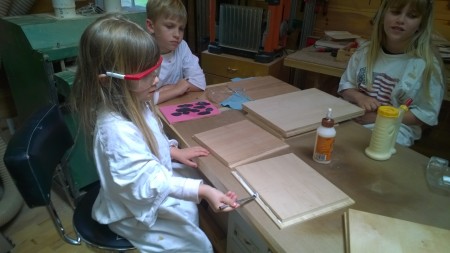
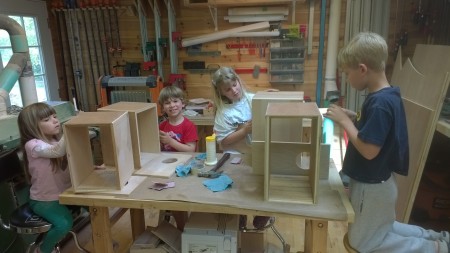
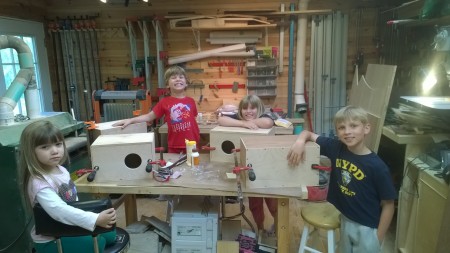
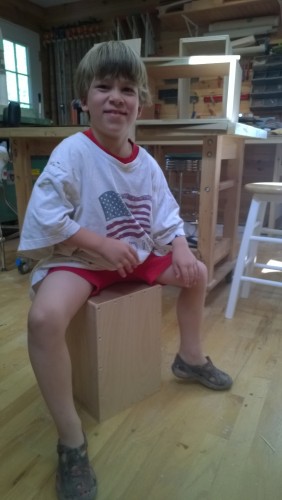
We designed these in the shop together, sizing them appropriately for each child. Naturally I needed to do all the cutting, but the kids were able to glue them up, assemble their boxes, and sand the rough bits.

The kids were great and we all had a wonderful fun – and full – day in the shop!

WP_20150517_009

an impromptu cajón lesson

Applying the glue

Applying the glue

Applying the glue

Applying the glue

Applying the glue

Applying the glue

Sanding the sound hole

Sanding the sound hole

Clowning around

Clowning around

WP_20150525_036

A job well done

A job well done

Testing the assembled box

Testing the assembled box

Next up, finishing our cajónes.

Facebook Comments
Categories: Woodworking | Tags: , , , , | Leave a comment

This Cabinet Goes To 11!

This entry is part 5 of 5 in the series Rock 'n Roll Basement
Something's missing

Something’s missing

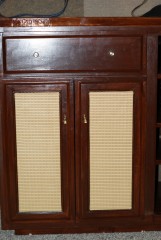
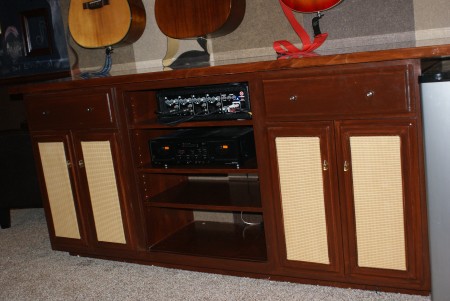
Grill cloth installed

Grill cloth installed

With apologies to Nigel Tufnel…

Shortly before completing the cabinet, I began considering the hardware – what to do for drawer pulls and knobs?

Nothing off-the-shelf appealed to me, so I started searching for an alternative. In the end I modified some Marshall stack gold-top volume knobs for drawer pulls and some very cool, retro “chicken head” style knobs for the doors.


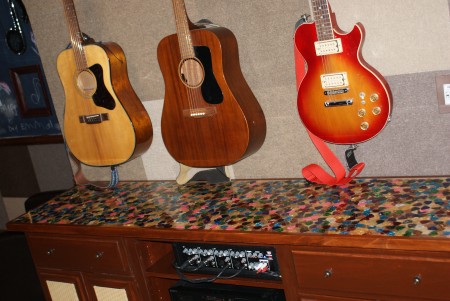
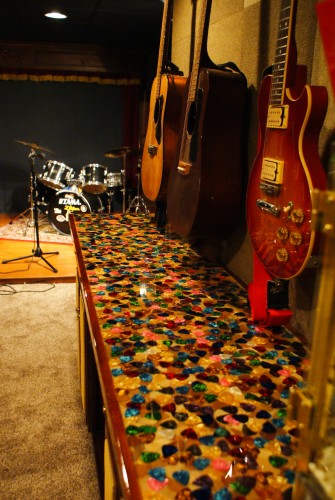
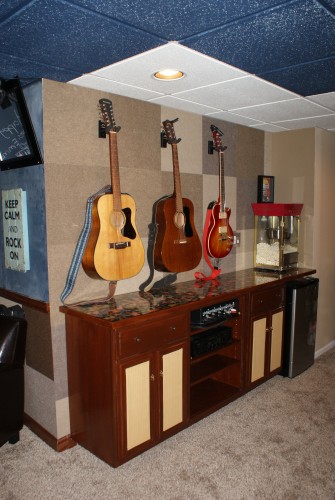
After letting it cure for about 3 days, it was finally time to install the top. And here is the finished piece:

Top installed

Top installed

Need a pick?

Need a pick?

Grill cloth was tricky to wrap

Grill cloth was tricky to wrap

Side view

Side view

Keep calm and rock on

Keep calm and rock on

SONY DSC

A new home for my old guitars


And of course…

Facebook Comments
Categories: Remodeling, Woodworking | Leave a comment