

- Rock ‘n Roll Basement
- Setting the stage
- Fuzzy Walls
- Picky Media Cabinet
- This Cabinet Goes To 11!
I love doing fine woodworking and remodeling. I’m not fond, however, of building basic cabinets and honestly wasn’t interested in spending any real time on the cabinetry. Unfortunately, after a fairly extensive search, it appeared that if I wanted a shallow base cabinet with a configuration anywhere near what I envisioned, I’d need to build something custom.
The point of the “media cabinet” in the design is to provide a) a place for the PA head and eventual home theater components to live, b) a nook for a mini-fridge, and c) a countertop for the popcorn machine.
Cabinets are painful for a few reasons. First and foremost – the plywood. It’s large, heavy, and awkward to move and slice up in my shop. Decent plywood is also rather expensive, and moreover, the only place that sells true cabinet-grade stuff is a bit of a hike and way overpriced. Second, they’re just not that interesting. And in this case, I really didn’t want the cabinet carcass to be a primary focal point – the guitars above it were to be the draw. Ultimately I decided to pick up the best “big box” ply I could get and spend some time up front working out how to cut up the sheets in the store such that they’d be more easily transportable. I used inexpensive dimensioned poplar for the face frame, and slapped on some Polyshades American Cherry, which is about as close to paint as you can get while still retaining some translucency. Needless to say I didn’t take many pictures of the build process – it’s just not that interesting.

The cabinet carcass glued up
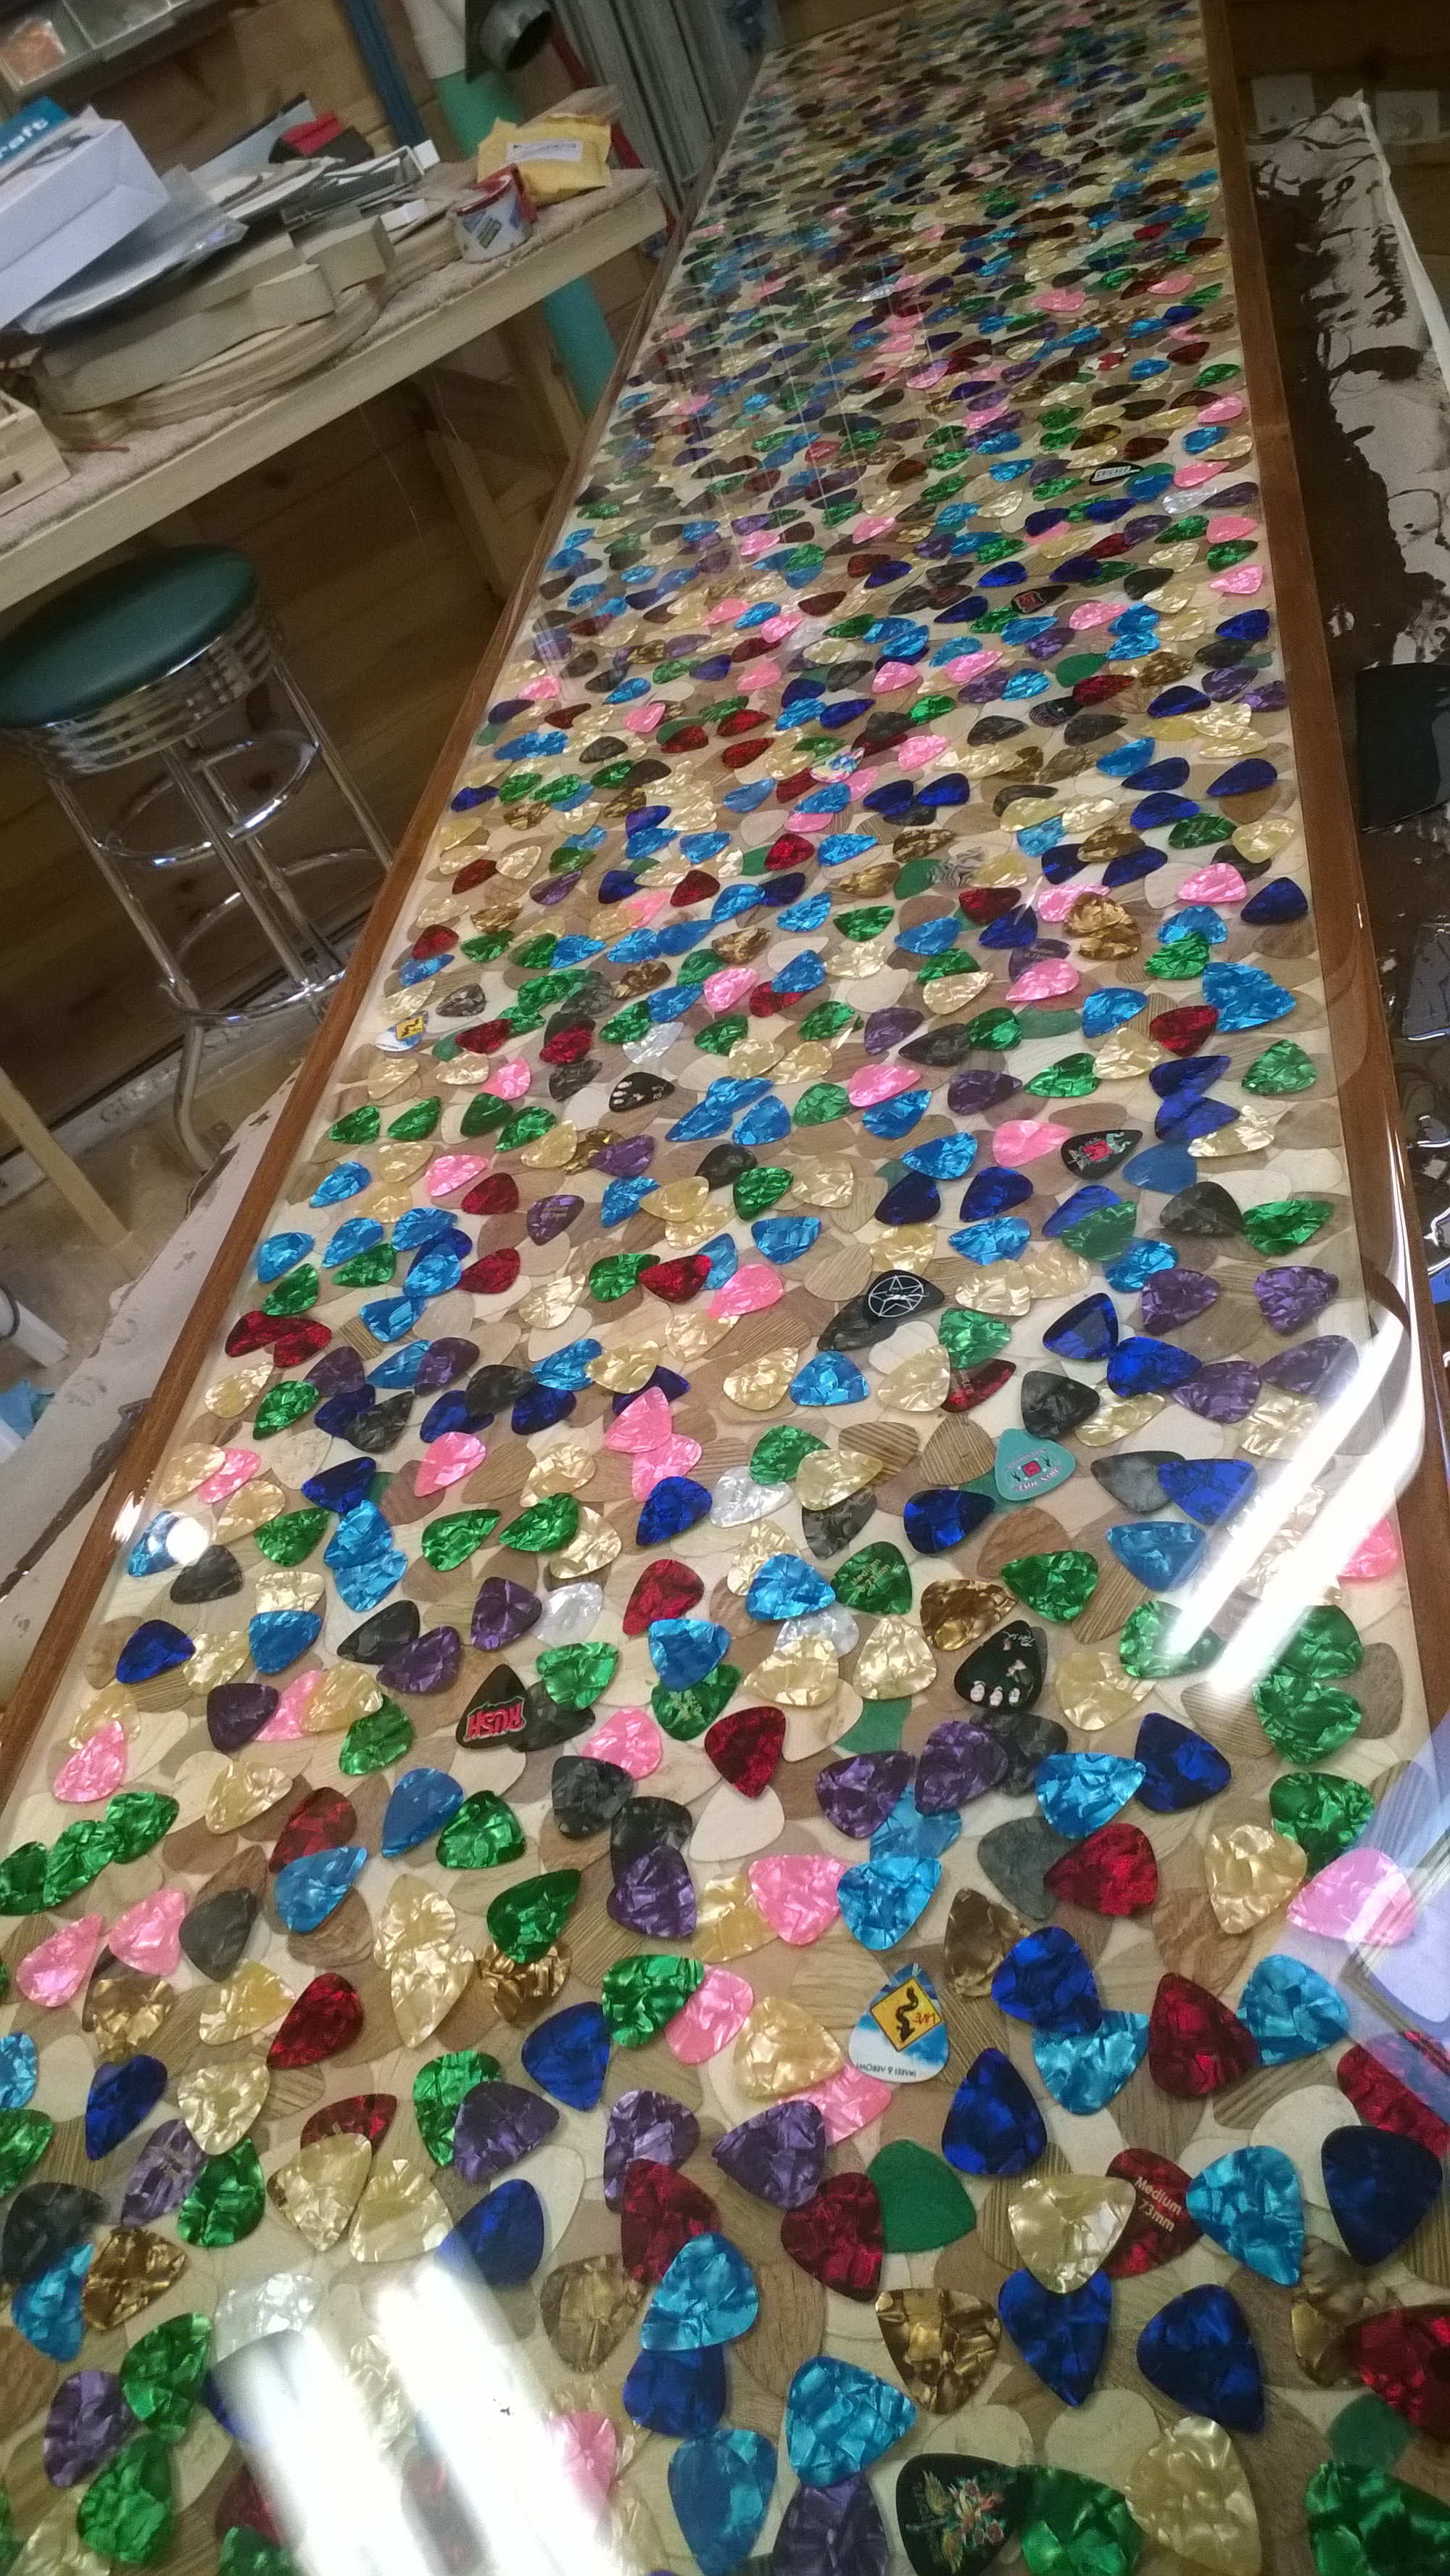
Got picks?
The counter top was an entirely different matter. Here again I spent some significant time searching for a decent top. At first I figured I’d use some type of solid surface top, like Corian. I also considered some fairly cheap laminate countertops from the big boxes. For under $100 I could get a top and cut it down.
The problem was I just wasn’t satisfied with any of the laminates – they either were the wrong color, or the pattern and style were a poor fit. A solid wood (or stained hardwood plywood) top just didn’t seem to work here either. What to do?
I don’t recall where I got the idea, but I thought it would be cool to a collage of guitar picks, concert tickets, 45’s, and other memorabilia sealed under pour-on epoxy. The guitar picks would act as the base for the whole thing – they would cover the substrate like confetti. Some quick basic math showed I’d need around 1,800 picks arranged without overlap just to roughly cover the top. This would leave tons of gaps of course between picks – especially the rounded edges.
The main problem was expense – sufficient quantities (3,000+) of real guitar picks would cost more that I was willing to spend. A few years back I picked up a sample pack of wood veneers. I thought these might make for good “picks” – they wouldn’t hold together for plucking strings, but under epoxy they should look quite nice. So I picked up a punch and began a nightly process of punching out these faux picks from the veneer sheets.
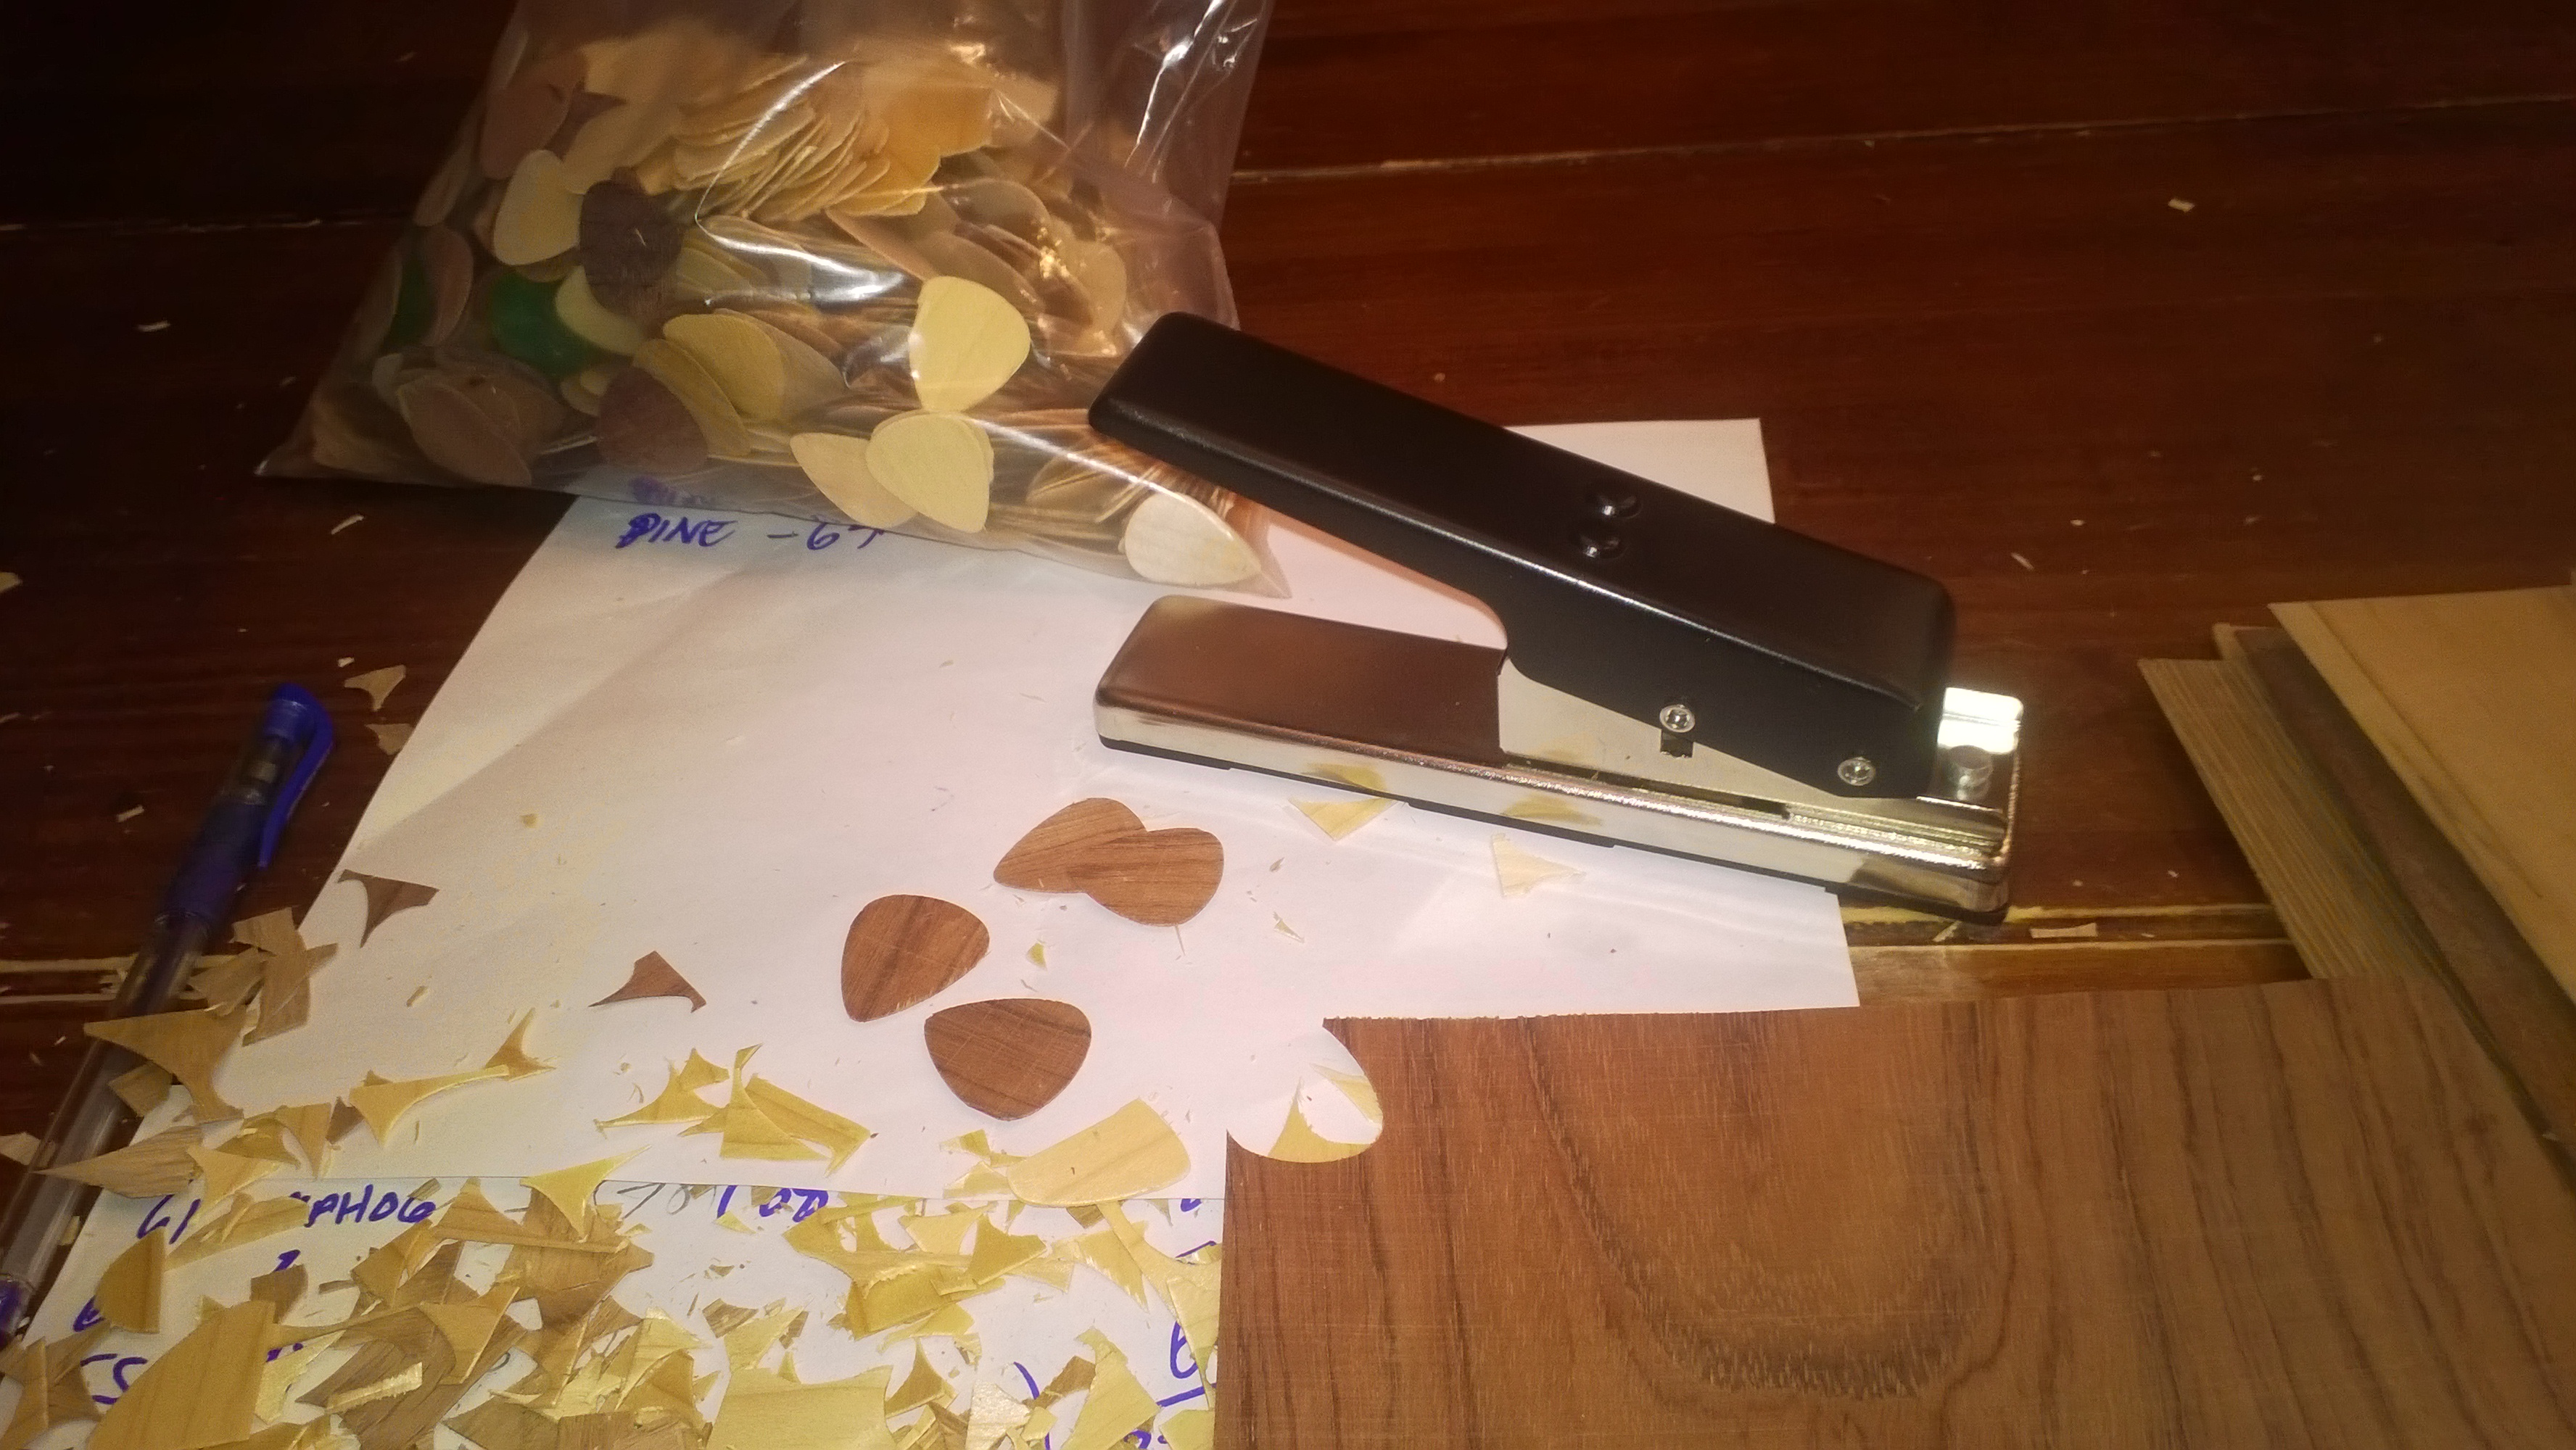
Punching out “picks” from veneer
With around 1,800 of them in hand, the next step was to construct the top. This was fairly straightforward – a sheet of plywood wrapped with 1-1/4″ strips of poplar. I left about a 3/8″ recess for filling with epoxy. Then began the process of gluing down the veneer picks. The mod podge swelled the veneer, resulting in some curled edges that required a bit of extra work to pin them down either with pressure or for some with cyanoacrylate.
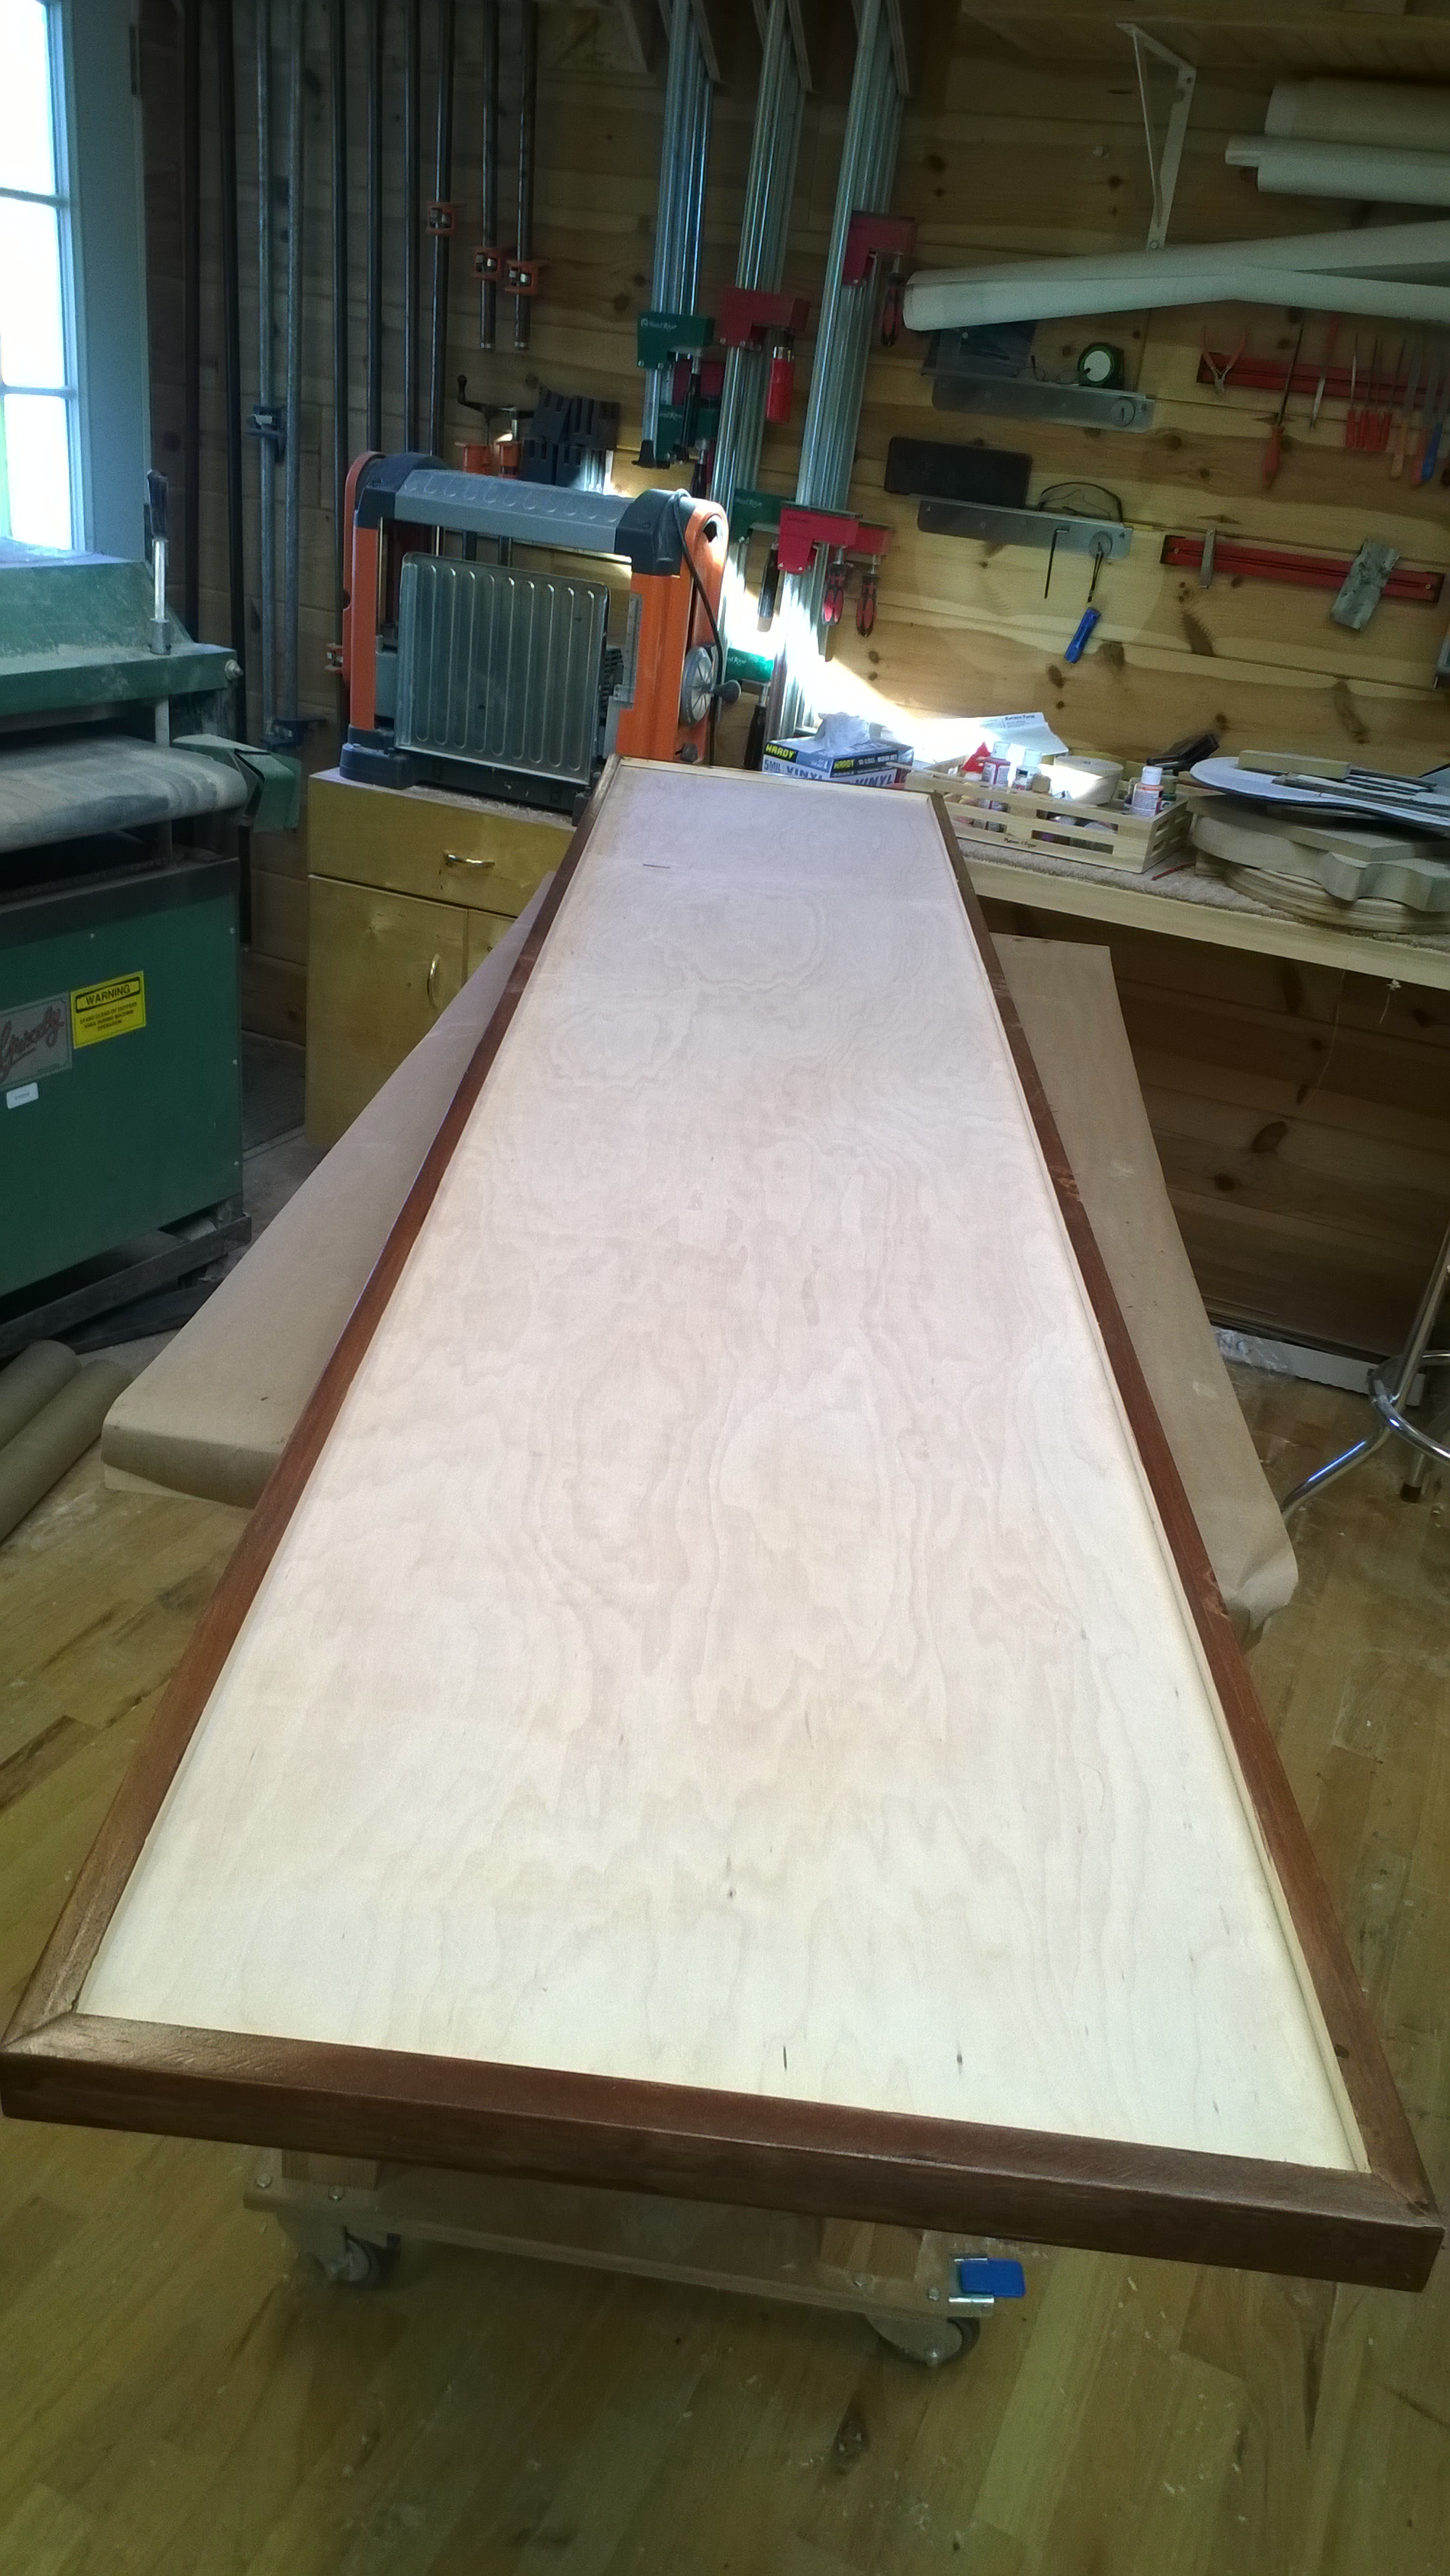
Assembled top empty

Starting to glue down the first layer
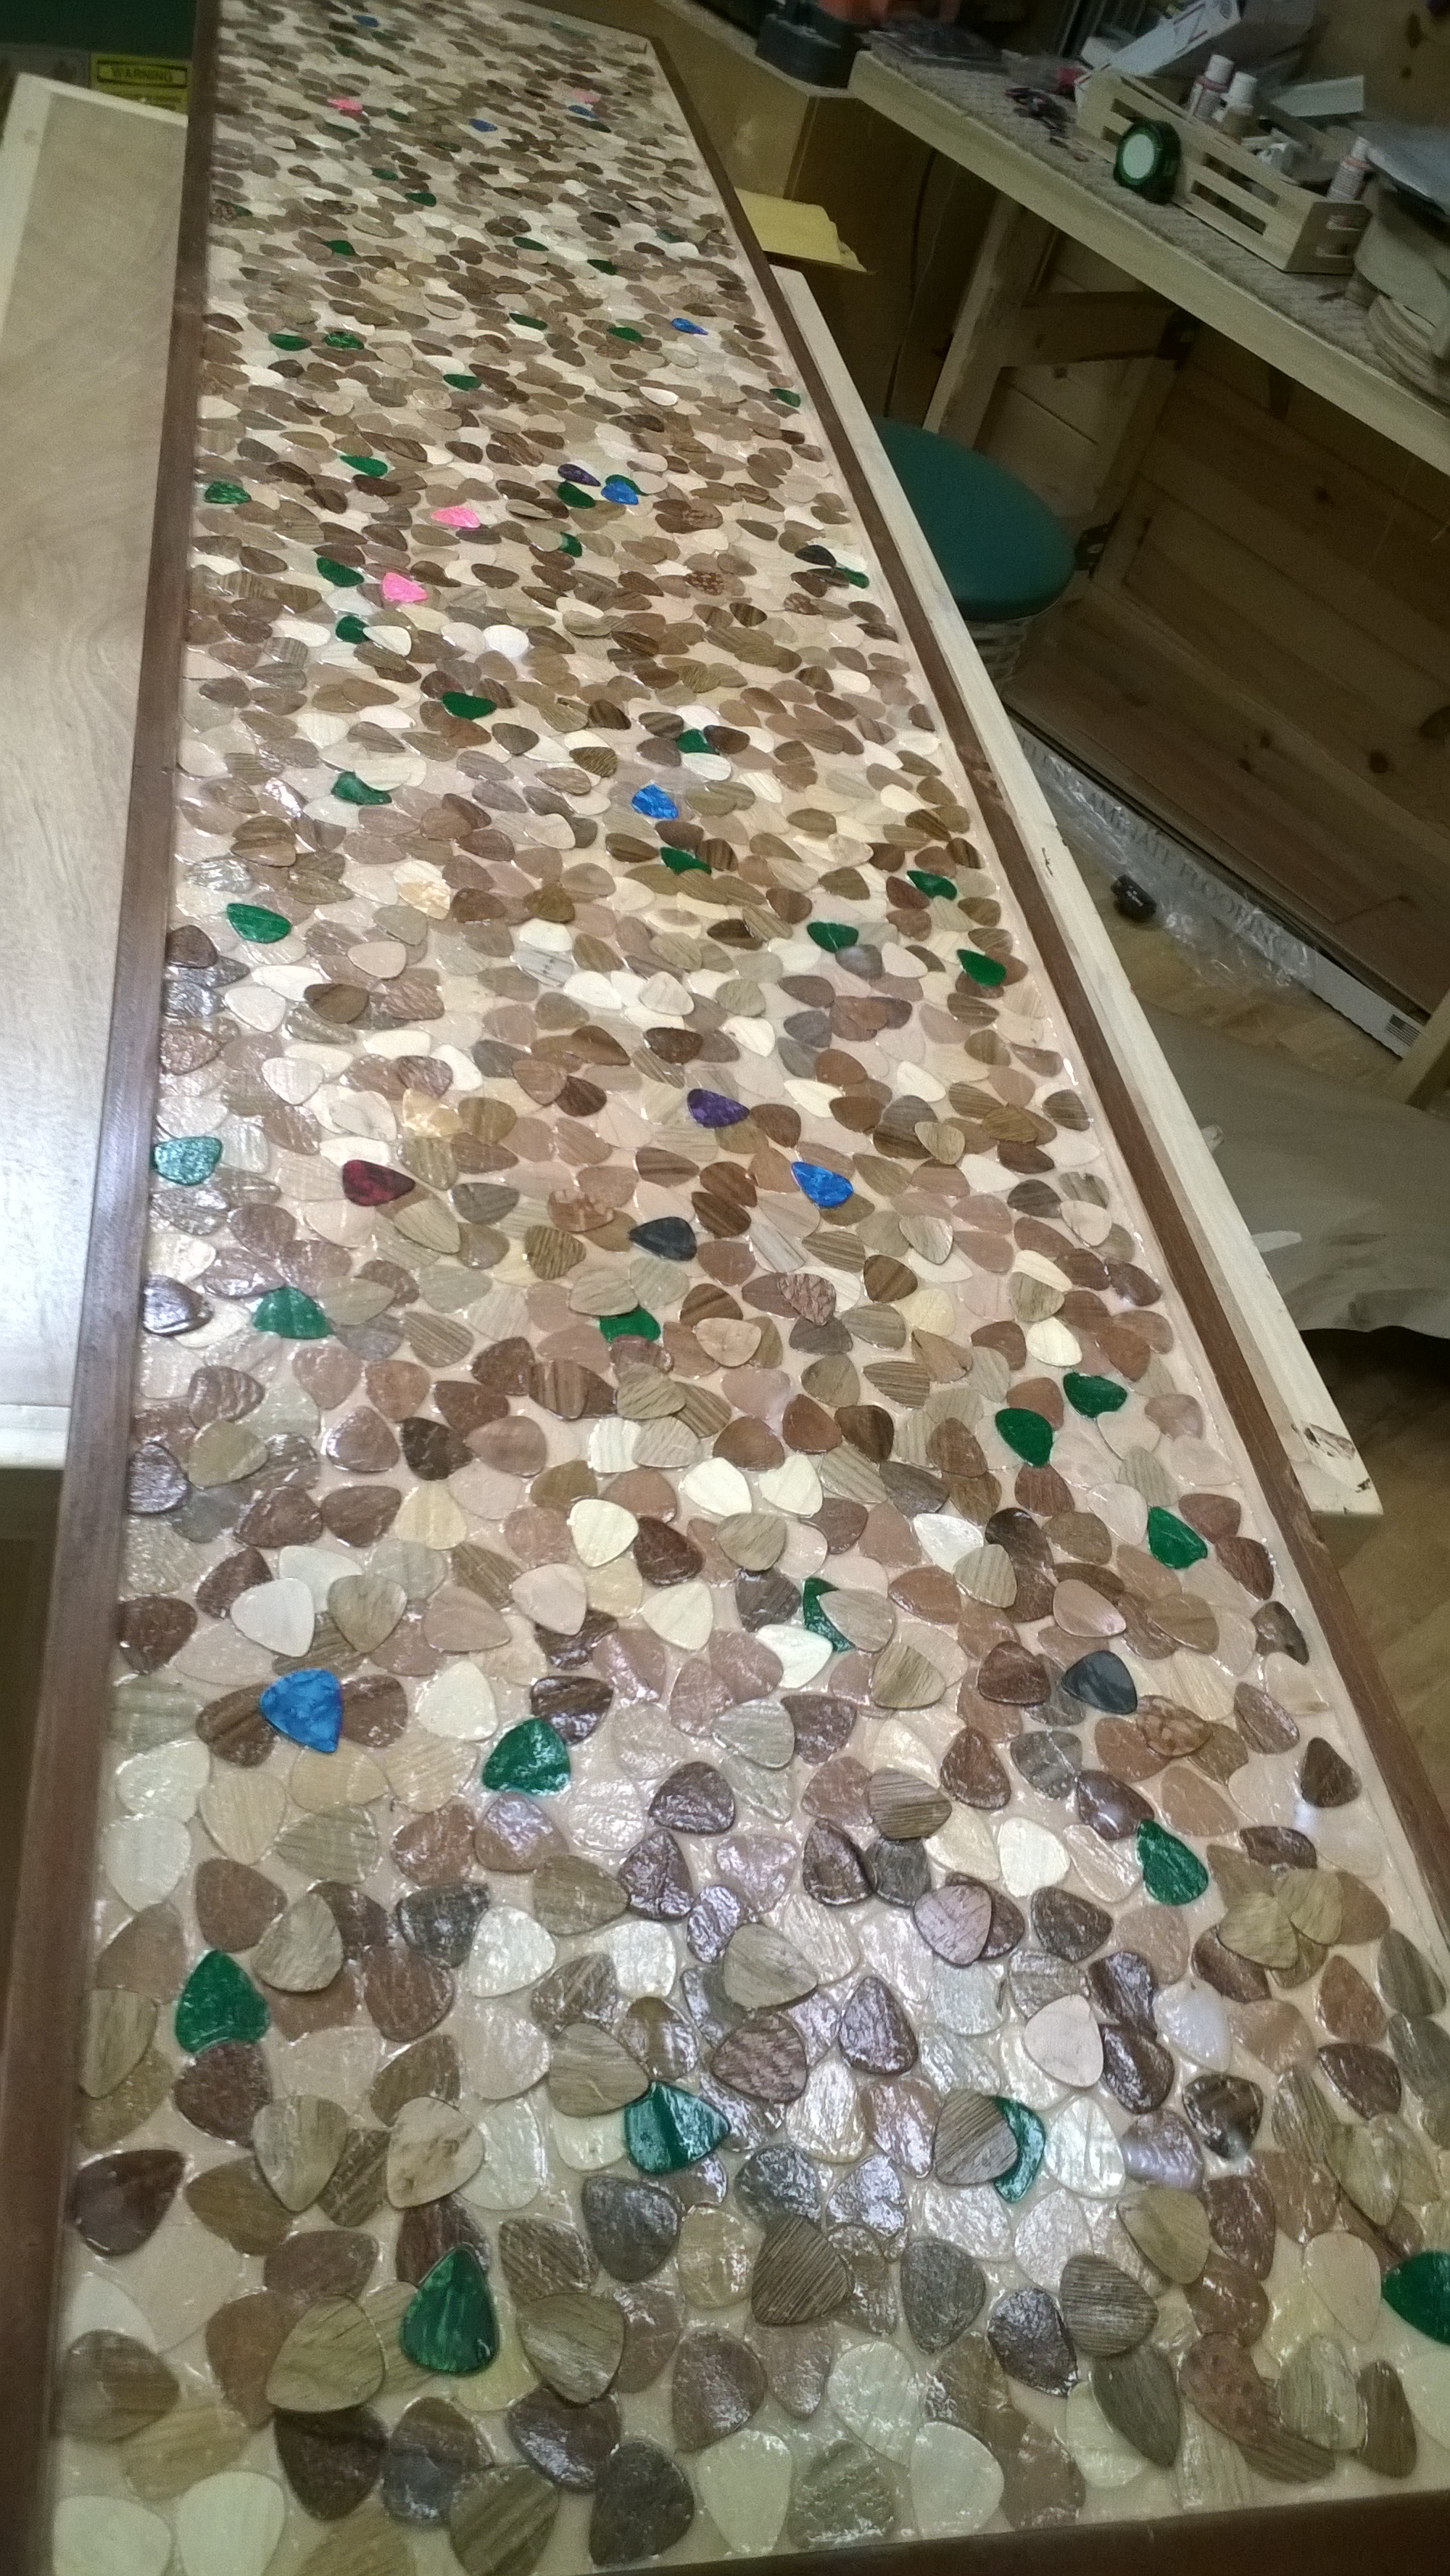
First layer complete – mod podged down
While I liked the veneer, I really wanted to add some celluloid picks to the mix. The problem with the affordable ones I could find on Ebay was they all shipped from China – and my last attempt to purchase something from China ended was a mess. I lost the money, no product. It also takes weeks.
Thankfully I found an American seller with an offer of 1000 picks for $43! It was the last batch offered, so I snatched ’em up and started laying them down over the veneer. I heated up the shop to 70+ degrees per the Envirotex Lite instructions and made a first pour over the wood picks. This proceeded through 4 pours, each time adding new picks on top of the prior pour after a few hours while it was still tacky. It worked quite well and resulted in a very nice layered effect.
The final pour I let flow right over the edge, covering them and smoothing the transition from the center to the frame. The epoxy worked quite well, however I did run into an issue with the next to last pour. It was a very thin pour and I got a bit too aggressive with the heat gun in a couple spots – leaving a few round, rough impressions in the top. Thankfully a final pour cured all ills leaving no evidence of its existence. Whew.

Adding a new layer on top of a still-tacky pour
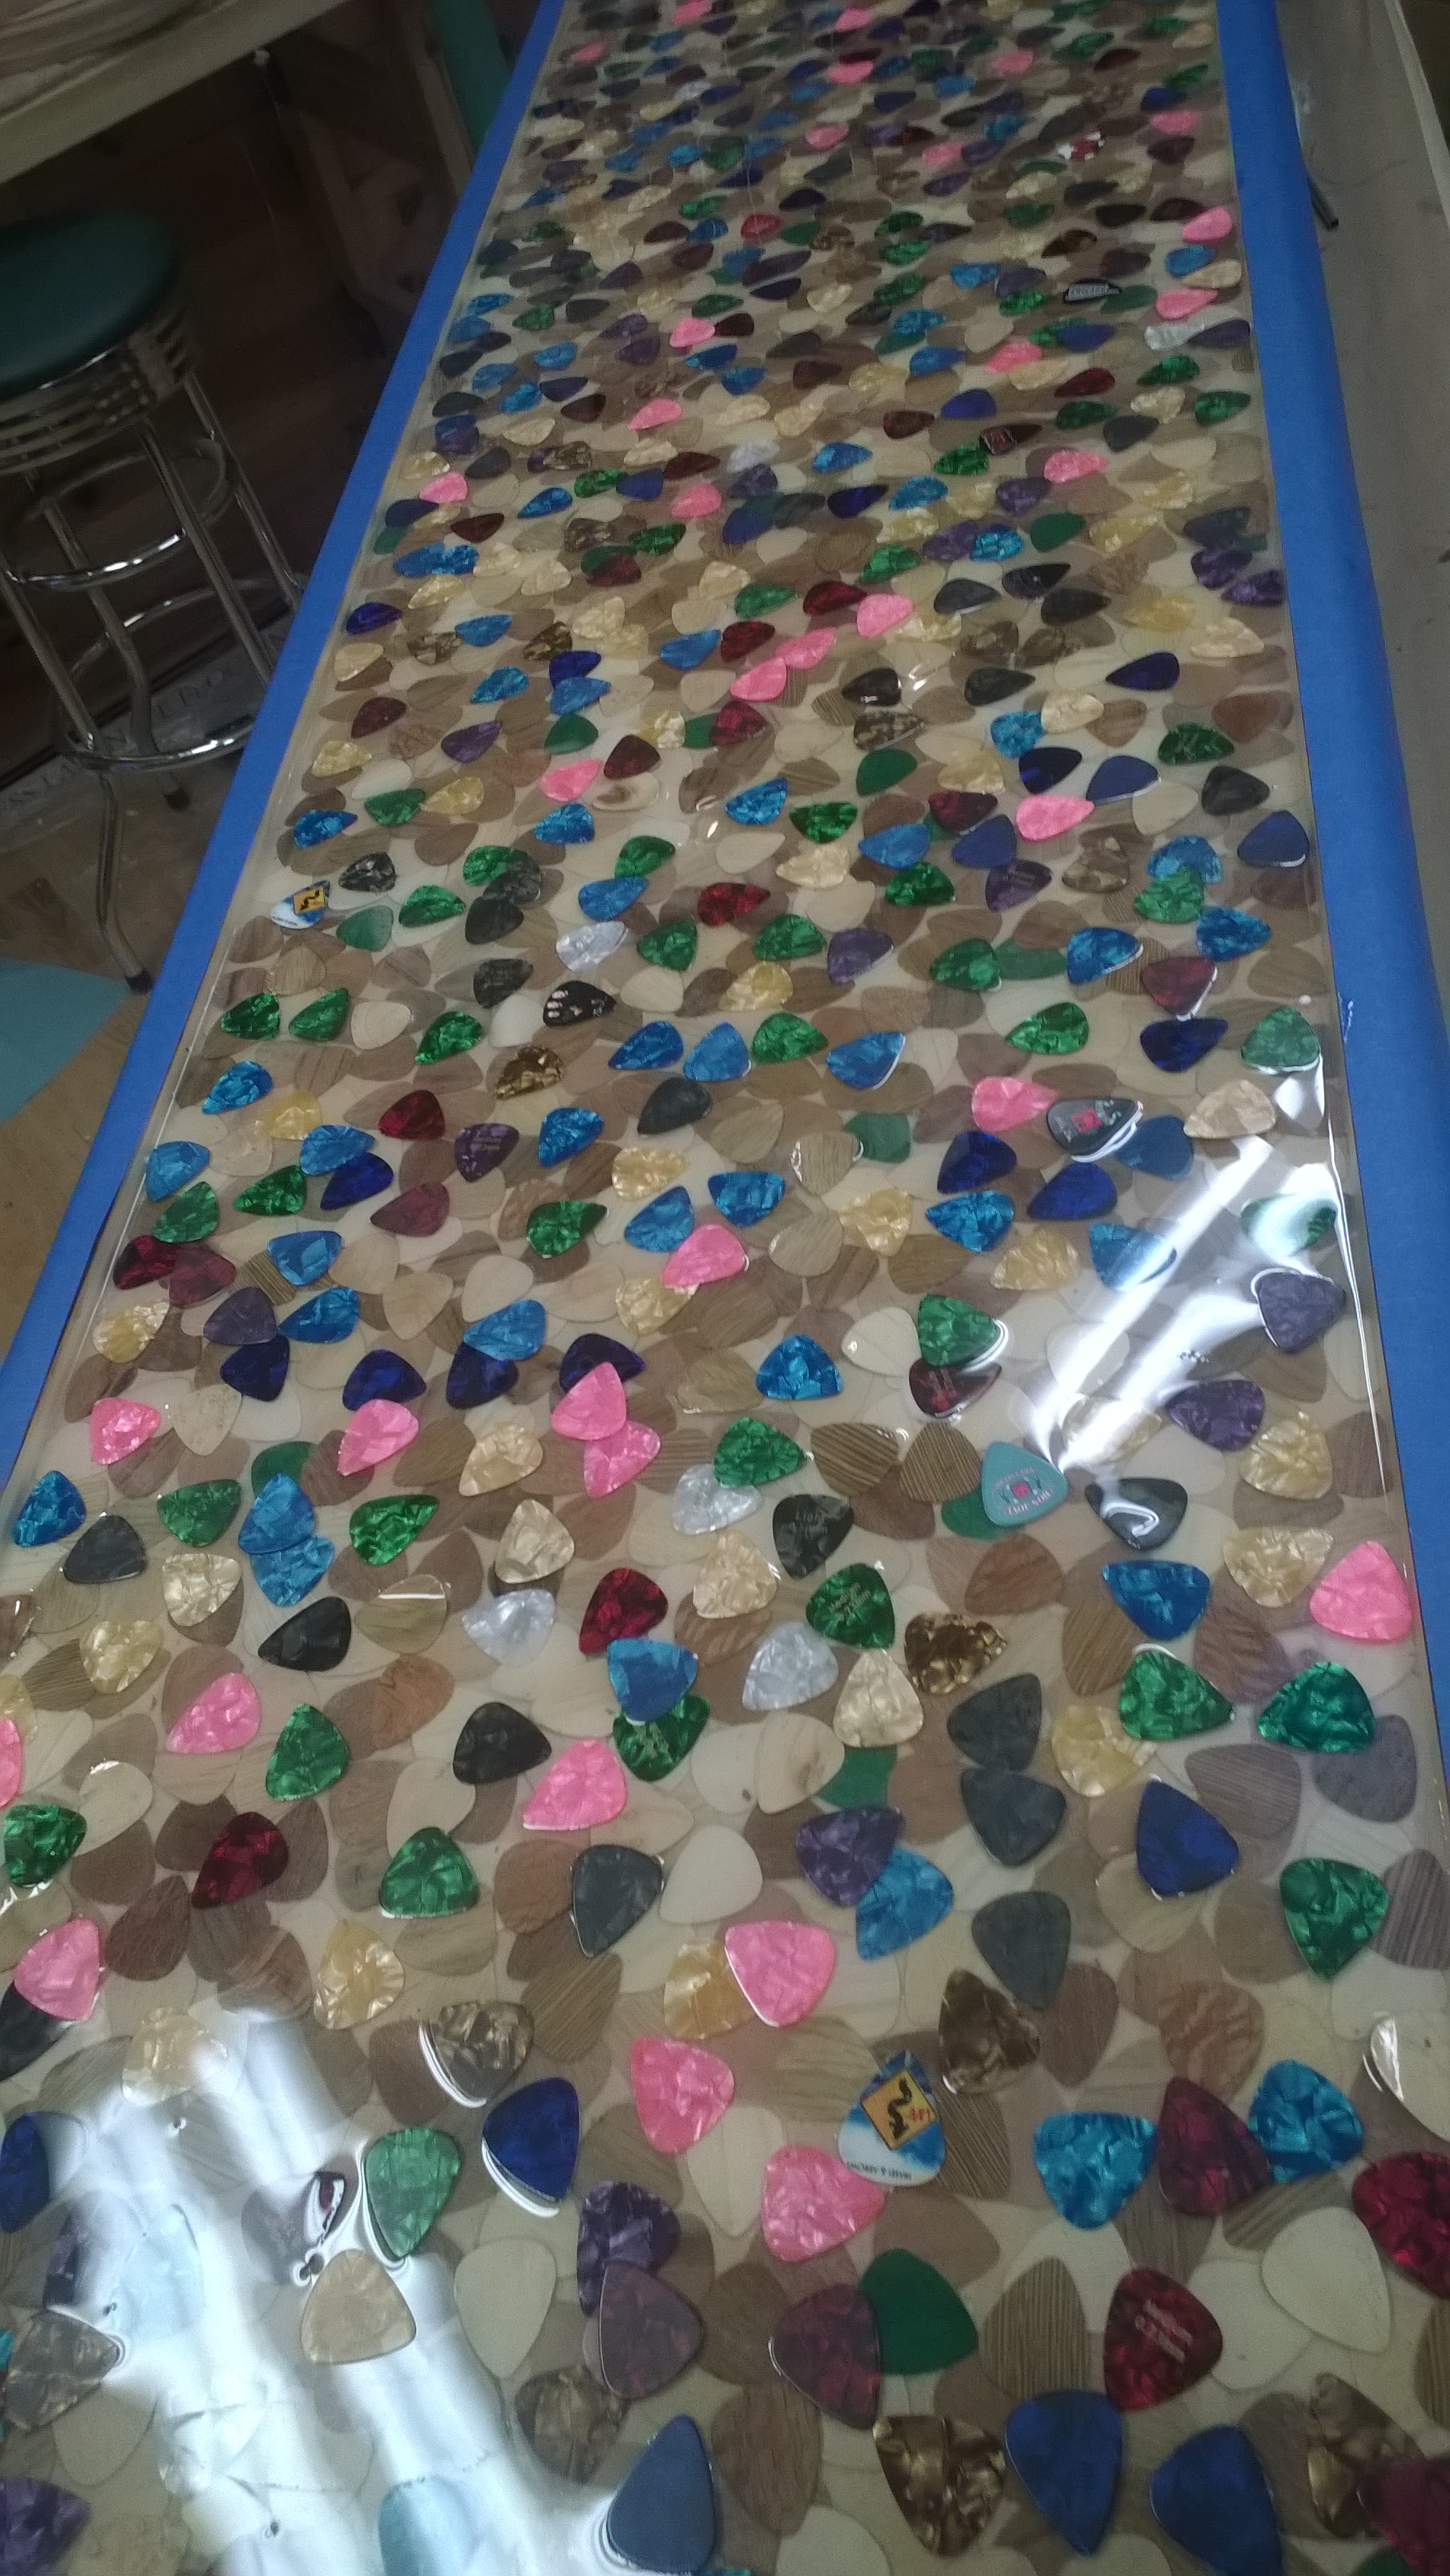
Layering on the celluloid picks under Envirotex Lite
Final pour
Next up…installing the top, drawer pulls, and grill cloth