

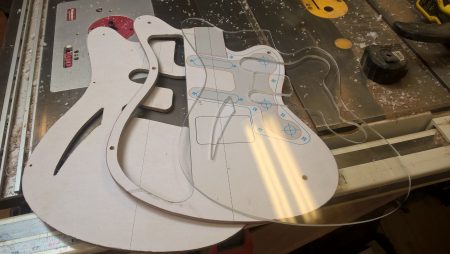
Body templates

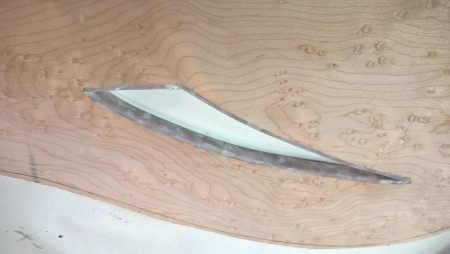
Close-up of wild bark inclusion in the birdseye Maple
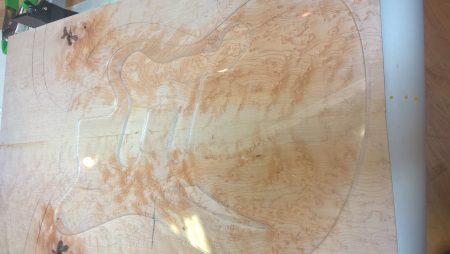
Choosing the top grain pattern

Binding the sound hole
The sound hole bound with pearloid white binding

The body base and figured top plate

Gluing the body together

Electronics pocket routed
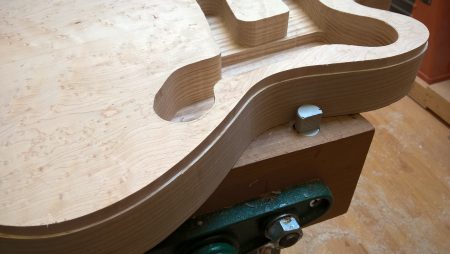
Binding ledge cut
With the Ash blank shaped, it’s time to prepare the figured top. I made a “top cap” template including holes for the sound hole and electronics pockets. Two of these were cut: one in MDF and another in acrylic. I wanted a clear version to allow me to see the grain pattern I was selecting for the finished top.
The book-matched cuts of birdseye Maple included a really nice bark inclusion. When initially laying out the top, I’d joined the edges such that the inclusion spots would appear just behind the bridge. I thought this would look amazing filled with colored or even phosphorescent epoxy. I played with this for some time but the tradeoff was there are few “eyes” in this section of wood. If I chose to use the inclusions, most of the birdseye figuring would either be underneath the pickguard or not on the top at all.
When I joined to top along the opposite edges, the center and lower bout featured significant figure, including both birdseye and curl. After agonizing over this for some time, I decided against using the inclusion and sticking with the birdseye. I made sure to leave as much material around the bark inclusion for possible use in a future project.
The top piece was jointed, glued, and thicknessed. I’d originally considered thinning this piece down to between 1/8″ and 3/16″, similar to my very thin Epiphone Wildkat top. The photos I could find online of the surfcaster however, seem to show a fairly chunky top. This was most evident at the sound hole where the binding looked about as tall as the binding on the sides. I briefly considered trying to resaw the top further and then adding a thicker patch under the sound hole, but ultimately settled on a solid 1/4″ cap.
A template was used to mark and then rough out the top and mark for the sound hole. I template routed the sound hole as much as I could and used a hand saw to remove the rest. Some cleanup with a small file and it was ready for binding.
The binding is a white pearloid plastic matching the pattern of the pickguard. It’s roughly 1/16″ thick and 5/16″ tall. This was attached with some Stewmac Bind-ALL and held in place with paper binding tape. A couple small gaps were filled with sawdust, but it came out looking really great.
Before turning to the neck, I decided to cut the rabbet for the binding. Instead of buying an expensive specialty bit from Stewmac, I grabbed a Whiteside flush trim bit and a spare bearing, 1/8″ smaller, to create a 1/16″ rabetting bit. This cut quite nicely, though I decided to hold off on actually binding the body until after cutting the neck pocket. And to help ensure a tight fit, I don’t want to cut the neck pocket without first building the neck.