

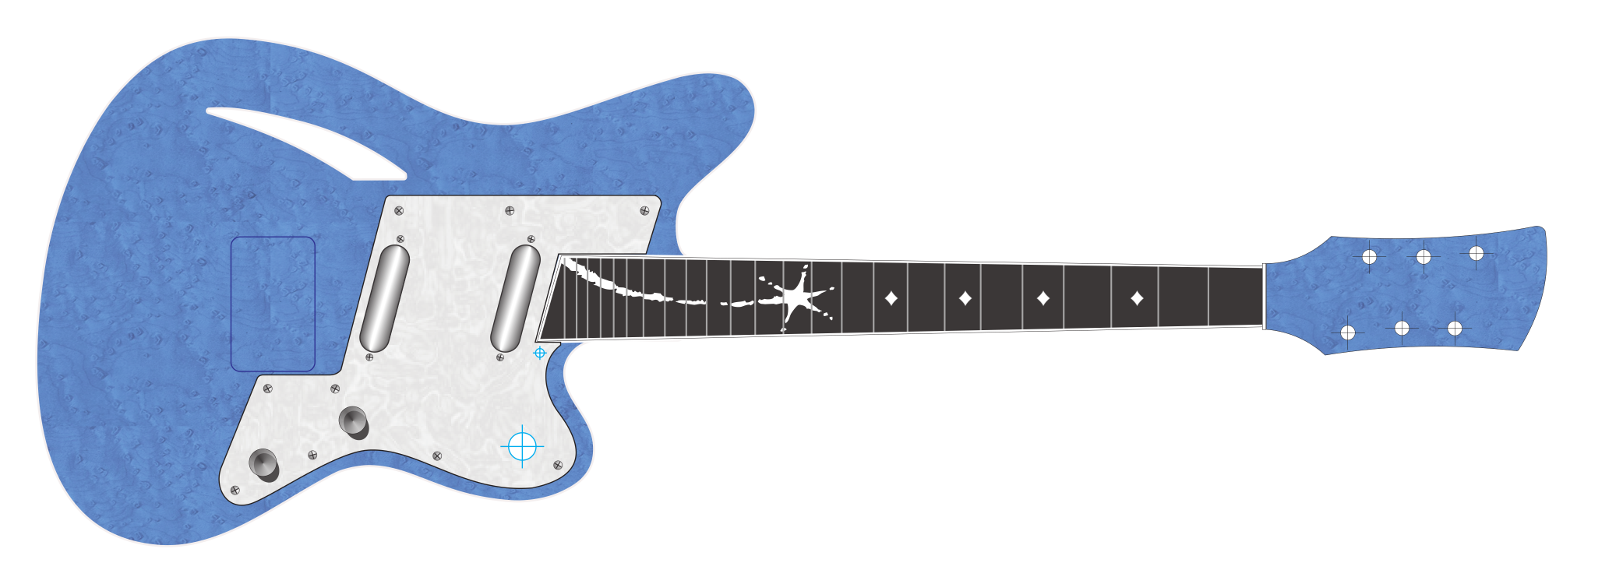
The Wish-caster design

Cutting out the star with a jewel’s saw
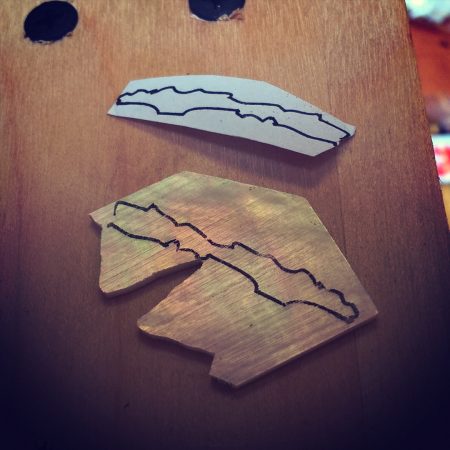
The line art transferred quite nicely from the laser printed output

Layout of the completed shell pieces prior to inlay

I placed the numbered pieces in a dixie cup for safekeeping
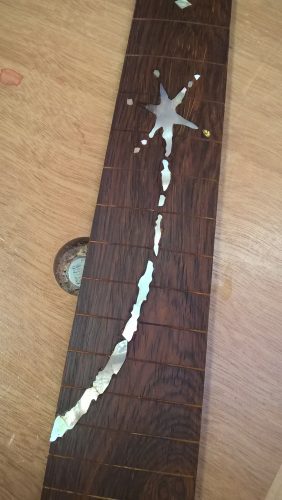
Inlay complete

Preparing to fret the fingerboard

Binding secured with tape while glue dries
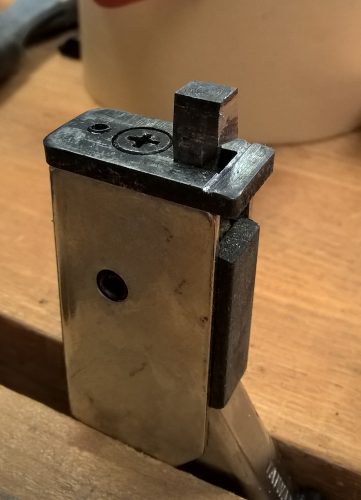
A clearance slot filed into my Radio Shack nippers to make fret tang cutters
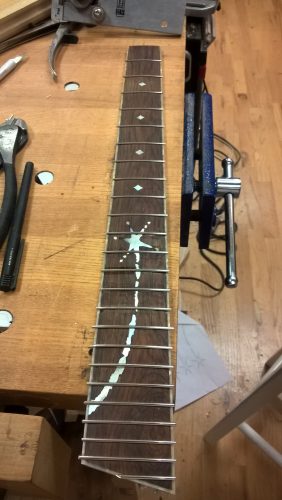
Frets installed. A few of the frets aren’t fully seated yet.
The Design
The first two electrics I built were constructed with factory-made necks. Having never fretted an instrument before, I was apprehensive about taking on that part of the project with a hard deadline. For this design I wanted a custom inlay on the fretboard featuring the primary ‘star’ component of the Make-a-Wish logo. Last year I acquired a fretting jig and table saw blade made for the task and used them with much success on the Appalachian Mountain Dulcimer project. This time, I would build the neck from scratch.
I’ve still got a decent stock of Cocobolo in the shop, so the fretboard will be made of that. I also purchased a few ounces of white mother-of-pearl blanks from stewmac.com. Using CorelDraw and a vector graphic of the logo, I scaled and arranged the bits I wanted over a full size drawing of the fretboard.
Preparing the Fretboard Blank
I prepared a 1/4″ thick fretboard blank of Cocobolo and slotted it to Fender 25.5″ scale length using the aforementioned template and saw blade. I chose a 9.5″ radius for this guitar, mainly because my favorite neck is on my Ovation, which is only slightly shallower at 10″. I’ve seen a few radiusing jigs online, but they were either overly complicated or required tools I didn’t possess. I did see someone who built a drum sander sled that carries the fingerboard blank through at a slight angle, taking off the edges. I chose not to build that and instead got started with the sanding block. Hand sanding the radius, however, took quite a bit of time and paper. The corners took a long time to drop down, wearing out the paper at the edges well before the center even made contact. Next time, I’ll build the drum sanding jig!
The Inlay
A neat trick I learned from Mary May’s online carving school is how you can easily transfer a design from normal laser printer output using a household iron. This had worked for me for transferring template designs onto hardboard, so I thought I’d try it out on the pearl blanks. The completed design was printed, cut out, and laid toner-side-down onto appropriate size pieces of pearl. A hot iron was held on top for about 30 seconds. Rocking it back and forth a bit seemed to help to ensure a good transfer. The lines came out dark and clear on the flat, brilliant white pearl pieces. Perfect!
Each piece was then numbered to match the numbers assigned on a separate print out of the design and cut out with a jeweler’s saw and fine blades. This operation required a magnifier visor I’d picked up at Harbor Freight some time ago. Though this appears to be a tedious job, the blades actually made fairly quick work of cutting out the parts and I was able to track the line closely.
Another trick I learned online was using masking tape and super glue to temporarily attach the pieces to be inlaid to the fretboard. It basically works like this: I affixed a piece of masking tape sticky-side-up over a print out of the design. The tape is sufficiently translucent to see the design though it. As the pieces of shell were cut, they would be placed into position on the sticky tape. Once the pieces were all cut, a second piece of masking tape was put on the fretboard. I then applied some CA glue to the top of the masking tape on the fretboard and glued the tape and inlay assembly into proper position on that (see photo). When the CA cured, I carefully scored the fretboard around the inlay pieces through the two thin layers of tape. The tape and shell pieces were then removed from the fretboard and white chalk rubbed into the score lines, making them sufficiently visible for routing.
A 1/16″ bit was used to evacuate cavities for the pearl pieces. I don’t have chisels fine enough for the small shell pieces I was inlaying, but an exact-o blade did a nice job of trimming back the Cocobolo until the pieces fit snugly. Once in place, super thin CA glue was applied to the inlay, which wicked around the pieces, holding them firmly in place. After sanding again with the radiused sander, additional CA glue was added to “lock in” the Cocobolo dust now filling any open spaces. The resulting inlay came out great though there was a bit of the star that didn’t survive the final sanding. The cavity wasn’t quite deep enough at the edges. I’m still quite pleased with the result and decided against trying to fix this by adding a separate piece.
Binding
I knew that binding the fretboard would add significantly to the build time. Each of the fret wires would need to be “nipped” to remove the tang on the ends and gluing them in place would also be a bit trickier as I couldn’t just drop some CA glue in the slot at the sides. However, the guitar simply wouldn’t look complete (to me at least) without a bound fretboard. The actual binding process is pretty straightforward. I did find that the curved binding — it’s packaged and shipped in a coil — was far easier to apply to the straight fretboard if I first heated it with a heat gun and spent a few seconds working it flat. Just as with the sound hole, I used the StewMac “BindALL” cement and secured it with that orange tape until dry.
The 5/16″ binding was nearly twice as tall as needed due to the thinning at the fretboartd edges from the radius. I started leveling this off with chisels first and then finished with sand paper and finally a scraper. The biggest issue I had here was cleaning up the corners – there was some glue squeeze out that was tricky to scrape away. Also, when I wiped the Cocobolo clean with some DNA (acetone would eat the plastic binding!), some of the wood’s oils rubbed onto the white binding, yellowing it a bit. I scraped the binding lightly to restore the color, but will need to be careful in future to prevent this from happening again.
The Frets
At the same time as I purchased the fret blade and template, I also picked up a fret wire bending machine. I considered making my own, but I plan on building quite a few guitars and don’t feel the need to learn from my mistakes at bending fret wire by hand. The machine makes quick and easy work of bending the fret wire, highly recommended. Once I finished cutting all 24 pieces, I began the process of pressing them in place. Again here I had purchased special tool that chucks into a drill press to push the wire into place. I’d hammered them in the fretboard of the dulcimer, and it wasn’t all that bad. However, it was also fairly easy to put a noticeable ‘ding’ in a fret, or otherwise warp it. This tool includes inserts for common neck radiuses and applies even pressure along the curved surface. Very helpful.
Because of the binding, the tangs at the ends of the wire would need to be removed. I first attempted to use my end cutters, but these aren’t truly flush – they would need to be ground for that and I don’t have a bench grinder. Next I tried filing the tangs away with a small file. Although this worked, it was awkward. Holding the wire proved difficult and would require a jig of some sort to do well. Filing was also slow work and one of the pieces I tried this on wound up a bit bent from the effort. I knew that I could purchase a specialty “fret nipper” from StewMac, but that would mean waiting a few days to continue the job. I did, however, have a PC board “nibbler” tool I got at Radio Shack years ago for electronics work. The tool needed some modification as there wasn’t any clearance for the fret top. But by filing a groove into the top of the tool, I was able to quickly and easily “nibble” away the tang…for most of the frets. Until I tried to “improve” the tool further by deepening the slot. Bad move – it essentially stopped working consistently at this point and I returned to hand-filing the remaining fret wires.
Most of the frets pressed into place fine, but there were definitely a few troublesome slots. The frets didn’t like passing through some of the pearl inlays. Though the slots appeared wide/deep enough, but the ends wouldn’t seat properly on a few of them seeming to bind slightly in the middle at the pearl, causing them to rise a bit. I tried sawing the slot wider/deeper. I tried nibbling a bit at the tang. I tried CA glue to hold them down, but this was also problematic as I had some issues applying the glue and then quickly clamping down and spraying the accelerator. The CA glue would also wick out from under the frets and leave a line across the unfinished fret board. At this point I think I’m going to need to scrape back any ‘bumps’ of glue and then finish the entire fretboard with the CA to get a consistent tone.
The next couple weekends we’ll be out of town, so for now this will need to sit and wait for me to get back and fix the bad ends, file and bevel the ends, and apply the CA ‘finish.’ Even with the issues, it’s looking really nice and I’m confident I’ll get a nice final result…