


Approval from Quality control

Verifying the pickguard drawing

Laying out the pickguard
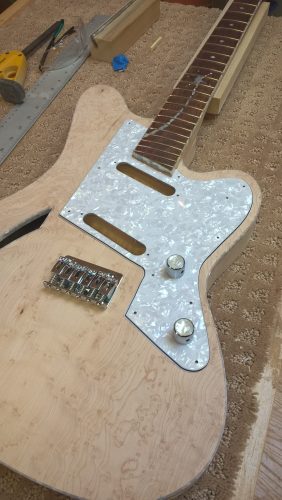
Test fit of the finished pick guard

Nate applies a water based mix of Transtint on a sample piece of birds eye Maple.
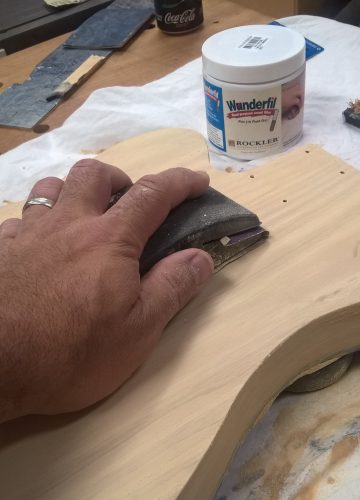
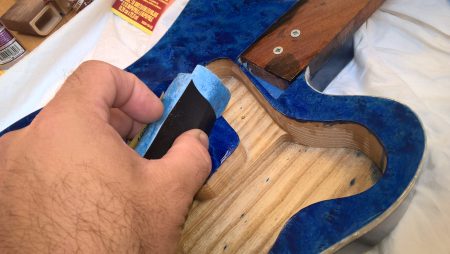
Sanding the grain fill
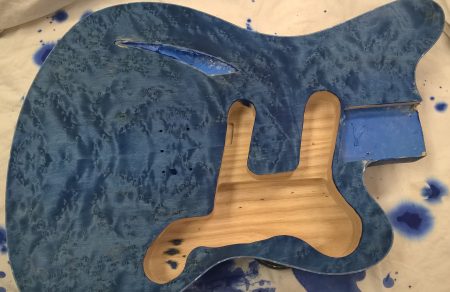
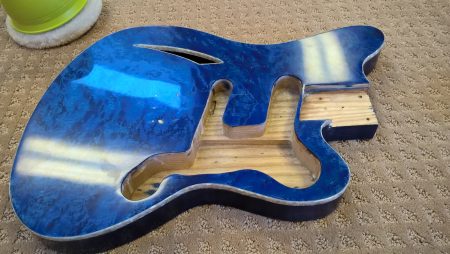
Body dyed blue

Headstock dyed

Applying the water slide headstock decal
With the neck now attached, it was time for a quick trip to quality control – my eldest son Sean – for a check. Thankfully it passed and so the project moved forward to making the pick guard.
Pickguard construction began, as usual, with templates. They were prepared from 1/2″ MDF using the full-size drawing. I made one of the full pickguard and another for just the pickup slot – which I then used to route a matching slot on the full pickguard template.
I had purchased a large sheet of white pearloid pickguard material off Ebay from a supplier in China. This is a three-ply sandwich consisting of a plain white bottom, pearloid top, and a black sheet in the middle. I affixed the template to the top with doublestick tape, cut it close on the bandsaw and pattern-routed it to final dimension. This is where I realized my mistake.
Because the template had been atached to the top ply, I was unable to now simply swap bits to route a chamfer on the top edge. Instead I would need to remove the pickguard from the template, flip it around, and re-attach it from the bottom. This wasn’t too big a deal, except that the protective film covering the top came up with the tape.
This left the pearloid plastic veneer unprotected for the remainder of the build, and resulted in a few minor scratches. It’s not severe enough to toss the material, but could have easily been avoided if I’d thought this bit through some more.
The new pickguard was then fit to the top. It fit pretty well on first try, though I did sand a bit around the neck to close up some gaps.
Now the fun bit – dying the body.
I chose to dye the body blue to approximate the Make-a-Wish colors. Also, I thought blue would look interesting and somewhat unique based off photos of 90’s era Charvel Surfcasters. I picked up a bottle of Transtint blue and my son Nathan and I experimented some.
We played around with applying the blue stain directly to the wood, mixing it with a gloss urethane, and applying it over a sanded-back base of black stain in an attempt highlight the grain. We settled on a simple direct application of blue dye.
Because the back is Ash, to get a great, perfectly smooth finish without dozens of clear coats, I applied a grain fill first. It so happened that the same weekend I was doing this, a brand new Rockler store was opening about 10 minutes away. I stopped into the store and picked up a can of their “Wunderfil” to try. This worked pretty well. It’s water soluble, went on easily enough, and the ‘natural’ color matched the Ash pretty closely.
I worked the fill into the grain with an old credit card, let it dry, sanded it back, and was finally ready to dye the guitar.
On the top, I kept with a straight application of several drops of blue Transtint in water. I would have preferred to use DNA, but as the alcohol would dissolve the binding, it seemed like a very bad idea. I wet the wood to pre-raise the grain and sanded back the ‘fuzzies’. I then applied a very liberal coat of stain, allowed it to soak in, wiped off the excess, and left it to dry. Once dry it was sanded lightly once more. For the back, I mixed a few drops of black into the blue stain to darken it up a bit.
Something I neglected to do and now wish I had was to mask off the plastic binding. I’ve watched several videos online with luthiers scraping away the color from the binding following dye or paint application and figured this would be a reasonable approach. Furthermore, it would prevent a witness line from forming where the tape edge meets the stain. Unfortunately, I found scraping back the binding to be a difficult and tedious process. The color scraped off the binding easily enough. However, it required a very steady hand and high magnification for me to keep from scraping the wood as well. I was forced to apply small amounts of blue dye with a cotton swab to some of my “oops” spots. There are still some areas that show the remnants of this less-than-perfect scrape job. Next time I will mask the binding!
For last year’s build, I chose to spray a tobacco burst finish using my Earlex 5000 and tinted water-borne poly (Minwax Polycrylic). A few critical errors were made on that finish that I wish not to repeat. First, the individual coats were too heavy and applied too often. Consequently, the finish came out soft and ultimately several cracks formed in the top polished gloss finish as the lower layers continued to cure and shrink. I also neglected to sand between coats.
Because poly requires a mechanical adhesion and doesn’t “melt in” like a lacquer, when I began final sanding of the initial top coats, cured poly began peeling and flaking off instead of sanding smooth. Ultimately I wound up literally peeling off the entire first finish and doing the whole thing over again.
Additionally, much of the grain fill wound up coming out with the first finish when I peeled it off. This resulted in a less-than-ideal surface which required many many coats of clear to smooth out entirely.
In order to prevent this from happening again, I decided to apply wipe-on clear top coats of oil-based Polyurethane instead. One of my favorite wipe-on finishes is Homer Formby’s Tung Oil finish. This isn’t really Tung oil at all – it’s a wipe-on polyurethane that goes on quite easily with a soft rag and builds to a beautiful sheen. I’ve used this stuff many times in the past on furniture pieces and was therefore very familiar with it and knew what to expect.
I applied two coats a day for several days, scuff sanding lightly in between with 400 grit wet/dry paper. For the headstock, after the second or third clear coat, I affixed a water slide decal forever identifying the guitar as the “LCA Wishcaster”.
After around the 10th coat I performed an initial leveling of the finish. Though I sanded through the top at one edge, it was a small enough area that I was able to apply a bit of stain and make it almost disappear.
The back, however, was a bit more problematic.
While leveling I was sure to use well-lubricated, clean sandpaper with very light pressure. I was careful to watch carefully what I was doing. I was careful not to hover in one area for very long. And yet I still somehow managed to sand through a decent-sized section of finish. Ugh!
I briefly considered sanding the entire back down again and essentially starting the back over. In the end I wound up applying additional stain in this area and topped it with another 16 very thin coats of wipe-on poly. The results are far from perfect, and though still months away, I’m more concerned with this guitar being ready on time. I’m going to move forward with the next build and if that comes out OK I may consider redoing the back of this one. Or I may just consider it “character” and a learning experience and move on.
After a little over 24 hours of cure time, I started the final sanding. I worked from 400 – 1000 grit wet/dry paper, briefly soaked first in a small container of water with a drop of soap. After 1000 I paused and buffed out the top a bit. Although I knew it wasn’t quite where I wanted it to be, I was anxious to make sure it *would* buff out. A little bit of brown compound applied to the buffer was all it took to bring out a very nice shine, albeit with very fine (1000 grit) scratches.
So I went back to sanding, using first 1500 and then 2000 grit before buffing it out again and then polishing with Meguiars’ M7 as I’ve read many do. I’m not sure if it’s the way I applied it or the finish, or what, but the Meguiar’s didn’t seem to add much if anything to the shine. Fortunately I was already happy with it before the application, so no concerns there.
Next up is wiring up the electronics and final assembly!
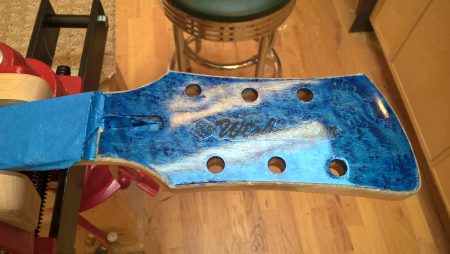
The headstock with decal
leveling the finish
Mmmmm….shiny!