


Body shot

Star detail on 12th fret

The back
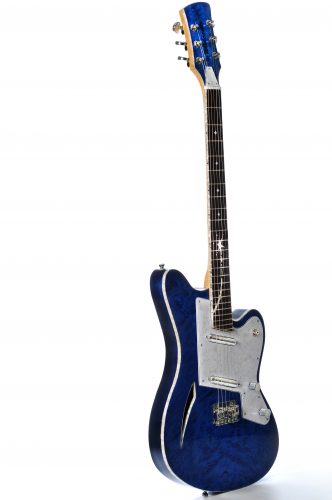
The completed “Wishcaster”
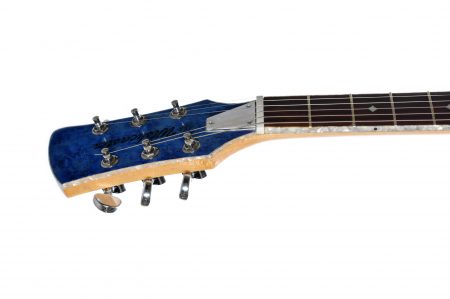
Headstock
Once the finish cured, I sanded with wet/dry paper starting with 400 grit and then working up to 2000. After than, I polished it with brown jeweler’s rougue and buffed it out to a high-gloss near-mirror sheen.
I attached the neck, installed the pickguard and bridge, and then attached the strap pins and tuners. For the nut, I cut a blank from a white sample block of Corian I’d ordered some time ago. This was slotted with files and filed down to the right height. Finally, the guitar was intonated, the action adjusted, and I got a chance to play her.
A couple of issues arose from this first session. First, there were a couple rough spots on the neck where the binding meets the wood. These were quickly and easily handled by sanding lightly with some 2000 grit paper. A bit more serious was a problem with a few of the frets. The high “E” string got caught in a gap between the bottom of the fourth fret and the fretboard. Closer inspection uncovered a few frets with this same problem. I believe these were loosened while the neck was clamped in the vice during final shaping/sanding.
Thankfully, I was able to superglue these back into the slots and then proceeded to reshape the ends a bit and polish them back up. This worked perfectly.
A friend and neighbor of mine owns a business doing product photography. As this guitar was built for charity, he offered to take some pictures of it for free!
I happily lent him the guitar and he produced the beautiful “glamour shots” on this post. If you need some professional photos taken of your product, check out his site.
All that remains is to show her off at the holiday party – perhaps playing her in a song or two – and then hand her over to the lucky winner!