

This weekend marked the beginning of the “load in” process. With Grandma and Grandpa in for the weekend, the kids were well occupied and I had the time to finally start to finish the shop addition.
On Friday evening I finished the loft underside — and did my typical lousy job of taping/plastering the seams. “Hat’s off” to the pros who do drywall for a living…someday I hope to get it right.
On Saturday, I needed to pay a visit to my local Woodcraft store in Woodridge. They were having a “tent sale” this weekend. I’ve been eying a cast iron router table extension for some time now. I was aware of two — one from Bench Dog and another from Peachtree Woodworking Supply. While the Peachtree version was significantly cheaper ($219 vs. $325), I was a bit hesitant about it as I was unable to actually see it and there were no online reviews available. From photos online it was clearly a different product from the Bench Dog version, though I’m guessing that they’re both imported from Chinese factories. In any event, Woodcraft had the Bench Dog ProMax listed as “no longer carried” on their website, so deep down I was hopeful that they might have a floor model or clearance package at the store that I might get at a good price.
After trolling the aisles for nearly an hour, picking up ~$30 worth of small accessories, I made a second swing past their closeout table and noticed something I hadn’t seen earlier — on the floor behind and underneath the closeout table — a Bench Dog ProMax wrapped in cellophane! Awesome. Apparently this was the floor model detached from a demo saw that was sold the previous day. After some brief discussion with the manager and then the “boss” (aka my wife Suzy), it was mine for $255!
The best part is how easy it was to install.
Not being a metal worker, nor having cut any metal denser than aluminum in many many years, I was concerned that I wouldn’t be able to properly drill holes in the cast iron top if needed. Turns out that a) I only needed to drill one hole through the front to attach the fence and b) it was not an issue. The holes in the table lined up perfectly with the saw top and it took almost no effort (even alone) to get the top flushed and tightened. Beautiful. While they say you don’t have to attach the front edge to the fence rail, I figured it couldn’t hurt. So I drilled a hole for the bolt – first 1/4″ starter, then a 5/16″ to finish size.
I then removed the wooden wing from the other side of the table and drilled 5 holes in the cast iron so that I could mount the old left wing in its place. I now have a full 60″ of cast iron top and no sagging melamine extension. I’m sure the extra weight won’t hurt either.
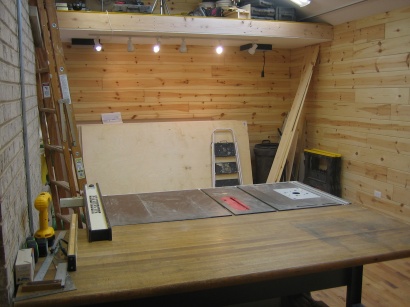
I then installed the track lighting and extension cord reels under the loft and got about as organized as possible to prepare for the construction of the cabinetry that will act as both storage and a shared miter saw/radial arm saw counter top and fence. Since I was getting no where visualizing the cabinetry required for these saws — even using SketchUp — I decided the only thing to do was to simply move them into the shop, test and fine tune their locations as best as possible, and take measurements from there. With some help from my neighbor Wilson (seriously) I was able to load in the jointer, miter and radial arm saw. I now have them positioned where (I think/hope) they’ll best be used and have begun the process of creating the detailed construction drawings for the cabinets/counter top.
Considering my available free time, I’m hopeful I’ll be ready to build/install drawers within two weeks!