

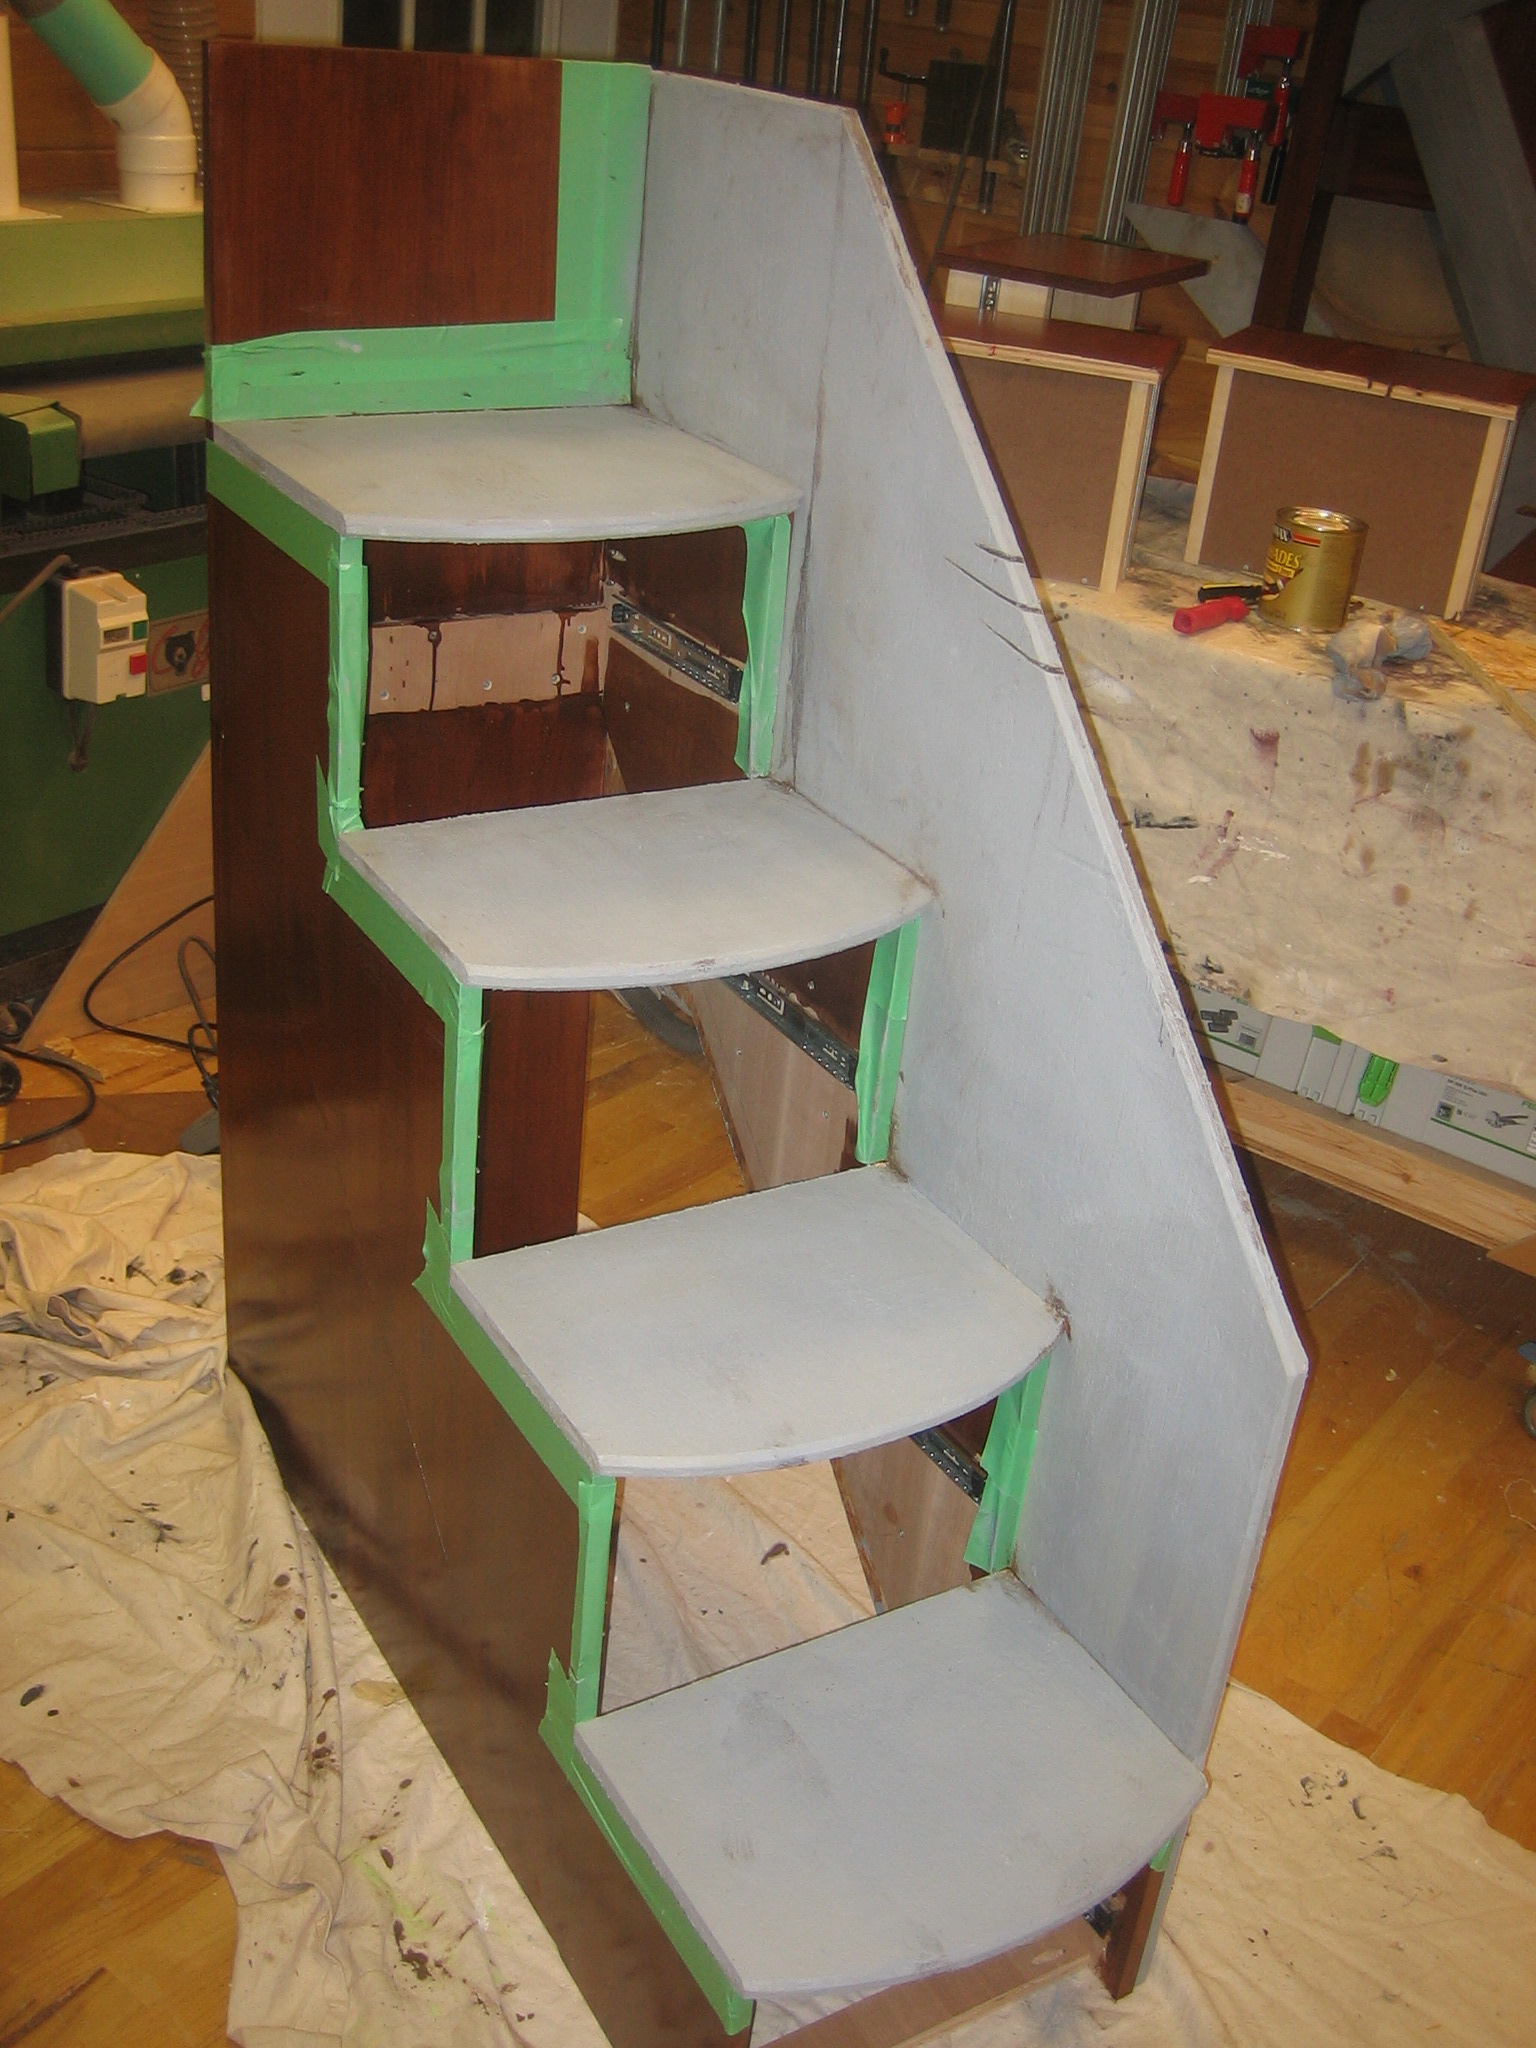
Building the stairs
With the main bunk bed complete, it was time to turn my attention to the stairs. For safety reasons, mom insisted the bunk bed have stairs instead of a ladder. The original design featured drawers on the end and paneled sides. Upon further reflection (and measuring) it was clear that this placement wouldn’t work – there simply wouldn’t be enough room to access them. Many commercial beds feature drawers under each step, so I figured this could work here. The final design was based heavily around what materials I had on hand. The stringers and back would be stained cherry ply. I’d always intended to treat the treads with the same faux concrete finish as the “X”es. I decided to use concrete-finished OSB for the side basically because I was out of cherry plywood and the left-over OSB has been taking up space in my shop since it’s construction. One more sheet gone!

Building the stairs

Assembled with drawers; treads ready for shaping
Drawer pulls
I really wanted to make custom X-Men logo drawer pulls. After much searching and a discussion with my very talented and craft-y sister-in-law, I made a run out to Hobby Lobby and picked up a box of Sculpey III polymer clay. This stuff is very cool. You can sculpt or mold it like Play-Dough, then bake it for 15 minutes and it hardens nicely. Armed with some metal commercial pulls, I formed the “X”s, applied them to the tops, and baked ’em. A quick coat of paint and some clear acrylic top coat, and they were ready to go.

The Sculpey III X-Men logo added to the pulls

Baking the polymer clay drawer pulls

The finished pulls
Faux Concrete
This is the fun part! I repeated the same steps as with the earlier pieces. Dry-brushing on the paint and stain is a blast. For the stairs, I let some stain run down the side and pool on a step. The results are very cool and it’s difficult to screw this part up. I thought it might be fun to carve Wolverine’s claw marks into the side…I think he may have slipped while climbing the steps or something.

Wolverine was here!

Stairs complete!
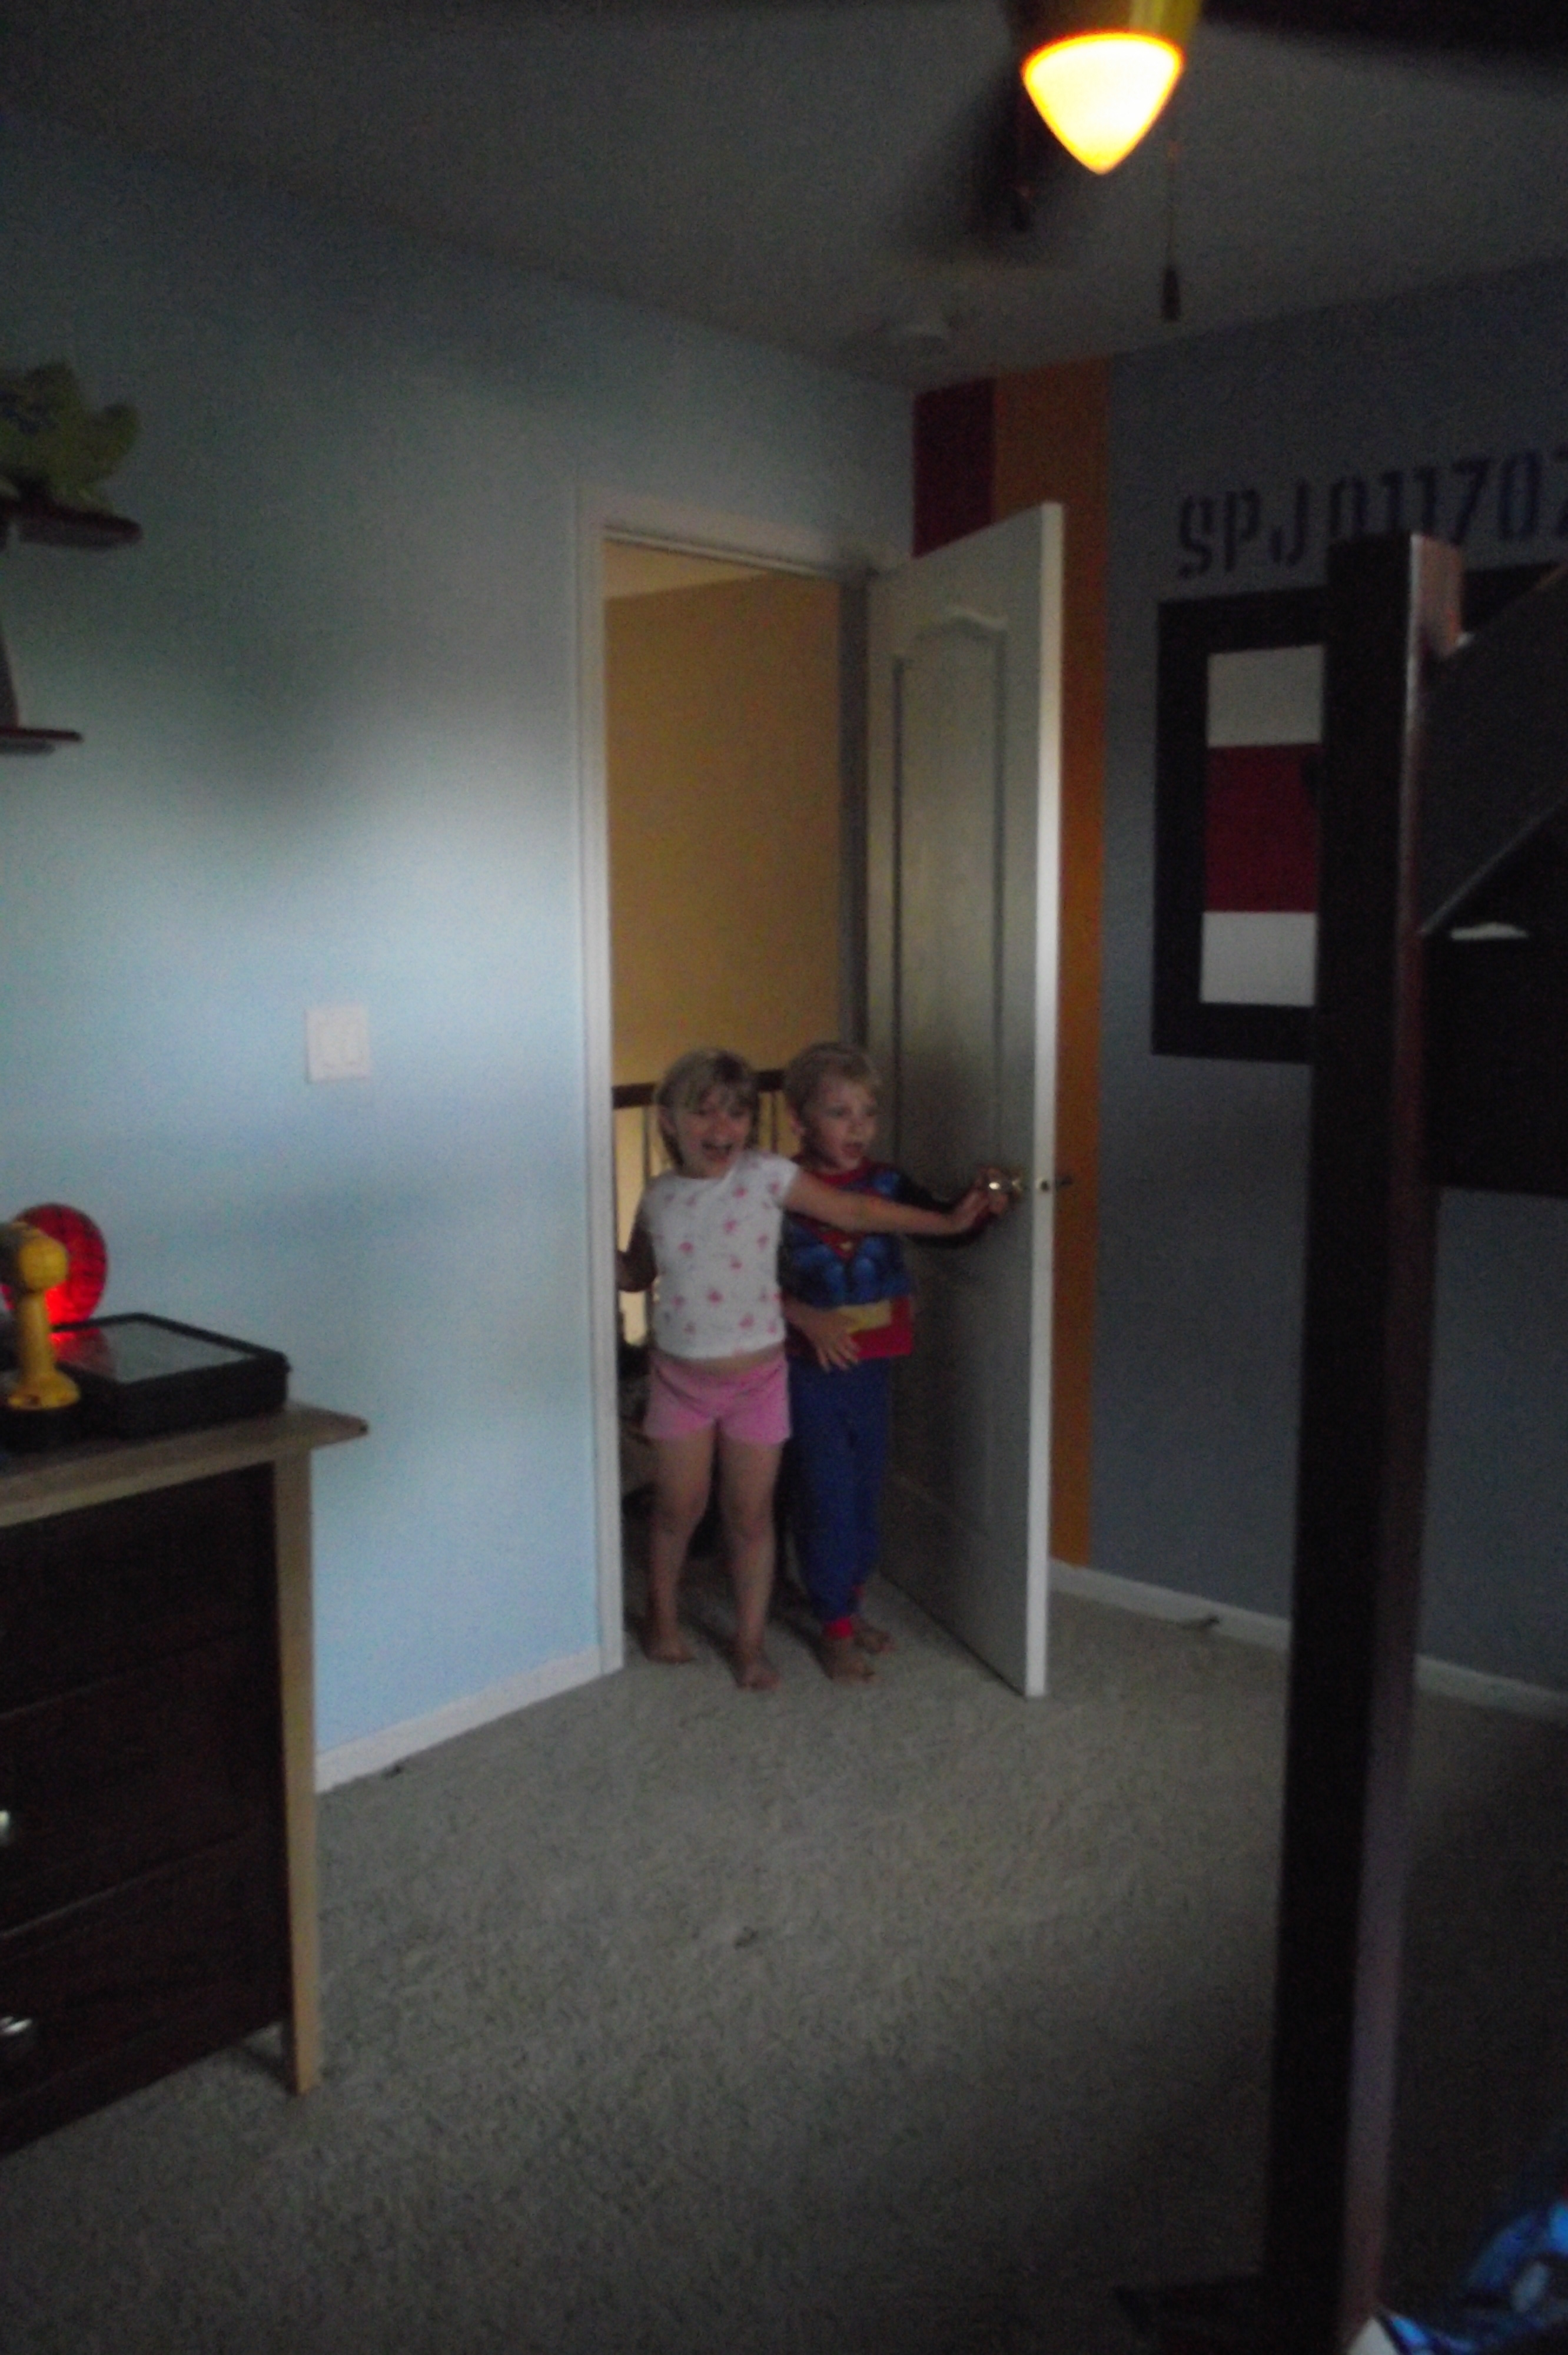
Awesome!
I installed the bunk bed and let them at it. Happily the results did not disappoint. The most heard comment was “awesome!”

Attaching the back "X"

Finishing the assembly

Ready for unveiling

"Awesome!"
Next up…
Next up, a backyard Tree-house Playhouse, and then “A Midsummer Night’s Bunk Bed” featuring butterfly fairies and tree-trunk posts for the girls.
-

- “Awesome!”
-

- Building the stairs

-

- Assembled with drawers

-

- The X-Men logo added to the pulls

-

- Baking the polymer clay drawer pulls

-

- Painted pulls

-

- Wolverine was here!

-

- Stairs taped off for final finish work
-

- Stairs complete!

-

- Attaching the back “X”

-

- Finishing the assembly

-

- Ready for unveiling

-

- The bed was definitely a hit! (“It’s awesome!”)

3 Responses to Building the Stairs and Installation