


Shielding the back of the pickguard with copper foil tape
All wired up and tested!
A sneak peak
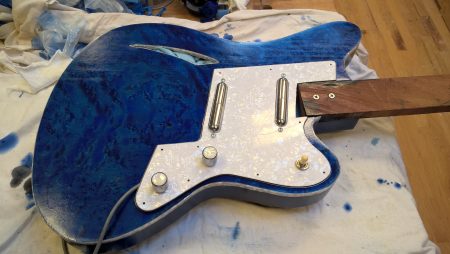
A primary difference between this guitar and the previous two is the electronics wiring and installation. The Surfcaster is wired like a Stratocaster — with the pickups and controls attached to the pickguard instead of directly to the body. This greatly simplifies installation and makes it possible to work on the electronics and the finish at the same time. Or, more accurately, to wire up and test the electronics while the finish is curing.
So, while the finish cured, that’s exactly what I did.
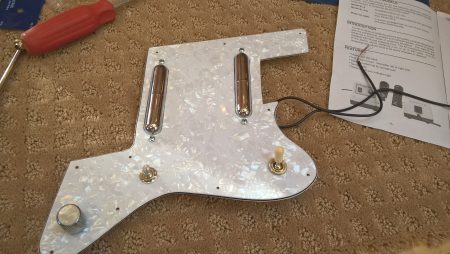
The surfcaster features two single-coil “lipstick” style pickups, single volume and tone controls, and a three-way switch to select neck, bridge, or both pickups. Because these are single coils and not humbuckers, I was a bit concerned about the noise. So before installing the components, I applied copper tape to the back of the pickguard to provide shielding. This shielding will also act as a common and convenient ground for the circuit.
I also figured I’d try wiring up the pickups RWRP (reverse-wound, reverse polarity) relative to each other. By doing this, I would be able to take advantage of the “humbucking” effect when both pickups are active. This was accomplished by opening one of the pickup cases and flipping the magnet around so that one pickup would be north up and the other south. Reversing the wind is simply a matter of wiring the pickup in reverse into the circuit – i.e. wiring the “hot” side to neutral, neutral side to hot.
I attached and soldered in the 250K audio taper pots, 3-way switch, input jack, pickups, and a .22uf capacitor for the tone control and tested the assembly by taping a screwdriver on each pickup while plugged into a small amp. I was pleased with both the output and relative quiet of the circuit. I was even more pleased by the obvious humbucking effect when both pickups were engaged. The low-level of background noise dropped dramatically and immediately.
The newly-wired pickguard assembly was set aside until the final phase of the build – buff out and final assembly!