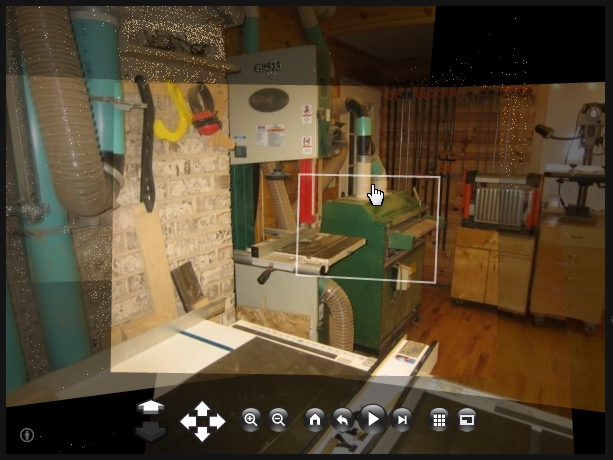
I’ve finally had a chance to clean the shop…so I took some time this evening to “photosynth” it. Click the image below for the result and let me know what you think!
Photosynth of the Workshop
“Growth Rings” Serving Tray
It’s been a very busy summer and I opted to spend most of my free time with my family rather than in the shop. Other than a couple cutting boards (after seeing all the cool ones posted at lumberjocks.com in the past few months I just had to try a few myself!), I really haven’t spent any significant time in the shop.
However, while shopping for a gift for my wife on the occasion of our 6th wedding anniversary, I learned that the traditional gift was candy or iron and the modern alternate was wood. In keeping with this theme, many of the online vendors were selling wooden boxes containing chocolates. This seemed like a great gift idea, but, being a woodworker, clearly I couldn’t buy her a wooden box. However, since I didn’t have time to build a nice box and don’t have any real experience with them anyway, I looked for another idea.
For the past 5 anniversaries I’ve made it a sort of tradition to get up early and, now that we have children, taking the kids out with me to pick up cinnamon rolls for breakfast. This year, I decided, I would make her breakfast instead and serve it to her, with chocolate-dipped strawberries, on a handmade wooden serving tray.
And this is the result.

This project was unique in that it’s the first project I designed entirely in my head and during the actual construction process. Typically I design my pieces in detail in SketchUp before even selecting the lumber. I must admit it was kinda fun building this way — designing on-the-fly so to speak — though I’m not sure I’ll make this the new norm.
The bulk of the body of the tray is cherry, the handles are walnut. The horizontal strips (the growth rings) are curly maple and purpleheart. The purpleheart, incidentally, was from a board my wife gave me for our fifth anniversary. Each strip represents a different milestone — the day we met, our wedding day, birth of a child and anniversaries. I labeled them with dates on the back and signed the piece with a personal message for my lovely wife.
The biggest challenge in this piece was scooping out the “dish” of the tray. I built the tray in a single day — it was the only time I could spend in the shop without letting on what I was up to. Therefore I had to hurriedly cobble together a quick-y template and jig to position and guide the router. The template slipped a bit on the front edge and the bottom was uneven in spots, requiring a good deal of sanding to make it acceptable. There are still a number of visible imperfections in the piece which, in this case I think give it character. It really does look handmade. In any event, I didn’t have much choice but to accept it as the best I could do within available time. It was a real hit with my wife and will certainly be difficult to top next year!
(PS – In case you’re curious, for her part my wife gave me a waffle iron (I love cooking from-scratch pancake breakfast with the kids on weekends and my son would eat waffles for all three meals if we allowed him) and made a generous contribution to my tool fund — I’m presently more than 1/2 way to a Festool Domino. Woo-hoo!)

Photosynthing the “Room at Pooh Corner”
Though it’s apparently been public for around a year now, I’ve only just discovered Microsoft’s Photosynth.net. I really wanted to create one of my workshop — but alas, I’ve been too busy with family stuff this summer to clean up after my last project. So, rather than create a synth of a messy shop, I thought I’d take some shots of something that has frustrated me to no end when it came to capturing it in photos: Annalise’s “the Room at Pooh Corner” bedroom.
I still need to learn a bit more about making it “synthy,” but I’m fairly pleased with this first attempt. It’s certainly an improvement over the standard, flat photogallery.
Let me know what you think!
Woodcraft Magazine Photo Shoot
What a blast!
Last Friday, Woodcraft Magazine Editor-in-Chief Jim Harrold spent the day visiting my workshop to supervise a photo shoot of the shop for an upcoming issue. With him was Chicago-area photographer Mike Crews, his assistant John, and numerous road boxes filled with some pretty slick photography gear.
A Dust-free Dust Collection System
The process actually began the day before the shoot. Thursday afternoon, Jim stopped by, followed shortly by Mike. After introductions, they surveyed the space. Mike was pleasantly surprised by the lighting situation and they continued to plan for the next day. Though I had spent nearly every spare moment the previous week preparing the shop, I still found myself working late Thursday night, per their request, vacuuming dust off of my dust collection piping! Seriously.
My shop hasn’t been this clean since the day it was completed!
Wide Angle
After a couple “welcome” shots of me standing in the entryway, Mike shot some overviews of the shop. While I’m not completely unaware of modern photography, I’d never before realized just how effective a good wide angle lens could be. My shop is only 14′ x 22′. In the past when I’ve attempted to capture a general “overview” of the space, I’d been frustrated by my inability to get much of the shop “in the shot” from within. Typically, when I think of a “wide angle” lens, highly distorted images come to mind. I think “fish-eye”. Consequently I was seriously amazed at how he could include all of the machines on the North wall in a shot with the camera aimed mainly west/northwest, with no obvious distortion. Brilliant! They then moved on to close shots highlighting some of the specific fixtures Jim plans to highlight in the article.
Outer Space
After lunch, the morning clouds had dissipated and we were enjoying a gorgeous, sunny afternoon. One of the shop’s features I’m most pleased with is its external dust collection closet. By keeping the monster in it’s own heavily-insulated cell, both me and my neighbors are spared the bulk of the noise generated by its 3HP motor and the resulting rush of air. Shots of the way the shop and this system integrate into my modest suburban home were next on our list.

Mike carelessly ignoring the high-voltage warning stickers on the side of the power box on the corner of our lot.
Dressers
From there, it was back indoors. This time, we moved Mike’s gear to the kid’s rooms to shoot some of the pieces I had built for them. Sadly we only had time for two of the three dressers — Annalise’s Butterfly Inlaid Dresser and Nathan’s Cherry and Walnut Dresser. My comment to Mike: these pictures look nicer than the pieces!
I sure do wish I could have shots like this take of everything I build. Sigh.
It’s a Wrap…
By 4PM it was “in the can” so to speak. Mike loaded his gear and Jim packed up for the airport. I had a great time with this. Jim is a very down to earth and incredibly interesting guy with a long list of accomplishments — and the stories that invariably go with them. Mike’s knowlege and skills were impressive, though what impressed me most of all was the way Jim and Mike worked together as if they were longtime partners, though they’d just met for the first time the day before.
Thanks to Jim, Mike, John and the folks at Woodcraft Magazine for this experience!
UPDATE
I forgot to mention that I was informed that the issue these shots will appear in will be out sometime in October/November timeframe.
See also: http://tenonandspline.com/archives/188
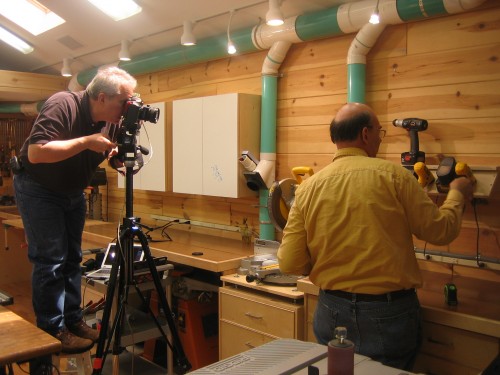
- Shooting the drill station
- Mike took some exteriors shots of the shop and dust collection closet.
- Left to right: Mike, photographer; me; Jim Harrold, Woodcraft Magazine Editor-in-Chief, Mike’s assistant John(?)
The One Where Bosley Gets New Cabinet Doors…
My little shop got a workout this weekend when gal pals Kathy, Cathy and Tracy spent Saturday building new cabinet doors. “The Angels,” as they’re known to workout pals, picked up irons of the domestic variety to apply preglued birch edgebanding to simple plywood doors for a client of Kathy’s. I think Charlie would have approved.
A Couple Minor Shop Enhancements
Over the last couple months things in the shop have been fairly quiet…mainly due to things in the house being more noisy! Of course, our now 5-month-old son Nathan’s an absolute joy and easily the least-demanding baby of the three. This weekend I snuck away for a bit to put the finishing touches on my new hide-away blade storage rack.
Hidden Blade Storage
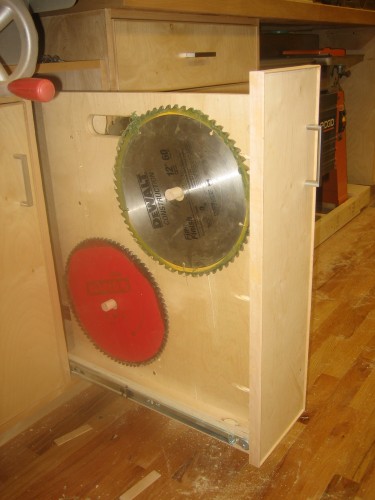
When I originally designed the shop cabinets, I kept the drawer sizes and placements open figuring I’d work the final dimensions out during the build, letting their ultimate contents dictate their sizes. This worked very well, with one notable exception: two tall and narrow openings on either side of the RAS base cabinet. Early on I was thinking that I might mount some narrow drawers for router bits in this location…but the RAS counter overhang made that impractical and they wouldn’t be in a terribly good location for these frequently-accessed accessoies. Early on these holes began attracting my table saw blades and accessories. So I hit upon the idea of a tuck-away blade storage rack. And here it is….
The design is based on this one I found online from Wood magazine. That plan calls for a 60-degree angle, which looks fine in their photos of 7-1/4″ blades/dado chippers, but wouldn’t work in my cabinet as 10″ blades at that angle take up more width than I had (8″). I built mine at 80-degrees — and, even if you don’t need the “tighter” arrangement, if you plan on storing 10″ blades, I’d advise an angle closer to mine. I’ve uploaded my Google SketchUp sketch for my version in case you’re interested. The article also suggests cutting the slots with a bandsaw or jigsaw. I made a quick jig for the router table and cut them with an 1/8″ straight bit…which made for much straighter, smoother and more consistent cuts than you’d ever get by these other means.
Roll-away Jointer
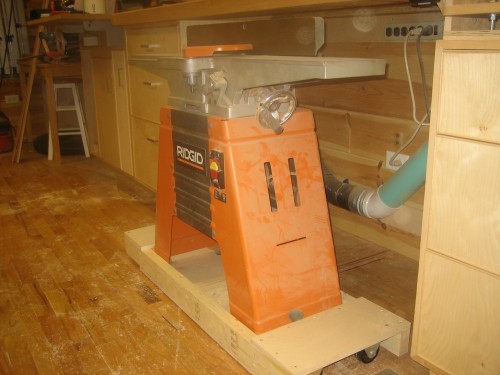
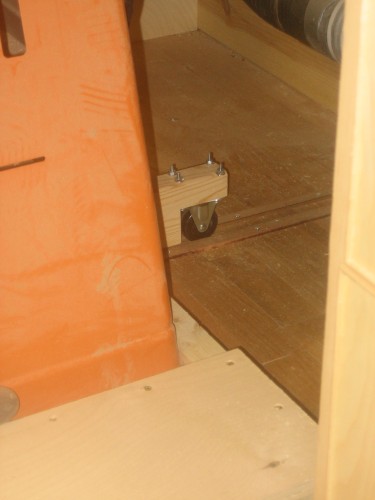
From the beginning I designed my jointer to “tuck” underneath the shared RAS/CMS counter. This was definitely a good decision, but walking the jointer in and out of its cubby was a bit awkward. A few months back I built a mobile base for it based again on plans I found online…this time from a fellow lumberjock. Instead of swivel casters, I mounted rigid ones on my version that would help track the based appropriately. The early version of this used a simple outrigger in the back with a “pin” that rode in a track in the floor. Unfortunately, this was unsatisfactory as the pin would frequently hang up on the floor at any high point — which meant it required more force to more the tool than I’d originally envisioned. A couple weeks ago I set out to remedy the situation. I wound up replacing the pin with a small caster. This did the trick, and I can position the jointer with one hand.
Shark Pole
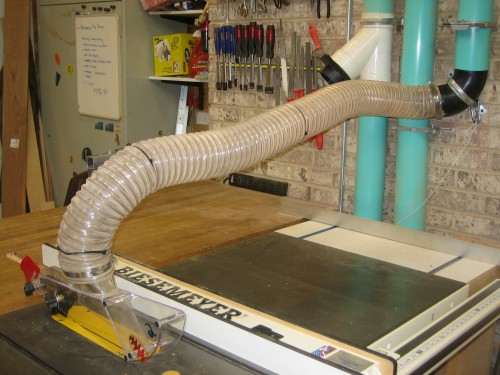
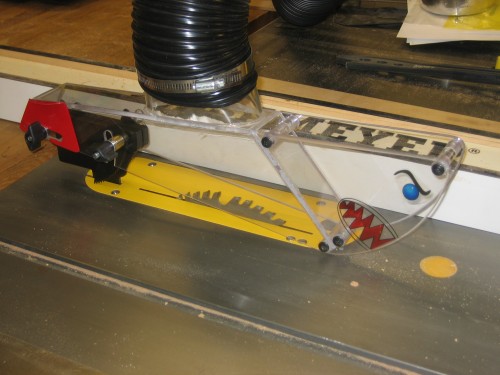
This past Christmas, Santa brought me a Shark Guard. I used it to complete Nathan’s crib, but knew I’d need to get it properly mounted before the next project. So I bought a 6′ length of 1″ square tube steel, a metal cutting blade for the jigsaw, and a bag ‘o 5/16 nuts, washers and bolts. I would have much preferred to weld it together, but since I don’t own the equipment or know anyone who does, that just wasn’t going to happen.
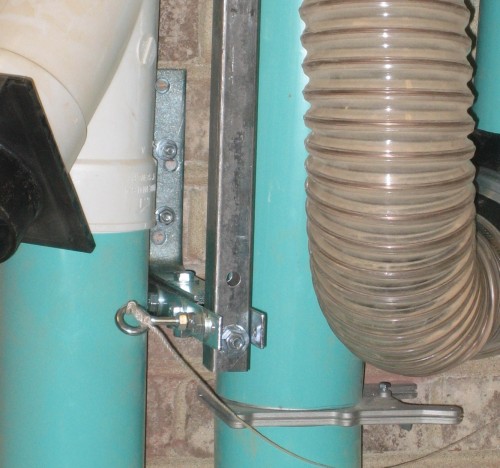
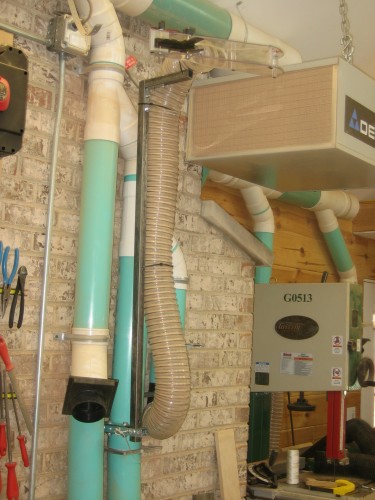
The overarm design is about as simple as they come and there’s really not much to say about its construction that isn’t fairly obvious from the photos. The arm hinges on a bolt through a couple mending plates attached to the fixed part of the bar and is held upright by an eyebolt inserted just behind the hinge point.
The trickiest part was bolting the dang thing to the brick wall on the right side of my table saw. The bricks are fairly brittle and soft and before this project I’d had mixed results using tapcon screws. Thankfully, expansion anchors did the trick.
The hose is held on by simple zip ties.
Finally Complete
It’s been difficult finding time to complete this project.
When you come home after work to two toddlers, a baby and an exhausted wife, it’s extremely difficult to then suggest you’d like to head out to the shop for a couple hours! “Disappearing” into the shop on weekends can be equally problematic. Nevertheless, we worked out a plan and I finally managed to make the time to get this crib done…and none to soon with Nathan now just over 3 mos. old!
I didn’t take many “in progress” shots — partially due to the time constraints, partially because while the build was “spread out,” there weren’t that many hours or steps, and partially because being the my third crib, and second project with curved legs, there were fewer unique and interesting shots to take.
Modifications
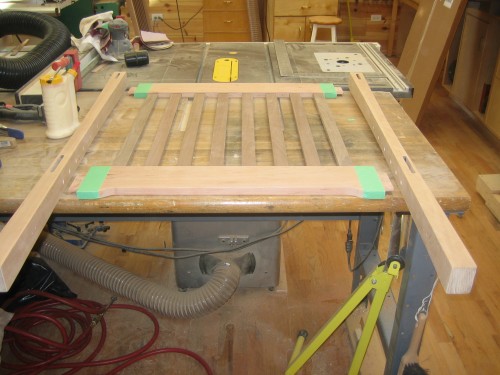
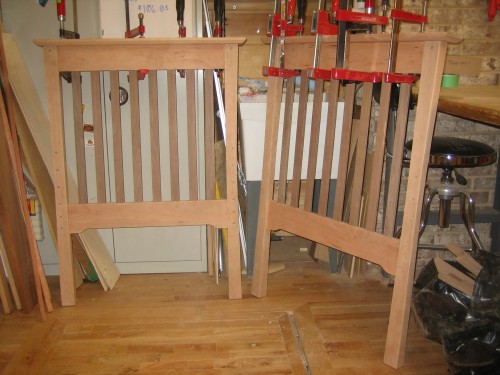
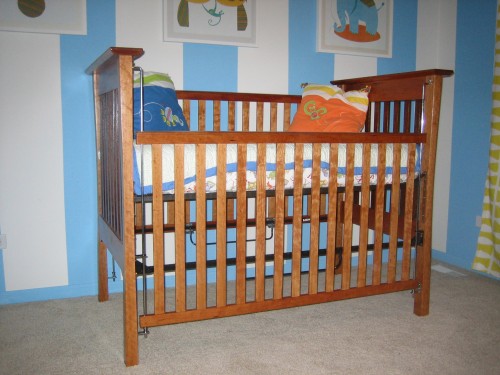
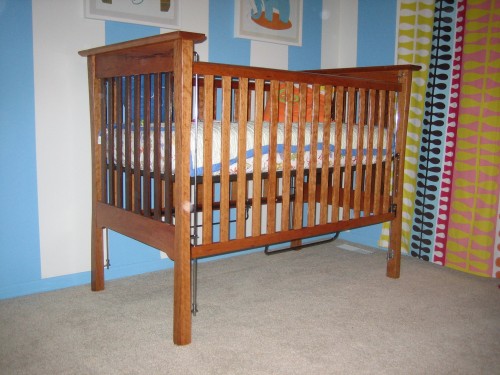
The crib itself is based on the very popular “Heirloom Crib” plan from Wood. I’ve made a couple modifications to make it better match the dresser. These include broader, thicker end caps with a chamfer matching the dresser’s top, “cloud lifts” on the bottom of the ends, and curved “gumby” legs.
One of the firsts for me with this project was the joinery of the end caps. The purchased plans call for a double cap — the bottom piece is glued and screwed into the ends and the top is then simply glued on top of it. As I wanted this to match the dresser, I needed to do away with the bottom piece — but how to join the cap without using exposed screws? I briefly considered using screws and matching cherry plugs in the holes, but felt this would negatively impact the look. I ultimately decided to use dowels, something for various reasons I’d not done before. I purchased a $10 jig at Menards and cut matching holes for (5) 5/16″ dowels in each cap. This seemed to work quite well and I’m fairly confident will stand up over time.
Finish and Assembly
I sanded all the parts, prior to glue up, to 220. The first coat was a Watco natural Danish Oil. I then topped it with 3 light layers of Waterlox Tung-oil based sealer/finish. During assembly, I had some issues with the threaded inserts and the Cherry. I had no problem with the Maple version of this crib, but clearly these inserts are too coarse for use with Cherry. Even after enlarging the holes, they “mounded” the cherry and splintered the face somewhat as they drove, even with a caul clamped to the face around the hole. I’ll probably fix this with some sanding and new finish in a couple years before putting it in long term storage. For now, the hardware covers this issue and I couldn’t bear delaying the “rollout” any longer!
Installed
And here’s the finished crib in its natural habitat…
Hopefully he’ll sleep soundly in his new crib for at least the next 2 – 3 years!
Santa Brought Me a Landshark
Or, more accurately a “Shark Guard” by LeeWay Workshop.
Installation
I’ve only had the opportunity to install this today, so I haven’t really had a chance to put it through its paces. However, so far I am impressed. The improvised packaging the unit arrived in was demonstrative of its small shop origins; the actual contents, however, were not. Installation was straightforward using the directions provided on the site. They warned that some owners of my saw (Craftsman 22124) have experienced alignment issues. I encountered this as well — leading to a bit of extra time spent applying, as suggested, small bits of foil HVAC tape to the mounting bracket. A bit of trial and error and I was in business. That is, of course, only after applying the supplied “shark face” decals, natch.
Impressive
Overall, this is a very impressive package. The unit I received is the version 9.4 — with the big 4″ dust port and anti-kickback pawls. It also includes 3 different splitter sizes. Two for use with the guard and one “Shorty Splitter” for cutting stock with the guard removed. Swapping out the splitters is a snap, quite literally, using the spring-loaded plunger. Pull a ring and lift out the current splitter and then just slide in the new one until it “snaps” into place. The snugness of the fit is adjustable via 4 small set screws using the hex key, provided (nice touch).
Anxious to try this out, I attached a 4″ hose to the dust port, locked the guard in place and reached for a scrap of MDF. With the DC running, I experienced 100% visible dust pickup. Awesome!
Time will tell just how practical this new device will be, but at this point I completely intend on making this a near permanent fixture on my saw, removed only when the cut demands. The next step will be to build a support arm for the DC hose that will swing away when necessary. My expectation is the Shark Guard will make for both safer and cleaner table saw cuts.
Thanks to Santa and Lee!
Very Cool News
I’ve been informed today that my entry into the WoodCentral.com/Woodcraft “America’s Top Shops Contest” won third place!
Be sure to check out the other entries — especially the first and second place winners. Truly impressive!
Thanks!


