One Tough Customer

This entry is part 1 of 2 in the series A Crib for Nathan

Now that he’s arrived, I need to get crackin’ on a crib for our latest addition.

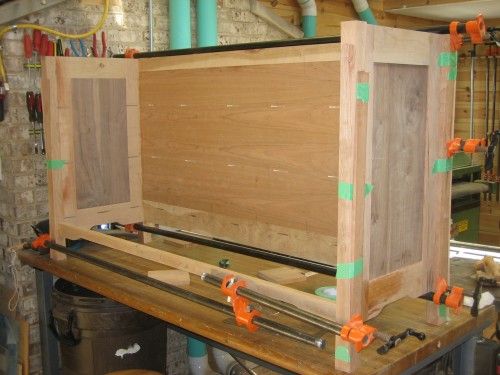
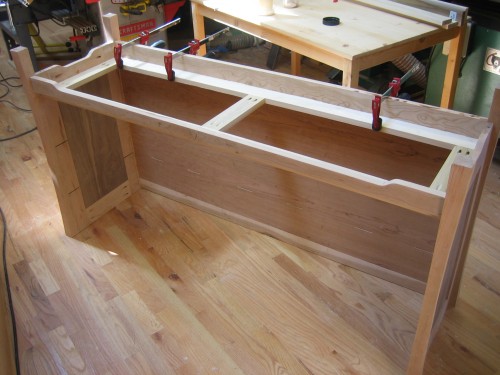
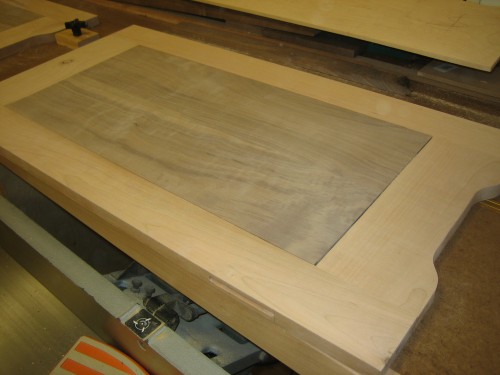
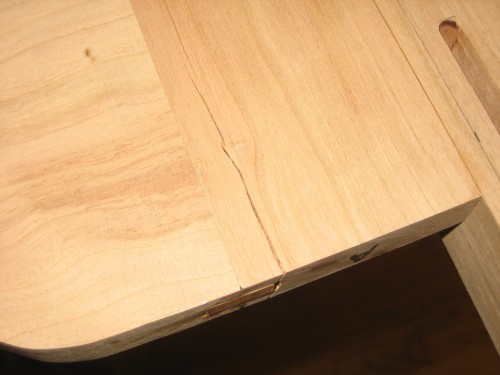
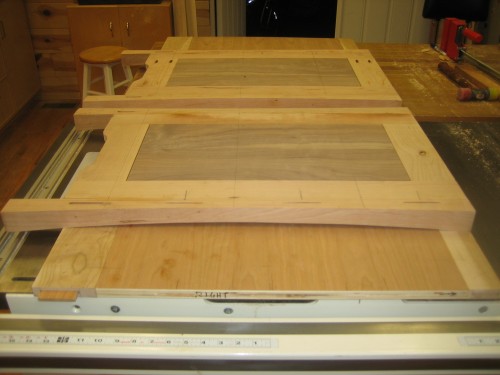
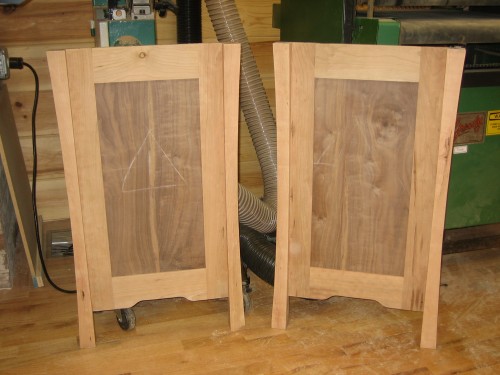
As with the cribs I built for Annalise and Sean, I wanted to use an “off the shelf” plan to ensure it complies with the latest safety standards as well as to make it easier to fit it with standard hardware, mattress, etc. In the end, we settled on the “Heirloom Crib” design I had used for my daughter. This one will be built with cherry and walnut and sport some minor changes, like walnut end panels and compound curves in the posts, to better match the completed dresser.

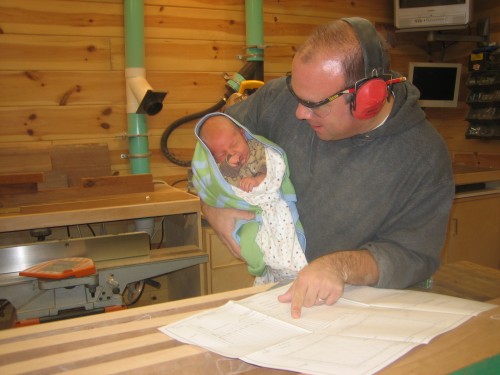
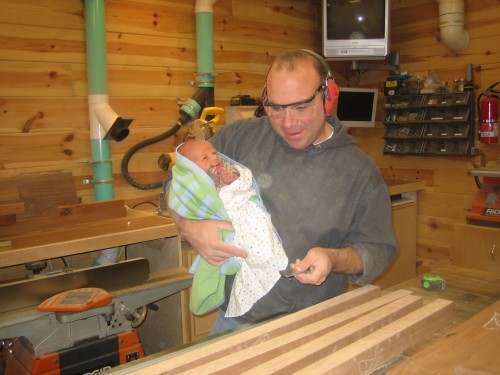
My 2 week old son Nathan decided to visit me in the shop this afternoon to supervise the construction. He was one tough customer when it came to my modifications, but in the end, he approved.

Facebook Comments
Categories: Woodworking | Tags: , | Leave a comment

Circus-themed Baby’s Room

This entry is part 5 of 8 in the series Boy's Cherry and Walnut Dresser

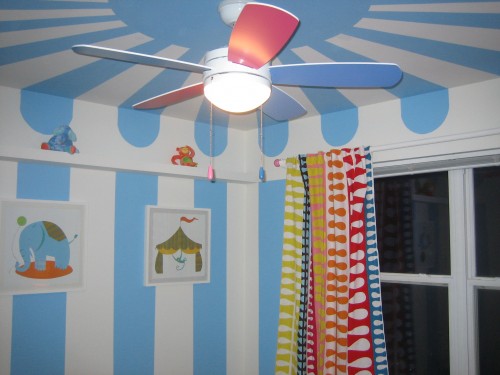
With the days of (relative) sanity in our home rapidly coming to an end — the impending birth of our third child — I was eager to finish his bedroom. For our first child, I pulled out all the stops. With no children in the home, time was a commodity we had in spades. When our son was born less than a year later, I settled on a “Flying Ace” theme with a much simpler build process — primarily a rather simple painted mural. For this child, I was determined to see the design through a bit more fully than I had for Sean’s room. But what to do?

Credit where due

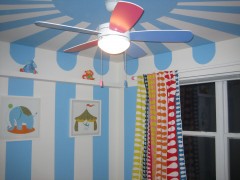
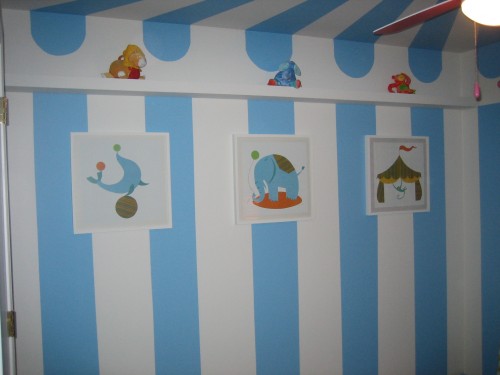
After a few discussions we settled on a “circus” theme. Before I even began the design process, my lovely wife pointed me to the Pottery Barn Kids site’s “Circus Friends Theme”perfect. It consisted of a simple paint process and some decorative elements. I’ve never been a big fan of painting, so the simple stripes easily executed with masking tape and rollers was very appealing. My (very talented) sister in law was generous enough to stop by and handle the freehand curves for me. After a week of evenings, the painting was complete.

Accessorize

I’ve always loved IKEA. I fondly recall my first visit, spending a few hours wandering around the labyrinth of room settings, finding a new bargain room accessory or kitchen implement around every corner. I took this first trip without two toddlers.

Click for details: Cherry and Walnut Dresser for my Son

The dresser project at LumberJocks

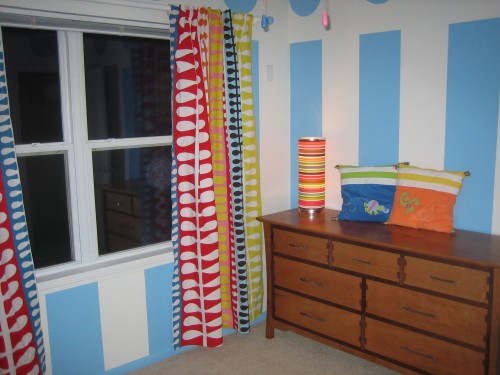
On Sunday we packed up the kids in the car and set out to accessorize the new baby’s room. Mostly they were very good. Annalise typically didn’t stray very far, but after an hour of shopping, Sean was done. In spite of this, I believe we managed to find some really interesting and appropriate pieces for the room, including draperies, a super mod/hip/colorful desk lamp for the dresser, and some inexpensive paint-able frames for the PBK matching circus prints my folks gifted the new baby. I also found the time (thanks, honey!) to build a room-length 6″ ledge for the far wall and enlisted Aunt Kathy and Kaelin to assist with hauling his new cherry and walnut dresser into the room.

Pictures, please!

The small size of the room made it difficult to capture much of the it in any single frame, but I’ve attempted to show as much as possible. I’m very pleased with the result and hope our new son finds it inviting — and, if we’re incredibly lucky — sleep-inducing!

Budget ceiling fan from HD with reversable, reb/blue blades

Prints from Pottery Barn Kids (thanks, Mom and Dad!)

Groovy lamp and cherry/walnut dresser

Facebook Comments
Categories: Remodeling | Tags: , , , | 1 Comment

Filling in the Blanks

This entry is part 4 of 8 in the series Boy's Cherry and Walnut Dresser
One of my favorite features of the top, is actually technically a defect — a quarter-sized knot hole. While both my wife and I agreed that it added “character” to the top, I couldn’t simply leave it as it was; it was large enough to swallow up small objects whole and naturally not very stable.
A large knot

A large knot

After some searching, I found a few references to folks filling holes like this using “Pour on” epoxy, of the type you might use to encase small chatchkis in a bar top.

A Slow Leak

On the first pour, I found myself constantly “topping off” the depression. I would fill the knot, level it off and a couple minutes later, most of it had been absorbed into the knot. By the time it cured 24 hours later, there was only a thin layer of epoxy, coating, but not filling the knot hole.

Puzzled, I decided to simply pour again. This time it filled just fine. The next day, while moving the piece, I discovered the cause: the knot hole went clear through the board and the epoxy

Pour on epoxy

Pour on epoxy

was leaking out the bottom! With the first coat effectively plugging the hole, the second coat filled it nicely and easily sanded flush (something I was a bit concerned about). The effect is exactly what I had hoped for.

My Favorite Finish

I spent quite a bit of time sanding this piece — and it still probably wasn’t enough. For the finish, I had purchased a wipe-on, “low sheen” Tung Oil-based finish. The first coat on the drawers resulting in less than spectacular results. Though each row was was made from a single board, a couple adjacent drawers were a noticeably different shade. This prompted a second, more vigorous round of hand sanding (and a few choice words). This time, they took the finish much more consistently. A week later I had built up 5 coats on all parts and was ready to attach the top and call this project “done.”

Amateur

After reading Dick Cain’s forum thread about “Photographing Your Work” (PDF from Wood Carving Illustrated), and feeling duly shamed about my previous point-and-click-using-built-in flash-against-any-old-background photo sessions, I decided to step it up a notch. Unfortunately, I don’t really own any real photographic equipment and can’t afford to start yet another incredibly expensive hobby at the moment.
So my first attempt fell rather far from the intended mark. I may take another crack at it later in the week — perhaps using a cleaner and less wrinkled backdrop and a couple more lights if I can find someone to lend me any! If the new pics are any good I’ll update this post.
In the meantime, here’s my (rather humbling) attempt at perfeshunal fotogerphy.
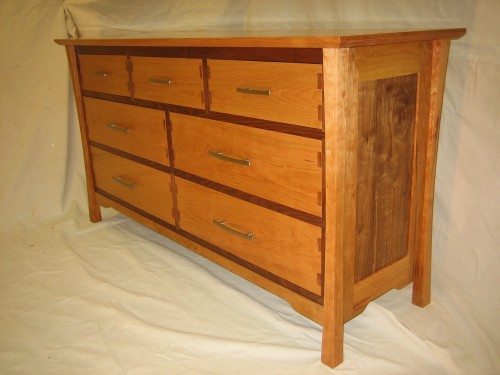
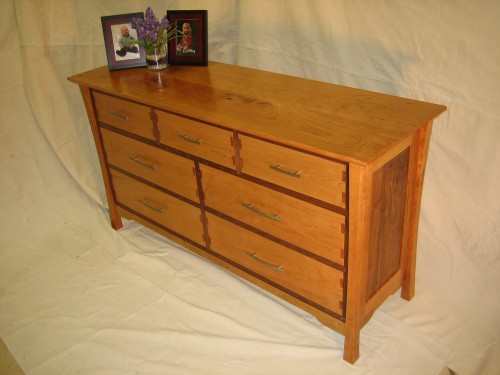
3/4 View of Dresser

3/4 View of Completed Dresser

I thought I’d put some pics of the new baby’s older siblings on top…in theater we called this “dressing the set”…

Closeup of drawer detail

Drawer detail

Facebook Comments
Categories: Uncategorized | Tags: , , , , | Leave a comment

Dead Flat

This entry is part 3 of 8 in the series Boy's Cherry and Walnut Dresser

I love my “new” drum sander.

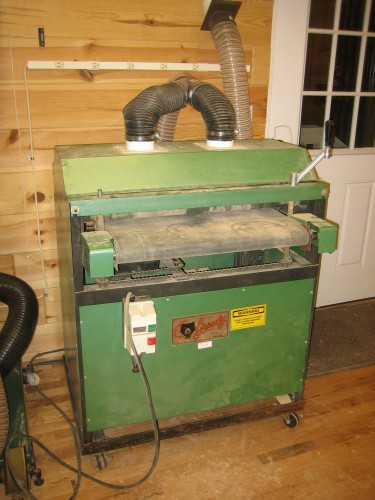
I purchased the used machine for the purpose of sanding shop-cut veneers and inlay woods. However, with a 23-1/2″ capacity, it is capable of so much more. I first cut my teeth with this thing on the side panels. Now it was time to glue up the top — and I was really looking forward to seeing what it could do with the 21″ x 64″ x 1″ thick part.

Joining the top

I started by rough cutting and gluing up two 5/4 boards. Jointing an edge on these long, tall boards was a challenge on my 6-1/8″ Ridgid jointer’s 45″ table. One of the boards had a 1/4″ bow that simply couldn’t be removed on the short table, so I pin nailed it to a sacrificial scrap of 3/8″ plywood and ran it through the table saw.

It’s a “feature”

I had hand-selected three 5/4 cherry boards, nearly 80″ long for the top from Owl Hardwoods. The first one I chose was beautiful and featured numerous streaks/pitch pockets that I just love the look of in cherry furniture. Unfortunately I was unable to find a similarly figured board in the pile. The other two I selected were nice, but didn’t match the beauty of the first…I figured I’d sort it all out in the shop. Well…the time had come and my dilemma was that the beautiful piece was a poor match for either of the others, and the other two, while a better match for each other didn’t match the beauty of the first. After much consternation, and a determination that I simply couldn’t afford to go back to the lot to find its perfect mate,  borrowing a term from software development, I decided that the mismatch should be a feature, not a bug.

I recall reading somewhere (maybe from David Marks?) that in a situation like this you should highlight the flaw…which has me now considering doing a simple inlay along the length of the joint. Perhaps in walnut and echoing the “cloud lift” (double, mirrored) from the front and side bottom apron? Or even something more “organic” (a river runs through it?).

Any opinions on that?

Dead Flat

Once the glue dried, I scraped and then planed the joint relatively flat and prepared to see how well the old Grizzly would handle the large piece. It took a bit of work just to place the machine in the room with >6′ of clearance on either side in my small shop…but in the end, I found the space. Since I was using nearly the full capacity of the sander, I was very nervous that it’d track a bit too far to either side and somehow ruin either the piece or the machine or both. While I did manage to brush up against the duct tape on one pass — resulting in the need to stop and re-secure the paper, I didn’t experience any significant issues. The front roller’s 100 grit paper loaded up enough to require replacement part way through the process, and I did notice some loading that I was unable to completely clean up on the edges, but overall this was an extremely satisfying experience with no burns or noticeable snipe and resulted in an absolutely dead flat top! Awesome!

My only issue was with the dust collection — for smaller pieces like the side panels, the collection was absolutely sufficient. However, with this piece, while there weren’t great clouds of dust or anything like that, I did wind up with a thin film of dust covering all of the shop surfaces. Prior to this, per a fellow LumberJock‘s recommendation, I had replaced the flexible hose that came with the sander with rigid PVC. I’m sure this helped, but it still couldn’t quite keep up.

After sanding, I routed a bevel around the bottom edge with a plunge router.

Winding down the build phase

Finally, I installed some small stop blocks on the dust panels behind the drawer fronts to prevent them from recessing too far into the carcass and some “tip blocks” at the top corners so the drawers won’t dip significantly when fully extended.

Next up: Inlaying the top(?) and then sanding, sanding, sanding and more sanding!

Facebook Comments
Categories: Woodworking | Tags: , , , , , | Leave a comment

Drawers

This entry is part 5 of 8 in the series Boy's Cherry and Walnut Dresser

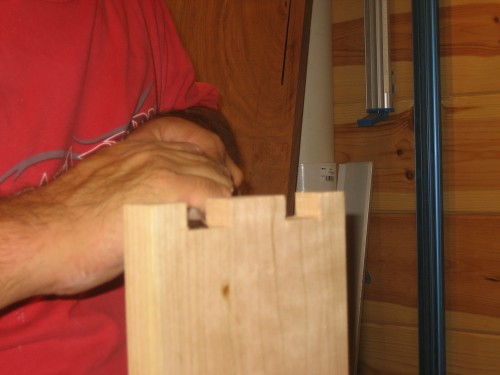
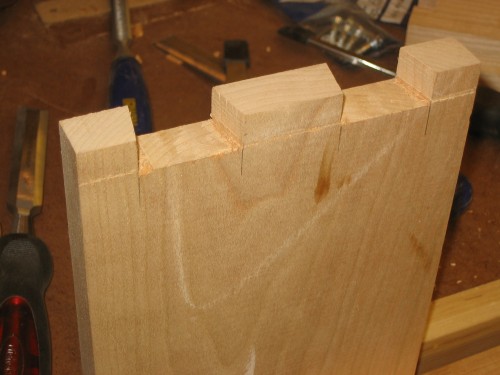
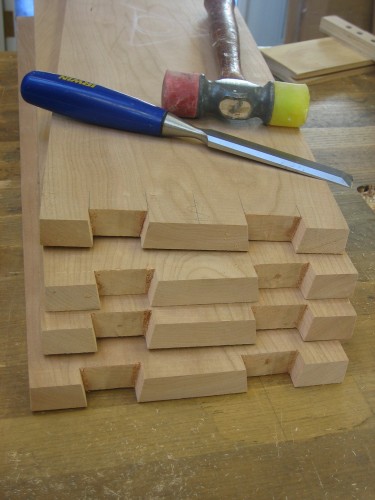
Labor Day weekend my wife took the kids up to the family cabin for a couple days. I spent most of this time in the shop working on the drawers. For this dresser I had designed the drawers with large through dovetails. Since I don’t own a decent dovetailing jig that allows for custom size and spacing, I was going to have to do these by hand. Since I haven’t done many projects with hand-cut visible dovetails, I figured I’d better take my time with these. To make things a bit faster and more accurate, I used the bandsaw with the table tilted to 10 degrees to start the pins and the router table to hog out the majority of the waste. I’m not sure how much faster it is vs. a hammer and chisel, but it was certainly more accurate than I would be solely by hand and saves a bit of wear and tear on the chisel blades — I wasn’t keen on spending my rather limited shop time sharpening chisels!
That said, I do truly enjoy working with sharp chisels as I am here cleaning up the pins:

The pins completed on one drawer front:

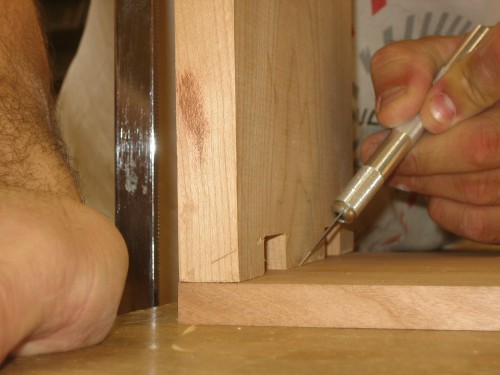
Marking out the tails with an X-acto knife:

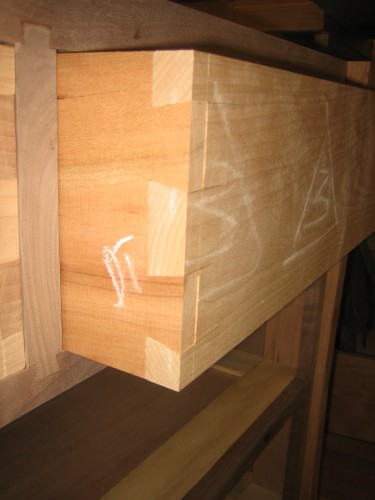
I’m very pleased with the end result. This is a dry fit of one of the drawers…

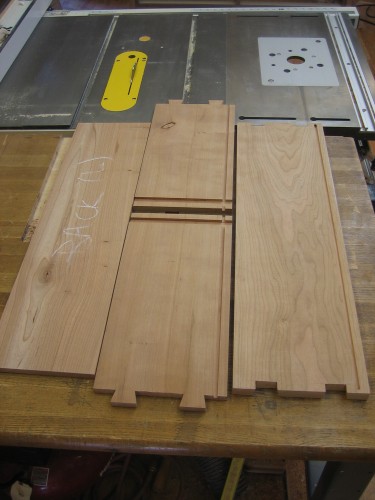
I used a simple dado to attach the drawer backs.

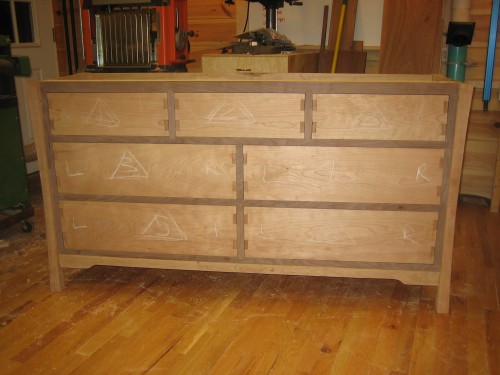
I had originally planned to use sliding dovetail drawer slides, but they fit so well, I decided to simply add guides on either side and a block at the top to keep it from dipping. Here’s the chest with the completed drawers:

Next up is the top. After that, sanding, sanding and more sanding.

Facebook Comments
Categories: Woodworking | Tags: , , | Leave a comment

Face Frame Installed

This entry is part 3 of 8 in the series Boy's Cherry and Walnut Dresser

OK, so I “cheated.”

I typically assemble face frames with pocket screws. It’s simple, fast and strong enough. Since this face frame is composed of 1″ x 3/4″ members, pocket screws seemed a bit weak to me — I’d only be able to use a single screw in each member, which would allow it to “spin” somewhat. While this would be minimized greatly after gluing to the carcass, some “twist” could still occur over time. Since the drawers will feature prominently displayed through dovetails, I figured dovetailing the face frame would be both practical and design appropriate. I briefly considered bandsawing and chiseling the joinery, but with a dozen to do and the drawers looming, I couldn’t see spending the amount of time it would take me to do this entirely “by hand.” Opening up my router bit drawer, I discovered a 3/4″ dovetailing bit I seem to recall buying to produce sliding dovertails for another job. So, I “cheated” and built a quick fixture to help me knock off this part of the process.

Test Fit

Without too much fuss, the bit and fixture process yielded some very nice, tight and clean joints.

Completed and Sanded

Once the glue dried, I sanded it from 120 through 220 and propped it up for this picture. Not only do dovetails create very strong, tight joints, they’re also “self squaring” which meant I didn’t have to make any adjustments to square it up during the glue up process.

Not too tight, not too loose…

I’m not certain, but there was likely an audible sigh when I first test-fit the frame to the carcass. It fit snuggly, without any gaps on the sides and aligned flush with the dust panels. Just the “right amount” of persuasion was required to complete the pairing. The trickiest part of the whole process was the glue up. I had previously cut a continuous slot along the front of each dust panel. I referenced my plate joiner’s fence off of this slot and proceeded to cut, more or less randomly, matching biscuit slots along the back side of the horizontal members of the face frame. Even with the A/C running, it was in the mid 70’s in the shop and there wasn’t much open time on the glue — and with around 36 biscuits to glue and set in place, this was gonna be tricky and hectic. Also, since the middle dust panels weren’t open, it was a bit tricky for the clamp to find purchase on the 1/4″ ledge around the panel. In my haste I was a bit overly-generous with my glue application to a few spots resulting in greater than typical squeeze out…and a longer than typical amount of time spent wiping up the excess. There are a couple spots that will require some additional sanding, but otherwise…success.

Fresh from the clamps

A few hours later the clamps were removed and the completed case is just awaiting its drawers and top.

Facebook Comments
Categories: Woodworking | Tags: , , , , , , , | Leave a comment

Gluing up the Carcass

This entry is part 4 of 8 in the series Boy's Cherry and Walnut Dresser

The Day Begins

I started the day by marking out and cutting the slots for the biscuits into the inside faces of the sides and back. Following this, I decided to “rehearse” the glue up of the main carcass — the sides, back and bottom front apron. After yesterday’s “flip” I have to admit to being a bit apprehensive about this step, but, lessons learned, I was watchful of the sides and never came close to dropping one this time. The green tape you see is there to protect the legs – I had preserved the offcuts from shaping the legs and I taped them back in place during clamping operations.

Dust Frames

My daughter has a lot of clothes. For the dressers I built for our first two children, I used simple open dust frames. I never truly understood the purpose of solid dust panels until one day, while trying to remove a sweater from my daughter’s dresser, I wound up in a tug-o-war with the dresser drawer. It seems that some clothes in the overflowing drawer had wedged themselves in the opening of the dust panel, effectively preventing the drawer from opening fully. I decided that closed panels were the way to go from now on! Since there’s no drawer below the bottom frame, I figured I could leave that one open. To build the panels, I purchased S4S dimensional poplar from HD — at $1/lf, it seemed worth it to avoid the prep time and wear on my planer knives. To simplify the assembly, I used butt joints and pocket screws to hold them together.  Since I had dadoed the full length of the frame members to accept the panels, I had to go back and fill them where the pocket screws would “bite,” but I think this was a fair trade vs. doing stopped dadoes or tenons. I also ran a thinner dado/slot on the outside of the frames to accept the biscuits from both the inside of the carcass and the face frames when they’re installed. The happiest moment was when the first (and then the second, and third) frames slid in cleanly and tightly onto the waiting biscuits.

Thankfully the corners were tight since I didn’t really have a good clamping solution for the middle one!

The bottom dust frame installed

The final dust panel installed.

The completed carcass…

The finished carcass

Next up: Walnut face frames!

Facebook Comments
Categories: Woodworking | Tags: , , , , , , , | Leave a comment

Legs shaped, sides assembled and Ouch!

This entry is part 2 of 8 in the series Boy's Cherry and Walnut Dresser

Construction Begins…

In between trips to the zoo, the Children’s Museum and backyard “play dates” with the kids, I’ve logged some decent shop time on this project the past couple weekends. Last weekend I dimensioned the lumber and assembled the two cherry and walnut frame-and-panel sides. Due to a misaligned rip fence, I wound up with a mortise and stub-tenon joint that simply wouldn’t close. I decided to lop off the tenons and attach the rails to the stiles with splines instead. This worked fine, but resulted in weaker joints than I really need here. I really should have used a larger loose tenon…but more on that later.

In the midst of this work, I picked up a used Grizzly 24″ dual drum sander. I couldn’t resist running these panels through this beast. It made quick work of sanding them perfectly flat…awesome.

After a pass through the Grizzly dual drum sander

Curvy Legs

After cutting the mortises in the leg blanks for the sides and front and back members, it was time to cut the compound curves. This was the part I was really looking forward to! In the past, I would have done this with a template and a flush trim bit. There were two problems I saw with this approach. First off, I’m always anxious about tearout when flushing up cherry. Usually this can be avoided by rough cutting very close to the line — but nonetheless I’ve still occassionally nicked a piece this way. The other issue was a bit more serious – my largest flushing bit has a maximum capacity of 1-1/2″. Since the legs are 1-3/4″ on each side, I’d have to get a longer bit. I’m uncomfortable enough with 1-1/2″ of high-speed exposed spinning carbide. I decided to try Norm’s usual method. About six months ago I picked up the Ridgid oscillating spindle/edge sander. Ya know, the one it seems like everyone has. I really like this tool. I cut to within 1/16″ (sometimes within 1/32″) of the line and then finished the cut off with the edge sander and the standard 80 grit belt. Worked like a charm. I think the results are just beautiful.

Sanding the legs on the Ridgid

Completed Legs

Pass the Biscuits, Please…

With the legs cut, it was time to glue up the sides. While these “cooked,” I turned my sights to the back. I had originally planned to use a section of 1/2″ plywood panel capped top and bottom with a 4″ bottom/2-1/2″ top cherry “rail” joined with mortise and loose tenons into the back legs of the side panels. Upon further reflection, I made a very minor modification of my plans and used 3/4″ plywood instead. I did this for two reasons. When thinking through the joinery for the dust panels and final assembly of the carcass, I realized that I needed to first assemble the sides, back and front rail and add the dust panels after this sub-assembly. In the past I’ve designed joinery that required simultaneous glue up of the sides, back and dust frames — and this is simply far too much for one person to juggle. I also didn’t leave room to cut dadoes in the sides for the dust panels and didn’t want to introduce glued on supports either. I decided that the easiest thing to do would be to cut biscuit slots in the sides and back and then cut a continuous slot around the dust frames so that they could simply slide into place in the partially completed carcass. To have enough depth for the #20 biscuits, the back would need to be at least 3/4″ thick. The other reason was simply that the 1/2 ply I had was a low quality birch from HD and I happened to have a 3/4″ sheet of cherry veneer ply left over from a prior job. So this kinda just worked out.

Ouch!

While I was dry assembling one side to the back to mark out for the biscuit slots, the side slipped, did a flip and slammed onto the floor. Unfortunately, the shock split the stiles – one on the top and the other at the bottom – at the point where the spline ended. My “fix” was to install some pocket screws to help hold the split together. The dust panels should provide sufficient additional reinforcement, so I’m not terribly concerned about the longevity of the sides…however I will need to do some work on the outside to obscure the visible checks.

Tomorrow is another day

At this point I’ve got the sides completed, the cherry rails biscuited and glued to the plywood back, and the lines for the biscuit slots to hold the dust frames laid out and ready for the lamello/plate joiner/biscuit cutter/what-have-you to do its thing.

I hope to build the dust frames and assemble the carcass by the end of day tomorrow. I’ll let you know!

Facebook Comments
Categories: Woodworking | Tags: , , , , , , , | 1 Comment

My New Big Honkin’ Machine

I love craigslist.

Around the same time I begain the planning for my new shop, I started using “igoogle” for my browser homepage. I also discovered a couple cool “craigslist” widgets for igoogle that display search results for preconfigured searches on your homepage. So, for example, if I’m considering the purchase of, say, a new dust collector, I’ll add a craigslist “dust collector” search widget to my igoogle homepage. Since I basically live online weekdays it’s unlikely I wouldn’t catch a new relevant post within, say, the first hour of it being posted. This is how I got my rather old but very competent 3HP 2100CFM dust collector for $225.

This is also how I found my latest workshop addition: A Grizzly G1066 24″ Dual Drum Sander for $400. Brand new these machines run about $1,500 delivered. Now the machine I got is not even remotely new — the copyright on the original manual (yeah, the seller had the original manual) is dated 1992 and the “Grizzly” logo is an older variety — but the insides were all there and it runs beautifully. Included with the machine were 2 new 150 grit rolls and 1 new/1 half used 100 grit roll of sandpaper. Considering these cost >$40 each, I figure I actually paid less than $300 for the actual machine. I consider this a very good deal, indeed.

Old Grizzly Logo on G1066

Heavyweight

Finding the machine was the easy part. Since this machine weighs in at over 400lbs., getting it home and in place was a bigger challenge. I was lucky that the seller had a couple pretty big guys pickup up some other equipment a the same time as I.  The 4 of us (seller, two “big guys” and me) basically muscled the thing into the back of my minivan. I nearly passed out on the last push and am fairly certain that, were anyone looking, they’d have seen my eyes bulging out of their sockets. I’m not kidding. Fortunately, lowering it out of the van, with the help of my brother-in-law and a couple of his football-player sons turned out to be a bit easier than I’d feared…and my load-in ramp for the shop easily supported the weight. It was in!

Power

When designing the shop, I saw fit to have a total of (4) 240V circuits installed. Two 15A and two 20A. One is for the dust collector, a second for my Grizzly 17″ bandsaw. This leaves one 15 and one 20A circuit available. The 5HP motor on this monster demands 240V @tenonandspline.com25A minimum. This meant installing a new dedicated 240V/30A circuit in the shop. Since I already had the 10ga. wire on hand, the expense was minimal (some 1/2 conduit and a breaker) and in about 2 hours yesterday afternoon I installed the new line.

Test Run

Much of the comments I’ve read on drum sanders dealt with frustrations over either burning wood like cherry, or tracking issues. These left me a bit apprehensive about what I would encounter when using this tool.  I decided to track down a current owner if I could and solicit some advice. Based on some of his prior posts, it appeared that a fellow “Lumberjock” (Todd A. Clippinger)  who’s work I’ve admired (and partially ripped off) had at one time owned this exact model. Todd took the time to provide me with a weath of information that I was able to put to immediate use. (Thanks!) So, after loading up the drums, per Todd, with some new 100 (front roller) and 150 (rear roller) grit, I picked up the first >9″ (minimum length per docs) piece of scrap I had at hand — a ~6″W  x ~10″ long piece of cherry. I fired up the dust collector (a must) and then the machine and ran this piece through, cranking up the table until the piece just made contact with the drums. It was a beautiful sound and after multiple passes without any burn or apparent strain on the machine, I eyed the cherry and walnut side panels I’d recently completed for my current project.

Beautiful! A few passes and the joints were dead flush and looking gorgeous. I’m hooked!

Did I mention how I love craigslist?

UPDATE: Todd responds here with some additional helpful information and photos.

Facebook Comments
Categories: Woodworking, Workshop Addition | Tags: , , , , , , , , | Leave a comment

Designing A New Dresser for Our New Son

This entry is part 1 of 8 in the series Boy's Cherry and Walnut Dresser

A few months back, we learned that we were expecting our third child. My wife, the youngest of five kids, is adamant that this child have their very own crib and dresser. Who am I to argue? A couple weeks ago we learned it was a boy – so, I set off to design and build a “masculine” dresser.

Inspiration

My first step was to review some of my favorite projects on lumberjocks.com. I’ve added references to these projects at the end of this post. They’re all excellent…check ’em out!

Perspiration

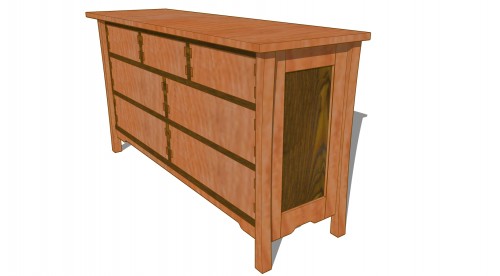
With those pieces in mind, I set out to design the new dresser. Here’s my current Sketchup rendering:

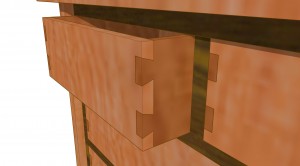
The light colored wood represents cherry and the dark, walnut. I spent some time debating reversing the side panels, that is, using walnut for the frame and cherry for the raised panel. This seems somehow more “right” since it more closely echos the drawer/face frame arrangement of the front. Howver, I just didn’t like the look as well. Feel free to tell me if you think otherwise! Also, since I enjoyed the “hand cut dovetail” process so much on the kid’s bench project, I figured I’d do a whole bunch of ’em for the drawers. I’d never really considered using through dovetails for drawers, but I liked the look of them so well on the design references below, I figured I’d give ’em a try here!

Decisions Remain

I’m still unsure what I want to use for pulls. I’m nearly positive that I will be crafting them in the shop out of hardwood…but I’m still looking for just the right design. Anyone have any ideas? Also, as with most of my pieces, I intend to customize this one with an inlay or two. I’m still unsure of the “what” and “where” at this point. I’m considering a pattern that cuts across a number of drawer fronts — but with the child due to arrive in early November, that may simply be too much to finish in time!

Google SketchUp!

Here’s my SketchUp drawing for anyone who’s interested in playing with it.

I’ve yet to cut my first board and wholeheartedly welcome any suggestions, comments or criticisms (preferably constructive 😉 ).

cherrywalnutdresser.skp

Design References

There are many examples of inspiring design and craftsmanship on lumberjocks.com. Here are the ones I used while working on my design. Thanks, guys!

Click for details: Michael Colca designed table

Click for details: 7 Drawer Maple and Cherry Dresser

Click for details: Mahogany Sofa Table

Click for details: Cherry Shaker Bench

Facebook Comments
Categories: Woodworking | Tags: , , , , , , , | Leave a comment